Showing posts with label Feather Stitch. Show all posts

Tuesday, October 1, 2019

TAST 2019 - Stitches 5 & 17


It has been ages since my last Take a Stitch Tuesday (TAST) post. I actually completed these stitches in June... (Learn more about the TAST challenge offered by Sharon Boggon at Pintangle.com through the link above.)

Click any image for a larger view.

This seam was added to a crazy quilted Valentine fabric postcard I am creating. It was created with two TAST stitches.

Stitch 5: Feather Stitches were added with a strand of green DMC S909 satin floss.


Stitch 17: Bullion Knot Stitches were added with #48 DMC size 8 variegated perle cotton floss to add flowers to a vine of feather stitches.

For this stitch, the right needle is very important. I struggled with these horribly before reading Sharon's tip to use a milliners needle. 


My 2019 TAST Progress:
Completed Stitches: 1-5, 7, 11 & 17
Need to Stitch: 6, 8-10, 12-16, & 18-36

Thank you for visiting!
Renee

Monday, February 4, 2019

Simple Heart Block


The Spring 2019 edition of the Crazy Quilt Quarterly Magazine is now available through MagCloud here.

The block in the photo above is featured on pages 14-15. The article shares how the block was pieced and how each section was embellished, using 8 basic embroidery stitches. 


The cover of the magazine features the gorgeous work of Margreet De Reus. (Note: This photo was borrowed from Pamela Kellogg's blog, Kitty and Me Designs.)

I must admit, it is a bit unreal to see my work in print with so many talented crazy quilting artists. There are a few tutorials in the magazine that I hope to try out and share soon.

If you crazy quilt at all, I encourage you to contact Pamela Kellogg about submitting photos of your work. My goal is to work on a Fall/Halloween piece to submit before May 1st for the Fall edition.

Thank you for visiting!
Renee

Tuesday, February 20, 2018

TAST Weeks 7-8


Week 7: Feather Stitch

The feather stitch was added to my messenger bag with a green strand of size 8 perle cotton.

To dress it up, size 8 variegated pink perle cotton fly stitches were topped with French knots, creating flowers.

Next, detached chain stitches were added with the same shade of green to make leaves. 


Week 8: Stem Stitch

This heart was embroidered using the stem stitch.

First, I outlined the shape from one of Sharon B.'s crazy quilt templates. (These were given to me for an honest review and I just love using them.)

Thank you for visiting!
Renee
TAST stands for Take a Stitch Tuesday. It is a personal challenge hosted by Sharon B. of Pintangle to learn a new embroidery stitch each week. You may learn more about it here and find the Facebook TAST group here.


Wednesday, January 3, 2018

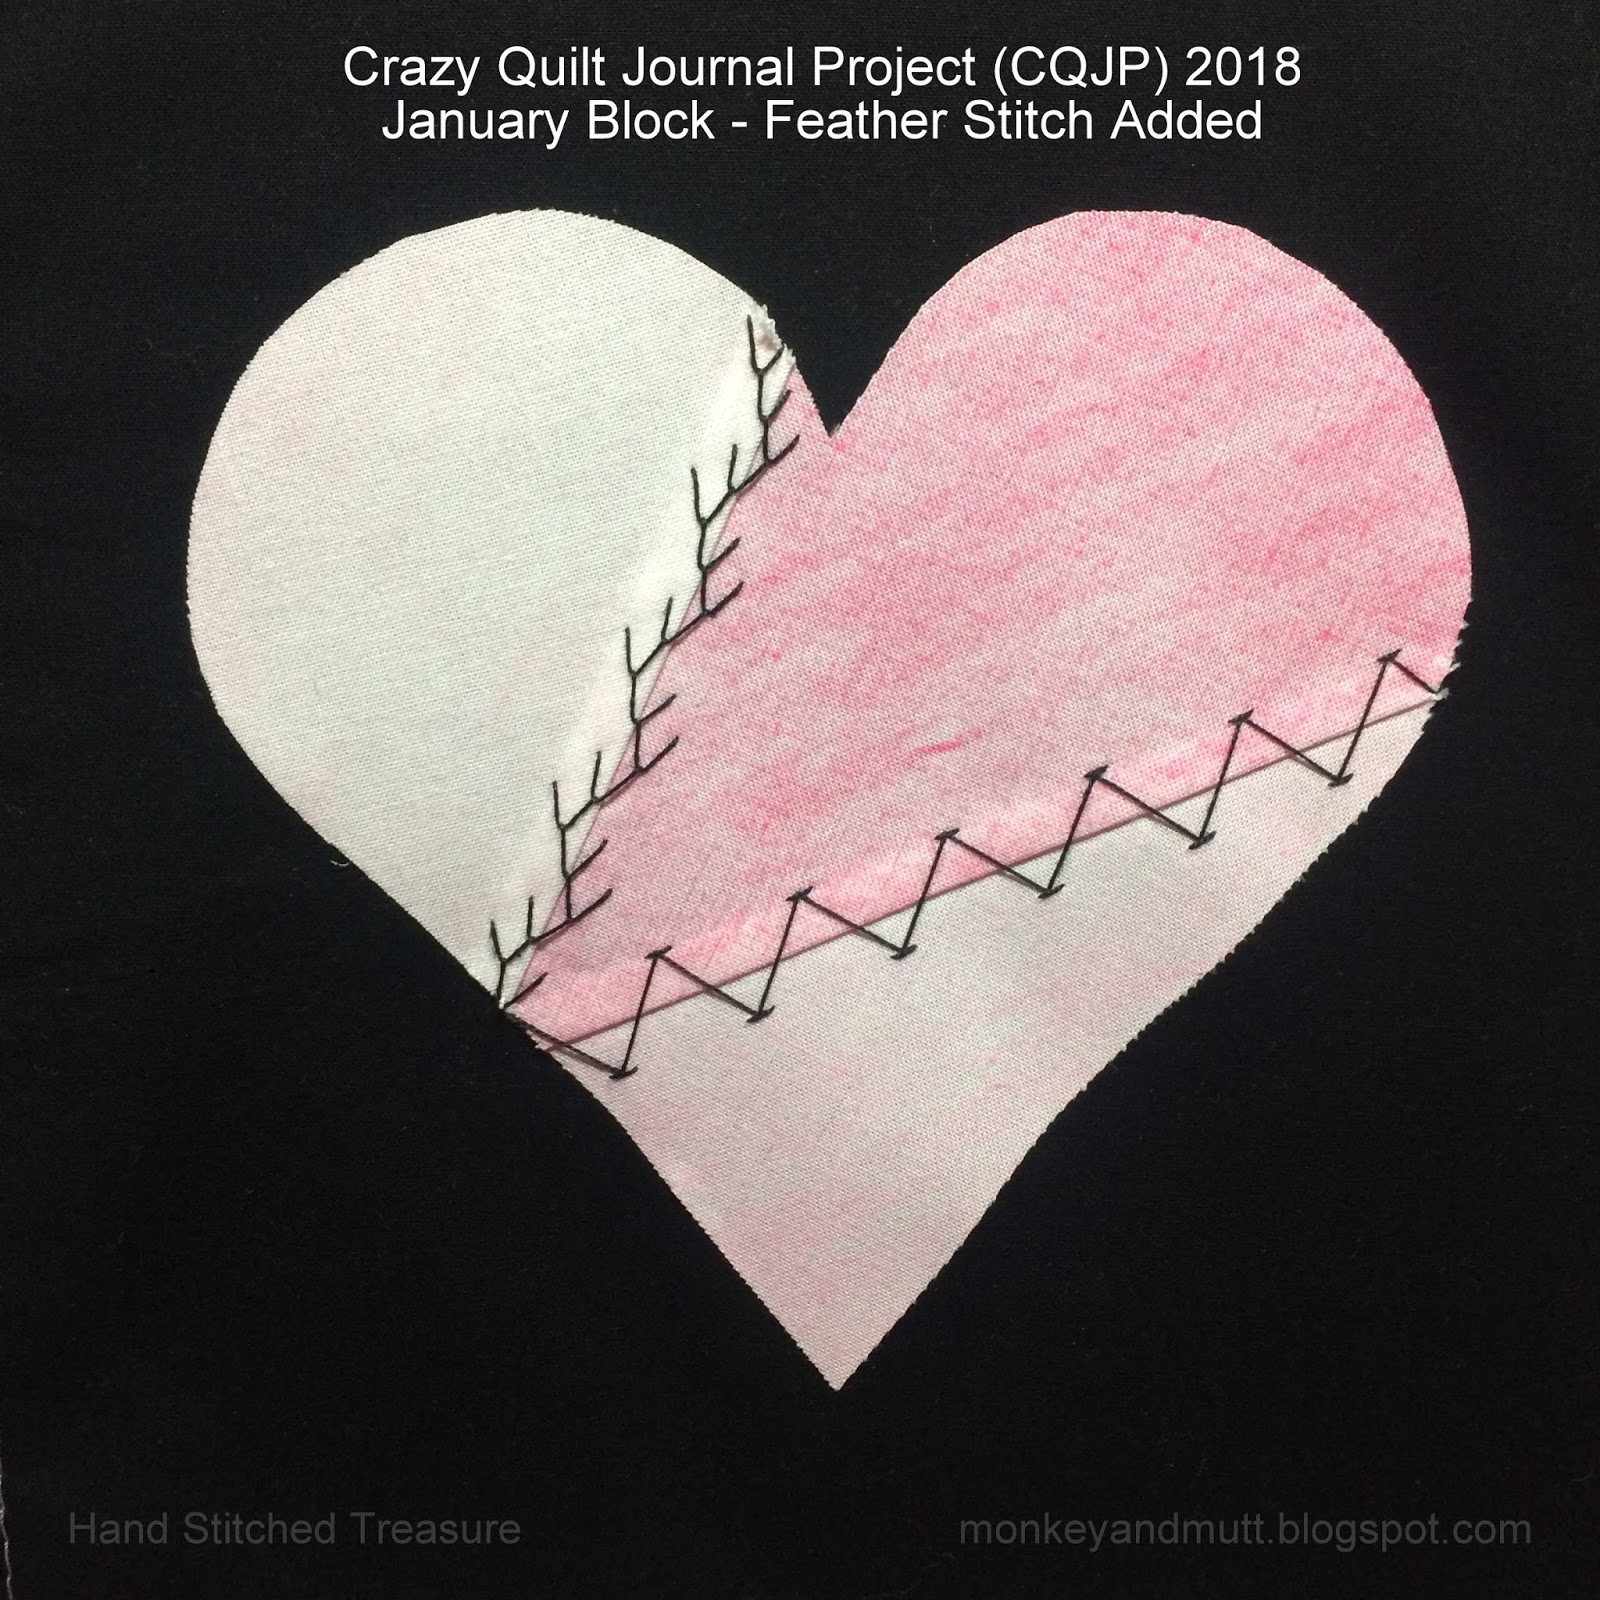
January CQJP 2018 - 2 Basic Seams


CQJP 2018 January Block Seam 1
The first seam was embellished with black size 8 perle cotton and a Chevron Stitch.
This seam will be built up with more embellishment later.


To keep my stitches even, I placed one of Sharon B.'s Crazy Quilting Templates (from Set 1) along the seamline and used a pencil to lightly mark the upper-most and lowest points.


CQJP 2018 January Block Seam 2
Using the same perle cotton, the second seam was embellished with a feather stitch. More embellishement will be added to this seam after I cover the applique edges of the heart with stitching.

Thank you for visiting!
Renee


Notes:
CQJP 2018 = Crazy Quilt Journal Project 2018. It is a challenge to embellish one crazy quilt block a month. Find the CQJP blog here.

Disclaimer: 
I recieved my CQ Stencils from Sharon B. in return for an honest review. I really enjoy using these stencils and look forward to creating more with them this year!


Monday, October 30, 2017

CQJP 2017 March Block Motifs 6 & 7

Feather stitched vegetaton accented with petite glass seed beads created motif 6 on my Crazy Quilt Journal Project (CQJP) 2017 block.

Size 12 green perle cotton floss was used for the feather stitches.

Motif 7 was added to both sides of the block. 

Using size 5 variegated perle cotton, I created vines with the barred chain stitch.

The flowers were made with a variegated size 8 perle cotton by making groups of 3 bullion stitches. Straight stitches were placed between the bullion stitches and over the ends where the bullion stitches met the vines.

My progress on this block has been slow, but I am enjoying it!

I am joining the Monday Stitchery Link Party #134 at Super Mom - No Cape! 

CQJP 2017 is a challenge to create a crazy quilt block that is at least 8-inches square in size each month. You may learn more about it and see the blocks completed this year here at the CQJP 2017 blog.


Related Posts:

CQJP 2017 March Block Motif 1 and Seams 1 & 2 - here
CQJP 2017 March Block Motifs 2-4 and Seam 3 - here
CQJP 2017 March Block Motif 5 - here
CQJP 2017 February Block - here
CQJP 2017 January Block - here

My CQJP 2017 progress is all shared on this Pinterest Board.

Thank you for stopping by!
Renee

Friday, October 13, 2017

2017 CQI Halloween/Autumn Fabric Postcard Swap

As mentioned in my last post, Wilma organized a Halloween/Autumn Fabric Postcard Swap for the Crazy Quilting International Facebook members. October 5th was the deadline to sign up and postcards need to be mailed before October 14th. 

I signed up to swap an Autumn themed postcard and this one went into the mail today. I do hope the recipient likes it!

If you have followed my blog long, you may recall that I used waste canvas to cross-stitch a pumpkin Pamela Kellogg designed and shared in the Autumn 2015 Crazy Quilt Quarterly Magazine. I am afraid my stitches using waste canvas are not as neat as I would like them to be, but the pattern is darling! (My post from last year may be found here.)

I do love autumn! I love the large harvest moons, pumpkins, colorful leaves, pumpkins, crisp fall air, pumpkins... 

 For the back, I printed this template onto cardstock. 

I was thrilled to find a white, yellow, and orange variegated rayon thread in my stash to finish the edges with.

If you are interested in making a crazy quilted fabric postcard, you may find a tutorial on the Crazy Quilting International blog, here. If you use cardstock instead of a fabric backing, remember that the zigzag stitches do perforate the edges of the cardstock. 

For this card, I set my machine to sew a zigzag stitch with 3.5 wide and 0.3 long stitches and went around the edges once. Without breaking the thread, I switched the setting to straight stitches and went around the edge of the zigzag stitch once before knotting the thread and trimming the thread. (The finishing method was inspired by this tutorial at Quilted Delights.)

These postcards need to be hand cancelled at the post office. In the USA, this requires an additional stamp (that costs $0.21 at the time of this post.) I send my postcards in a clear plastic envelope approved by USPS that I found and purchased through Amazon. With the envelope, I have to pay for a regular postage stamp instead of a postcard stamp. Some post offices will hand cancel the the fabric postcard and then allow you to put it into the clear envelope to post it. The 2 post offices I have been to will only hand cancel directly on the postcard if it is mailed as is - without the plastic envelope. 

Thank you for stopping by!
Renee


Saturday, September 16, 2017

Crazy Quilt ATC Tutorial Part 2 - Embellishing

The Crazy Quilt Quarterly Magazine is hosting an artist's trading card (ATC) swap - crazy quilt style. You may find the details about the swap at Kitty and Me Designs, here

Yesterday, I shared a tutorial explaining how to piece an ATC. The finished card will only be 2 1/2-inches by 3 1/2-inches. 

When embellishing an ATC, there are a few things to keep in mind.

1. To keep the postage expenses down for this swap, the ATCs cannot be more than 1/4-inch thick (much like a fabric postcard.) This includes the thickness of the interfacing (Peltex or Timtex) you use.


2. All stitching needs to be within the outline drawn on the back of your muslin.

3. Beads, buttons, sequins and charms should be at least 1/4-inch away from the edges of the ATC card. (This is important when finishing the card.) I keep buttons and charms at least 1/2-inch from the edge.

4. What color scheme are you working with? The colors you use for embellishment should coordinate with the fabrics used to piece your block. For this block, I chose to work with pinks (as the ribbon is pink), greens (for leaves and stems), and blues. All of these colors go well with the basic black background fabrics.


Materials to embellish an ATC could include:
Ric Rac
Flat buttons (no shank buttons)
Seed beads and beading needle
Small flat charms
Sequins
Ribbon
Lace
Silk ribbon
Embroidery floss (cotton, silk, stranded, perle cottons, etc.)

It is my hope that beginners will participate with this swap. So, for this particular ATC card, I tried to use several basic stitches. 

Click on any photo for a larger image.


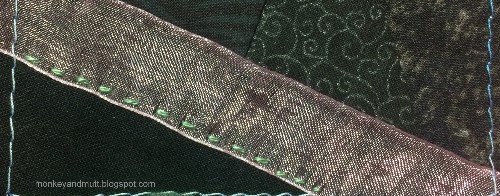
Seam 1: My first step was to secure the loose edge of the ribbon. This was done with a running stitch made with green size 8 perle cotton.


Seam 2: I added a buttonhole stitch above the ribbon, using a different shade of green size 8 perle cotton.

The stitches were intentionally spaced irregularly and at various angles.


Detached chain stitches were added to make leaves.

Seed beads will top the stems in a later step.

Note: The pins in this photo were added at 1/2-inch intervals to help me space the next seam embellishment.


Seam 3: I planned to embellish along the center of this ribbon, but there was a flaw near the top that I needed to hide. 


Using another shade of green size 8 perle cotton, I worked pairs of detached chain stitches (leaves) with a straight stitch (stem) between each pair.

The flowers were made with 2 straight stitches and a French knot using size 8 pink perle cotton.


Seam 4: Sets of 3 French knots were evenly spaced beneath the ribbon using size 5 variegated pink/blue/purple perle cotton.


Seam 5: First, a feather stitch was added along the far right seam using yet another shade of size 8 green perle cotton.


Next, I worked from the bottom up adding detached chain stitches as seen in this photo. I skipped every third "stem" to add a flower.


To add the flowers, I stitched little stars made up of 4 straight stitches with pink size 8 perle cotton.

First, I made a "+" with two straight stitches.


Then, I stitched an "X" over the "+" with two more straight stitches.


This left one final seam to embellish.


Seam 6: Alternating sides of this seam, I worked a detached chain stitch (leaf), and then worked a curved stem stitch to create a flower stem. This was worked in green size 12 perle cotton.


Next, pink size 12 perle cotton was used to add two small detached chain stitches to make flower petals.


Motif: With the size of this block, I only added one motif. Spider webs were traditionally added to crazy quilts, so I added one to this ATC. I used size 12 white perle cotton.


Long straight stitches were carefully threaded beneath existing stitches to create spokes.


For this web, I looped the thread around the spokes and later tacked each into place with small stitches. (Pamela Kellogg and Kathy Shaw both have great tutorials on making webs.)
A spider's body and head were added with blue size 5 perle cotton. 


A detached chain stitch created the body. A straight stitch filled the center of the detached chain stitch (so the black fabric did not show through.) 

A colonial knot created the head. (These are slightly larger than French knots.)

The legs were made with a single strand of a matching of cotton embroidery floss. Each leg was created almost like a fly stitch. However, instead of making a "Y", I tacked the thread down making "V" stitches. 

Each leg stitch began between the head and the body and worked out. 

In the first spider photo you may see that the first set of back legs are almost even with the chain stitch. The first set of front legs extend just past the head. 

The second spider photo shows that the second set of front and back legs extend a little further out than the first sets of legs.


Beads: Dark blue Mill Hill Petite Glass Seed Beads were added to the pink flowers along seam 6.

Tip 1: I used a beading needle and a single strand of cotton floss in a similar shade to the bead.

Tip 2: To firmly secure each bead in place, I wrapped the thread through the bead 3 times. On the back side, I knotted the thread 3 times before moving on to the next bead. This takes a bit more time, but the beads are not loose on the card. And, if one comes off in the future, the others will remain.


Light blue seed beads were added to the flowers on seam 2.


I felt the feather stitched seam on the right looked a bit bare, so I added more detached chain stitches to make more leaves.

Now the block is ready to be finished into an ATC.  

Assuming our Internet does not crash again (it has gone out 4 times while creating this tutorial), I plan to share the final part of this tutorial tomorrow.

If any step of this process was unclear, please feel free to let me know or ask questions!

Thank you for stopping by.
Renee

Related posts:
Crazy Quilt ATC Tutorial Part 1 - Piecing
Crazy Quilt ATC Tutorial Part 3 - Finishing

Note: This post was updated on September 17, 2017 to add information about color schemes and securing beads and on September 18, 2017 to include the link to Part 3 above.

Monday, June 19, 2017

CQI Heart RR "E" Block is Done!


In April of 2014, I participated in a Heart Round Robin with 5 other members of the Crazy Quilting International (CQI) Group. 


This year, I am participating in the All People Quilt UFO Challenge 2017.  In May, project #2 was selected as the UFO for the month. Completeing my "LOVE" wall quilt with blocks from the Heart Round Robin was second on my list. This required embellishing the final block (my "E" block) and assembling the wall quilt.


The feather stitched seam pictured above was created with 2 strands of DMC S5200 snow white rayon floss. Cast on stitches created with a strand of size 8 red perle cotton were added to the tips of some of the feather stitches. Mill Hill Petite Glass Seed Beads #42010 were placed in the center of the cast on stitches to make small flowers. Onyx seed beads and detached chain stitches embellished the rest of the feather stitched seam.


For the next seam, Herringbone Stitches were added with a strand of EdMar Lola #206. Beneath the herringbone stitches, I added Mill Hill Petite Glass Seed Beads. #40161 beads were added to the red fabric and #42014 were added to the black fabric.

A Swarovski Elements 6mm butterfly bead (the color is light siam) was added to the black motif area. A strand of red DMC floss and a running stitch created a flight path with a little heart loop. 


Using white silk ribbon I purchased for the free basic crazy quilting course I took from Kathy Shaw, I made evenly spaced French knots for flower buds. 


A strand of metallic white DMC floss and double detached chain stitches (also called berry stitches), made leaves. I added a small straight stitch in the center of each leaf to fill in the black center. Red seed beads were placed between each flower (where the pins are seen in the photo above.)


My favorite addition to the block is the spider and spiderweb. Each feature a heart to fit the theme of this round robin. The web was created with straight stitches using DMC Fil Argent Silver Thread. The spider has a heart-shaped bead for the body and a bead for the head. Fly stitches added with a strand of white DMC floss created the legs.


Two heart-shaped beads added the final touch to the block.

Now that the "E" block is fully embellished, it is time to pull the basting seams from each block and assemble the wall quilt!

Thank you for stopping by!
Renee

NOTES:
1. Crazy Quilting International (CQI) is a group that focuses on hand embroidered crazy quilts. The group began on Yahoo! However, due to difficulties members had posting photos and updating round robin information through the Yahoo! groups, most of the active CQI members moved to the Facebook Crazy Quilt International Group. You may find the group here.

2. I have begun the daunting task of a bit of blog clean-up. Some of the links I have shared in the past go to websites that no longer exist, so I am deleting those. And, now that I am aware of Blogger's "nofollow" guidelines, I am making sure my links are all in compliance. Although, I always let readers know if I am affiliated with a product/company, I was not aware of adding the "rel=nofollow" attribute to those links. Several have already been changed. And, as I am not into blogging to earn money, I am no longer an Amazon Associate, so I am no longer affiliated with links shared to products on their site. 

I am linking to Monday Stitchery Link Party #115 at Super Mom - No Cape! It looks like this week's free pattern is for a cute potholder.

Related Posts:
1. My Heart Round Robin Bare Blocks - here
2. My Heart Round Robin Blocks are Home - here
3. My 2017 UFO Challenge List - here
4. Beaded Hedebo Stitched Seam - here
5. Ric Rac and Whipped Double Chain Stitch Seams - here
6. Floral Seam with Metallic Threads - here