Showing posts with label Gifts. Show all posts
Thursday, February 15, 2018
Happy InCoWriMo Mail!
I am feeling so spoiled! Just look at the happy mail I found in my mailbox this week.
When my friend, Christine, agreed to swap letters with me through InCoWriMo this year, I had no idea I was going to receive such a treat. If you click on the photo to see a larger image, you may be able to tell Christine sewed the patches together on the card she made for me. I love her "patchwork" - it is absolutely darling!
You may have noticed my favorite shape is a heart. So, the card of heart buttons is a wonderful treat. And I cannot wait to play with these gorgeous threads!
Thank you so very much, Christine!
If you would like to see some of Christine's pretty quilting and embroidery projects, you may find them on her blog, Patchwork Allsorts, here or on Facebook, here.
Thank you!
Renee
February is International Correspondence Writing Month (InCoWriMo). You may find more about it here. Or search #incowrimo on Instagram to see what others are mailing and receiving.
Sunday, January 7, 2018
Happy Mail!
My friend at Createology sent me this lovely tatted wreath ornament.
My photo does not do it justice. You may see more wreaths she has tatted here. She also does lovely crazy quilt work.
Thank you so much, Sherry! It is a treasure.
Hugs,
Renee
Monday, September 4, 2017
Pink Zipper Pouch
A (long) while back, someone I know saw my work and asked if I could make a gift for her daughter. I happily agreed.
She did not care what I made, and insisted she would be happy with anything in any color. Very sweet.
Unfortunately, I ended up with creative block. Most of my work includes beads, charms or buttons. This needed to be something without any choking hazards. There were too many options and too many ideas. Over time, I watched as this friend shared photos on social media and decided pink looked like a good color to use.
Using a stem stitch, I embroidered the young lady's first initial onto pink sparkly fabric with a variegated pearl cotton floss.
This pink butterfly print was used for the lining and the back.
I have one more project to finish up this week so the two items can be on their way to an adorable young lady!
I am joining Monday Stitchery Link Party #126 at Super Mom - No Cape!
The vintage embroidery pattern shared at the party this week is a covered bridge. I am trying so hard to finish up projects this year without starting new ones, but I have soooo many ideas seeing this embroidery pattern.
If any of you are interested in embroidering the covered bridge, we could do a little stitch-along, using that pattern in common and see just how unique our creations turn out. (Yes, I am looking for enablers to join me in some stitchy-fun!) Just let me know! In the mean time, I will be working on another finish or two to justify a new start...
Thanks for stopping by!
Renee
She did not care what I made, and insisted she would be happy with anything in any color. Very sweet.
Unfortunately, I ended up with creative block. Most of my work includes beads, charms or buttons. This needed to be something without any choking hazards. There were too many options and too many ideas. Over time, I watched as this friend shared photos on social media and decided pink looked like a good color to use.
Using a stem stitch, I embroidered the young lady's first initial onto pink sparkly fabric with a variegated pearl cotton floss.
This pink butterfly print was used for the lining and the back.
I have one more project to finish up this week so the two items can be on their way to an adorable young lady!
I am joining Monday Stitchery Link Party #126 at Super Mom - No Cape!
The vintage embroidery pattern shared at the party this week is a covered bridge. I am trying so hard to finish up projects this year without starting new ones, but I have soooo many ideas seeing this embroidery pattern.
If any of you are interested in embroidering the covered bridge, we could do a little stitch-along, using that pattern in common and see just how unique our creations turn out. (Yes, I am looking for enablers to join me in some stitchy-fun!) Just let me know! In the mean time, I will be working on another finish or two to justify a new start...
Thanks for stopping by!
Renee
Tuesday, May 16, 2017
TAST Stitches 44 and 77
There has not been much time for crafting this month, and when there has been time, the energy was lacking. Between working and a few trips to the ER with someone dear (thankfully, the issues ended up being side affects from medications and nothing more serious), life has been a bit crazier than normal. My hubby and my boys have been rockstars, taking on some of my chores without even being asked. That was the best Mother's Day gift this mom could hope for!
Here is a bit of progress I have been hoping to share for a while. (I typed this post over the weekend, to be sure I finally did share it!)
TAST Stitch 44 (part 2): Plaited Feather Stitch
Back in February, I shared the Crossed Feather Stitch. In April, I worked the Plaited Feather Stitch on my TAST sampler using pink and black perle cotton. (The arrow is pointing to it in this photo.)
TAST Stitch 77: Pistil Stitch
I apologize for the photo quality. This was the best of over 10 attempts to capture the snowflake I created with the pistil stitch.
The bottom snowflake was created with size 12 white perle cotton, 4 pistil stitches, 4 straight stitches, 4 Mill Hill Petite Glass Seed Beads and 1 small white bead.
(Some of the other snowflakes in this photo are partially complete and were created using designs my dear blogging friend shared on her blog, Magpie's Mumblings. You may find the designs here, here and here.)
I most frequently use the pistil stitch to create antennae on butterflies, as seen here. (You may see more of this block here.)
I also used pistil stitches to dress up this seam created with the use of one of Sharon B.'s Crazy Quilting templates. (I am not affiliated, but did receive the templates in exchange for an honest opinion, and I do love using them! You may see more about this block here.)
Pistil stitches were also used with bullion knots to create flowers on the block I embellished for Annette in our Under the Sea Round Robin. (You may see more about this block here.)
TAST Challenge
In April, there was a 2 week TAST break to provide time for some of us to catch up. If you did not need to catch up, you were encouraged to participate in the TAST Break Challenge to create a small project using 3 TAST stitches.
I do need to catch up, but opted to use the feather stitch, bullion knot, and detached chain stitch to create a gift for Mother's Day. I also used the chain stitch to add "Mom" to the center.
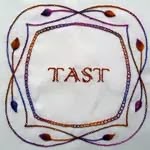
TAST stands for Take A Stitch Tuesday. This is a personal challenge offered by Sharon B. at Pintangle.com, encouraging others to learn new embroidery stitches. A new stitch is introduced each week, but participants are able to choose their own pace for working the stitches. You may learn more about it here.
This is the 10th year Sharon has offered TAST and she is celebrating by sharing interviews with some of the TAST participants. Here are links to the interviews she has shared so far (I hope I did not miss any):
The cover of the Summer 2017 edition of the Crazy Quilt Quarterly features work by Sharon B. This edition focuses on buttons. Adding buttons to my work always feels challenging to me, so I am looking forward to ordering my copy.
I am not affiliated. You may find the magazine here and learn how to submit your work to the magazine here.
And, Sharon shared some exciting news about her book today. You may check it out here.
Thank you so much for stopping by!
Renee

Thursday, February 9, 2017
Glasses Case for Kim
| Crazy Quilted Glasses Case - Front |
| Crazy Quilted Glasses Case - Back |
Kim was very sweet and agreed not to share photos of the glasses case before it was featured in the Crazy Quilt Quarterly Spring 2017 Magazine, which is now available.
I am not associated with the magazine. You may find it here on MagCloud if you are interested. Sharon B. did a review of it that you may find here. I love the cover piece by Allison Aller!
Now, I have a question for you all. A friend recently asked me this question and I did not have an answer. Perhaps you do. If you had 7-10 days to spend anywhere within the United States or Canada, where would you go? And why would that be your choice?
Thank you so much for stopping by!
Renee
Wednesday, December 28, 2016
1 Christmas Item a Month - December 2016
Wow! I do not know about all of you, but Christmas felt like it whipped right by. I do hope you all had a wonderful Christmas or a happy holiday season!
Last Friday, a relative went into the hospital for the 2nd time in two months. (They are home again now and doing well.) It was only two days after another relative had surgery (which went really well) and I found myself with too much nervous energy to get to sleep Friday night. So, instead of going to bed at 9:30 p.m., I started making these two little zipper pouches. :)
I thought they would be a fun way to gift a couple of gift cards we had purchased.
Thanks to this tutorial by the Missouri Star Quilt Company on YouTube and this tutorial on making a wristlet, these were easy and fun to create. (I am not affiliated with either website, but found the information helpful.)
Both gifts were well received. Another last minute gift was one I made back in January. I intended to sell it in my Etsy shop when I made it... (Have you noticed a pattern there? 2017 is a new year, right?! I really will stock the Etsy shop...)
I embroidered a snowman on the bottom of the tissue-pack. It was made with upcycled denim.
Once again, I want to thank Narelle for hosting the 1 X-mas Item a Month blog. Without that extra push of motivation each month, I would not have had as many handmade gifts to share this year.
I do plan to participate again next year, if the workshop is open in 2017!
A dear friend of mine from Little Orphan Stitch let me know about another challenge that I have decided to participate with in 2017. If you have 12 or more UFOs, you may be interested! (UFO = UnFinished Object.)
I decided to participate in the 2017 UFO Challenge at allpeoplequilt.com. You may find the full details here. Projects do not have to be quilts. They may include embroidery, knitting, crochet, scrapbooking, and painting. Participants are to post photos of finishes with the hashtag #APQResolution on Facebook, Instagram and Twitter.
I told my husband I was making another commitment next year and I could almost hear him groan. (Every now and then he'll tease me by asking, "How many projects do you have going now?!") When I told him I joined a challenge to complete 12 unfinished projects in 2017, I think it left him a little bit stunned. (I am giggling as I type this. He is incredibly supportive!)
Today is also the last day to register for the Crazy Quilt Journal Project 2017.
Tomorrow, I hope to share my list of 12 projects for the 2017 UFO Challenge.
Friday, I will share my update on the Fractal White Tiger.
Saturday, I will share a review of my 2016 goals and progress.
Wow! 2017 is really close. I wish you all a fantastic week. Thank you for stopping by!
Renee
.
Monday, December 26, 2016
CQI Under the Sea Round Robin 2015 Quilt Complete!
![]() |
| Kenna's Sea Garden - Under the Sea Crazy Quilt |
Let me just say, I am so glad I opted to conquer my fears and just get it done.
The 1st block was embellished by Kathy S.
The 2nd block was embellished by Sandra T.
Barbara "Nicki Lee" embellished the 4th block.
The 5th block was embellished by Mary B.
And the 6th block was embellished by Sandy B.
I did add batting to this wall quilt. I stitched in the ditch between the blocks and the blue border. I also added a few small charms (a turtle, an octopus and a sea star) to secure the batting to the back of the quilt along the center seam.
It is difficult to really capture the texture in photographs, but I tried. The photo above is from Nicki Lee's work.
Mary B.'s jelly, coral and clusters of beads and sequins along the ocean floor is loaded with texture.
Sandy B.'s block was also full of texture.
This wall quilt included my first hanging sleeve. (I cannot believe I let that intimidate me for so long! The tutorial shared by the Missouri Star Quilt Company on YouTube made it easy.)
This set of blocks was assembled into a wall quilt and given to a sweet relative as a Christmas gift for her beach themed bedroom. (I did not measure the full size of the quilt. The crazy quilt blocks are 6-inches by 6-inches, so it is not huge.)
The label on the back (not pictured) includes the full names and states of residence for the ladies that embellished these gorgeous blocks. I cannot thank these ladies enough for doing such an amazing job coordinating their work with the blocks the other ladies completed.
For anyone wondering, CQI stands for Crazy Quilting International. The group originated on Yahoo, however most active members now participate through the Facebook Crazy Quilt International group.
I am linking this post with the Monday Stitchery Link Party #90 at Super Mom - No Cape!
This link party is open to anyone with a blog and a project with hand embroidery to share.
Thank you all for stopping by and special thanks to those of you that shared encouragement as I worked on this Under the Sea crazy quilt! -Renee
Wednesday, December 14, 2016
Pink Spider Coin Purse
| Embroidered spider web with pink beaded spider. |
While looking through some photos this morning, I realized I forgot to share this project on my blog! Well... sort of.
The photo above was shared in this post, back in September of 2015, after the embroidery was completed. The spider and web were sewn onto denim recycled from an old pair of blue jeans.
I planned to create a coin purse (and 9 other projects) to finally stock my poor empty Etsy shop. (Did I mention I have a hard time with the idea of selling what I make?)
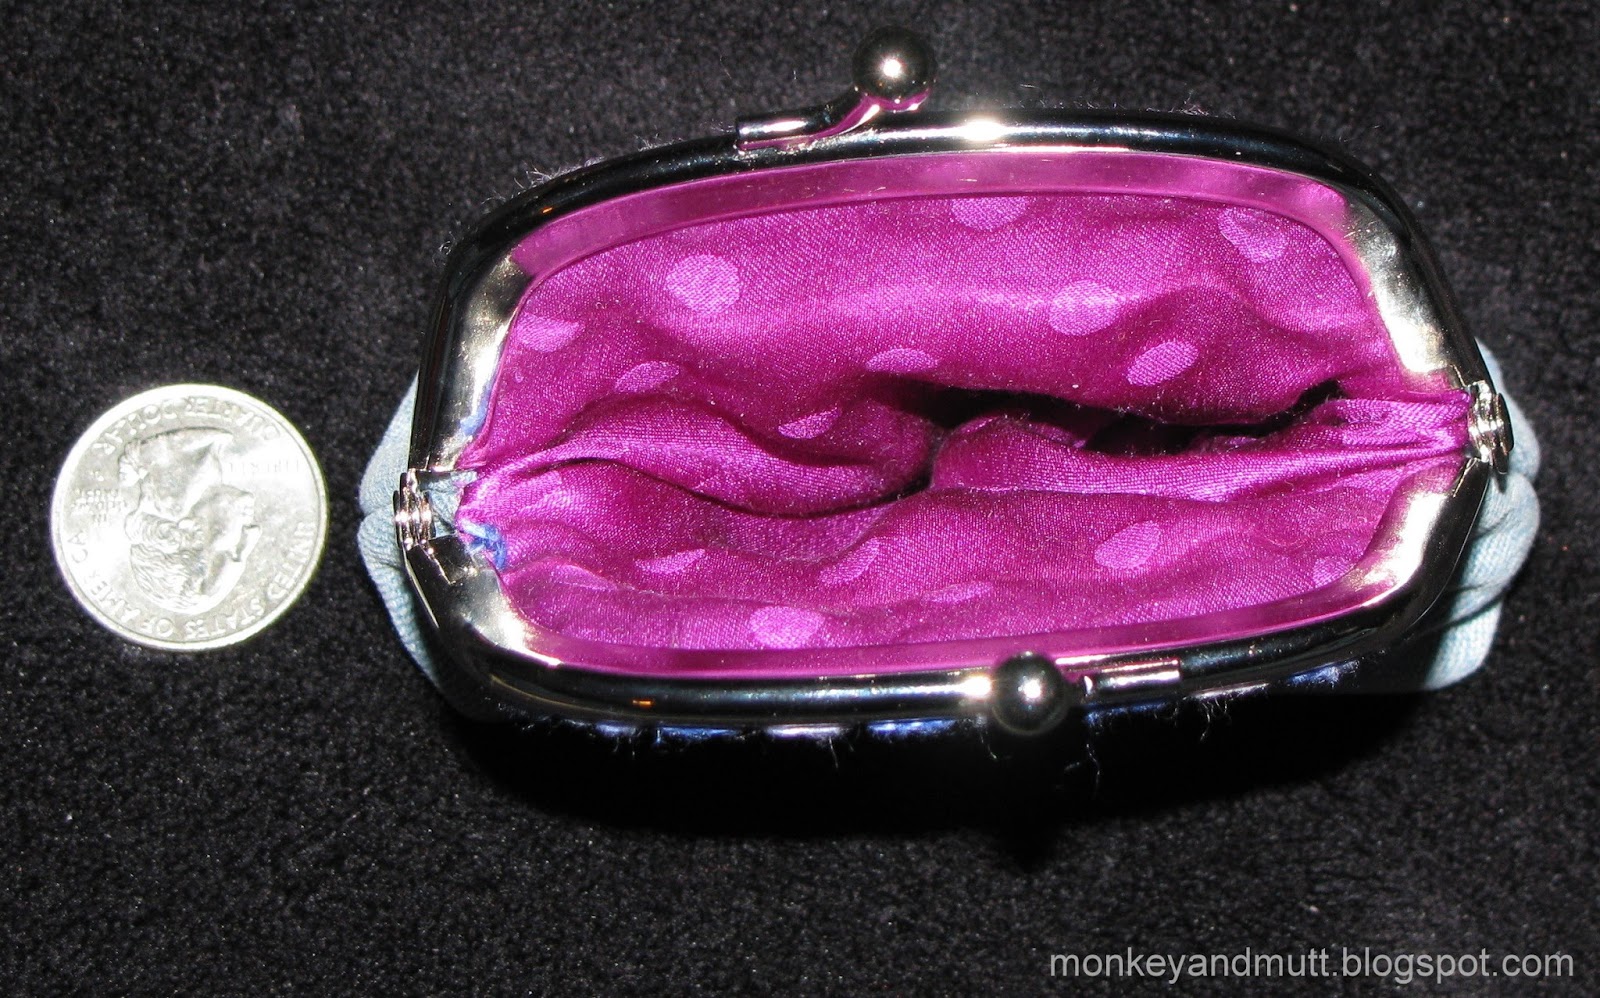
In January, I completed this and one other project (that will be shared soon - it will also be a gift.) I used the same variegated pearl cotton used to embroider the heart to sew the fabric onto the purse frame. The coin purse was created following this tutorial at Sweet Bee Buzzings.
For the inside lining, I used 100% silk in a purple polka dot print upcycled from the lining of a dress found at a thrift store.
While visiting us this year, a 12-year-old Dutch relative was sadly disappointed when her zipper-pouch coin purse broke. I was not sure if she would like this as a replacement or not, but I offered it to her. Her sweet reaction and the way she lovingly admired the spider and its web truly warmed my heart.
Thank you so much for stopping by! If you have any time for crafts right now, I would love to know what you are working on - assuming it is not secret stuff. It is that secretive time of year!
-Renee
| Coin purse with embroidered heart and pink beaded spider. |
In January, I completed this and one other project (that will be shared soon - it will also be a gift.) I used the same variegated pearl cotton used to embroider the heart to sew the fabric onto the purse frame. The coin purse was created following this tutorial at Sweet Bee Buzzings.
For the inside lining, I used 100% silk in a purple polka dot print upcycled from the lining of a dress found at a thrift store.
While visiting us this year, a 12-year-old Dutch relative was sadly disappointed when her zipper-pouch coin purse broke. I was not sure if she would like this as a replacement or not, but I offered it to her. Her sweet reaction and the way she lovingly admired the spider and its web truly warmed my heart.
Thank you so much for stopping by! If you have any time for crafts right now, I would love to know what you are working on - assuming it is not secret stuff. It is that secretive time of year!
-Renee
Labels:
Change Purse,
Embroidery,
Gifts,
Hearts,
Sewing,
Spider
Wednesday, August 31, 2016
1 X-mas Item a Month August 2016
I was not sure I would have a finish this month, but I managed one!
Last December my son and I saw this no-sew fleece blanket kit at JoAnn Fabric and it was marked down 75%. We bought it with plans of completing it before Christmas. In February, we found it in the "safe place" we stored it in and realized we both completely forgot. Oops!
This was my first no-sew fleece blanket. The panels were not quite the same size, but almost.
About 2 hours later it was done. Now, my son and I just need to remember it is hiding in its "safe place" this Christmas.
Thank you so much for stopping by! I do hope you will visit the 1 Xmas Item a Month blog to see what the other elves have accomplished.
Renee
Thursday, August 18, 2016
A Surprise in the Mail
My sweet blogging friend, MA from Magpie's Mumblings, made this beauty.
Pictures do not do it justice!
It arrived beautifully packaged, too.
I love the way the pretty silkie was attached and check out that button!
Hearts are my favorite shape, so I love the charm.
And the seam work is all exquisite!
I believe MA recently shared 19 gorgeous postcards on her blog.
You may see this lovely postcard at Magpie's Mumblings HERE.
She also shared a series of seam treatments recently. You may check them out HERE. (And you may see some featured in my work when I find time to play with a needle and thread again!)
On another note, I apologize for falling out of the blogging world. Life has thrown us a few curve balls this summer. Stressful ones, but we are counting our blessings!
To balance out the stressful bits, we have also been lucky enough to have Dutch relatives come and visit. We are truly enjoying their company. We have been crazy busy playing tourist, but it has been the highlight of the summer. Here is a list of some of the fun places we have gone with our guests this month:
Evergreen Aviation and Space Museum in McMinnville, Oregon
OMSI - Oregon Museum of Science & Industry in Portland, Oregon
Big Al's in Beaverton, Oregon (For those of you eating gluten free please note: the online menu differs from the restaurant menu in some respects. For example tater tots are not gluten-free as indicated on the website.)
Build-A-Bear in Clackamas Town Center in Happy Valley, Oregon
Pike Place Market in Seattle, Washington
Seattle Center in Seattle, Washington (The International Fountain was a big hit!)
Future of Flight Aviation Center & Boeing Tour in Mukilteo, Washington
Woodburn Premium Outlets in Woodburn, Oregon
Aurora Colony Days Parade in Aurora, Oregon
Clackamas County Fair in Canby, Oregon - My Mother-in-Law really wants me to submit an entry next year. ;)
Jimmy Mac's Roadhouse in Everett, Washington (This is one of the 4 restaurants that I have been to with amazing food and that have been wonderful about dealing with my dietary restrictions. I wish every waitress could be as knowledgeable and informative as ours was. And the steak... Goodness, I need to stop thinking about it before I begin drooling... However, this is not the place to go with peanut allergies.)
I also apologize for being late in responding to comments made on my last blog posts. I may get to them by September - I hope! I have been able to check in on Facebook with my iPad here and there, but computer time has been limited. (I could respond tonight, but I've only put 3 stitches into a project since July 30th. I need a stitching fix and have a date with my needle and thread tonight! As far as addictions go, embroidery is a pretty safe one, right?!)
Wishing you all a fabulous August! In September, I look forward to catching up with my favorite blogs. :)
Thanks for stopping by!
Renee
Tuesday, July 26, 2016
1 X-mas Item a Month - July 2016
Yay! I finally finished a couple of projects to share with the 1 X-mas Item a Month blog!
In May, I shared the embellished front to this stocking. Today, I carved out enough time to stitch it all together.
I completed the cross-stitched center over a decade ago and tried to make a wall quilt for my husband. (The pattern was in the book Alma Lynn's Country Cross-Stitch.)
The wall quilt did not turn out well, so I set it aside. Last year, I pulled it out of my pile of UFOs (unfinished objects) and decided it would be fun to use in a crazy quilted stocking for my husband. I am happy to say that he loves it!
Some time ago, my husband mentioned he wanted a new pillowcase, so I found these fun beer prints. Unfortunately, I did not think about the print and grain running in the wrong direction...
This was my first time making a pillowcase using the "roll up" or "burrito" method.
I followed the tutorial I found at The Seasoned Homemaker. I also watched this YouTube video by The Crafty Gemini to make sure I understood the method first.
His pillow fits in it perfectly and I think he'll like it - even if the beer is all sideways.
The body fabric is Cheers by Martin Irish. The cuff fabric is by Hi-Fashion Fabrics, Inc. - Pattern HJG-C3867. (I wanted to share links, but could only find the Cheers print with a black background and could not find the cuff fabric on-line.)
Are you working on any handmade Christmas gifts?
In May, I shared the embellished front to this stocking. Today, I carved out enough time to stitch it all together.
I completed the cross-stitched center over a decade ago and tried to make a wall quilt for my husband. (The pattern was in the book Alma Lynn's Country Cross-Stitch.)
The wall quilt did not turn out well, so I set it aside. Last year, I pulled it out of my pile of UFOs (unfinished objects) and decided it would be fun to use in a crazy quilted stocking for my husband. I am happy to say that he loves it!
Some time ago, my husband mentioned he wanted a new pillowcase, so I found these fun beer prints. Unfortunately, I did not think about the print and grain running in the wrong direction...
This was my first time making a pillowcase using the "roll up" or "burrito" method.
I followed the tutorial I found at The Seasoned Homemaker. I also watched this YouTube video by The Crafty Gemini to make sure I understood the method first.
His pillow fits in it perfectly and I think he'll like it - even if the beer is all sideways.
The body fabric is Cheers by Martin Irish. The cuff fabric is by Hi-Fashion Fabrics, Inc. - Pattern HJG-C3867. (I wanted to share links, but could only find the Cheers print with a black background and could not find the cuff fabric on-line.)
Are you working on any handmade Christmas gifts?
Subscribe to:
Posts (Atom)