Showing posts with label Colonial Knots. Show all posts

Tuesday, January 23, 2018

TAST Weeks 3-4


Week 3: Fly Stitch

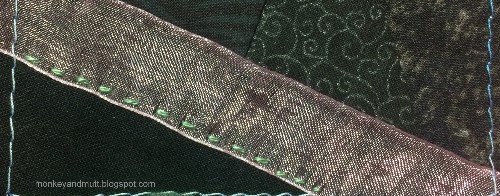
For Week 3 of TAST, I added a fly stitched seam to the crazy quilted messenger bag I am making.

(Click on any photo for a larger view.)

Mill Hill Magnifica #10026 Old Rose Beads were added above each fly stitch to create small flowers. 


Week 4: Detached Chain Stitch

Detached Chain Stitch is also known as a Lazy Daisy Stitch. It is incredibly versatile and may be the one I use most often. 

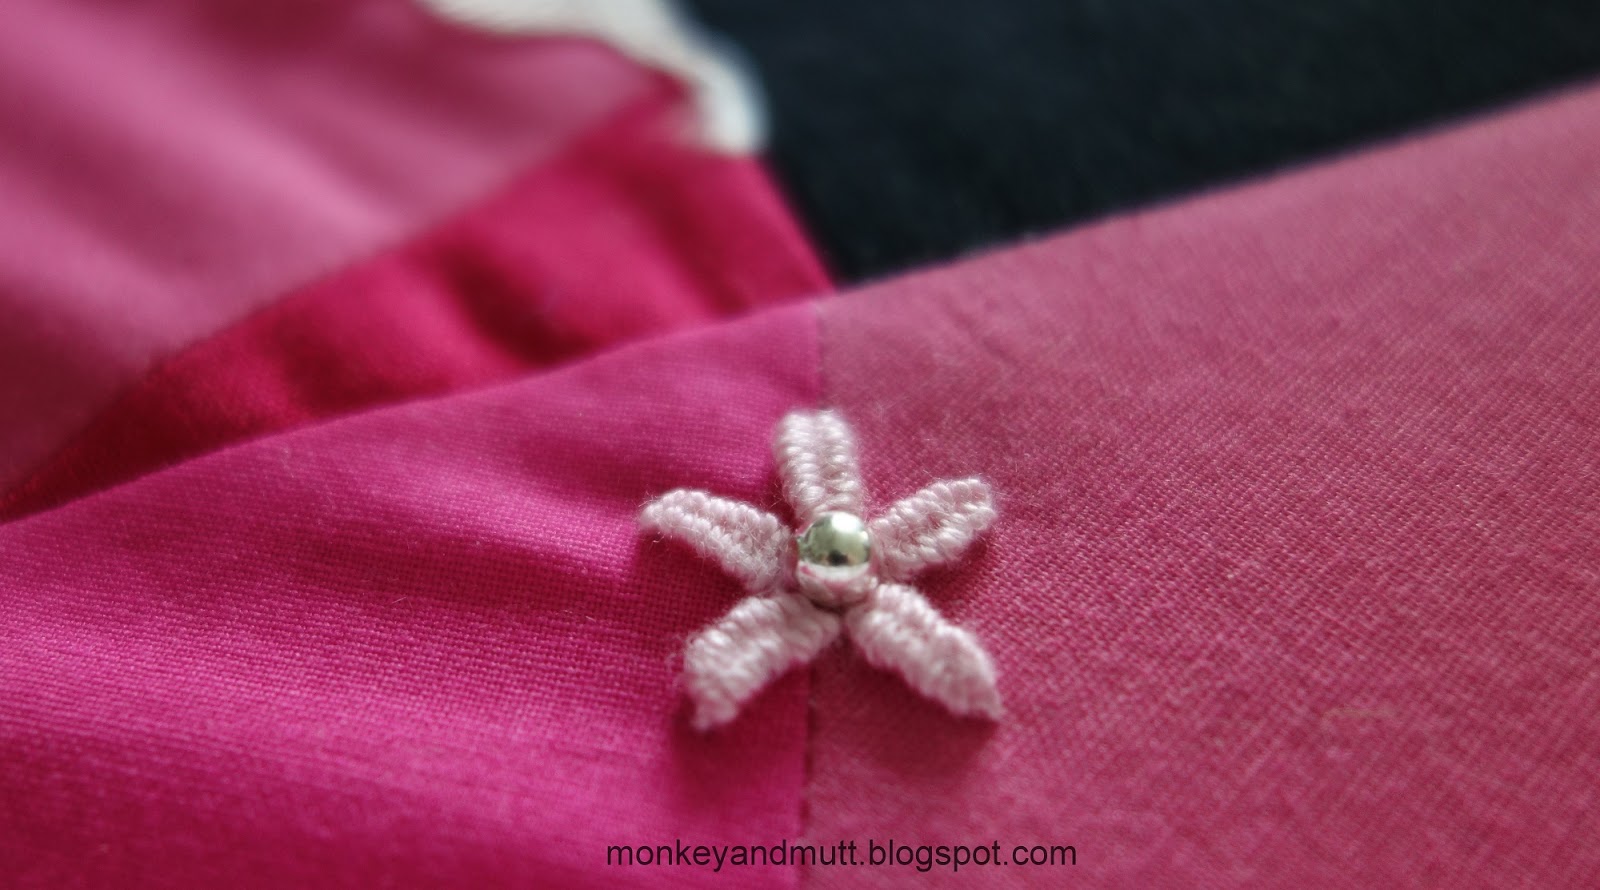
Clusters of 5 detached chain stitches with colonial knots in the centers create simple flowers.

A third seam was added to my messenger bag using straight stitches (flower stems), pairs of detached chain stitches (leaves), and sets of fly stitches (heart flowers.)

Here is a photo of this seam in progress. The hearts are made with two fly stitches (like the pink one here) that meet in the center.

Thank you so much for stopping by!
Renee

TAST stands for Take a Stitch Tuesday. It is a personal challenge to learn a new embroidery stitch each week. The challenge is offered by Sharon B. of Pintangle.com. Anyone may join in at any time. This link will take you to the TAST FAQs. Find the TAST Facebook Group here.


Saturday, September 16, 2017

Crazy Quilt ATC Tutorial Part 2 - Embellishing

The Crazy Quilt Quarterly Magazine is hosting an artist's trading card (ATC) swap - crazy quilt style. You may find the details about the swap at Kitty and Me Designs, here

Yesterday, I shared a tutorial explaining how to piece an ATC. The finished card will only be 2 1/2-inches by 3 1/2-inches. 

When embellishing an ATC, there are a few things to keep in mind.

1. To keep the postage expenses down for this swap, the ATCs cannot be more than 1/4-inch thick (much like a fabric postcard.) This includes the thickness of the interfacing (Peltex or Timtex) you use.


2. All stitching needs to be within the outline drawn on the back of your muslin.

3. Beads, buttons, sequins and charms should be at least 1/4-inch away from the edges of the ATC card. (This is important when finishing the card.) I keep buttons and charms at least 1/2-inch from the edge.

4. What color scheme are you working with? The colors you use for embellishment should coordinate with the fabrics used to piece your block. For this block, I chose to work with pinks (as the ribbon is pink), greens (for leaves and stems), and blues. All of these colors go well with the basic black background fabrics.


Materials to embellish an ATC could include:
Ric Rac
Flat buttons (no shank buttons)
Seed beads and beading needle
Small flat charms
Sequins
Ribbon
Lace
Silk ribbon
Embroidery floss (cotton, silk, stranded, perle cottons, etc.)

It is my hope that beginners will participate with this swap. So, for this particular ATC card, I tried to use several basic stitches. 

Click on any photo for a larger image.


Seam 1: My first step was to secure the loose edge of the ribbon. This was done with a running stitch made with green size 8 perle cotton.


Seam 2: I added a buttonhole stitch above the ribbon, using a different shade of green size 8 perle cotton.

The stitches were intentionally spaced irregularly and at various angles.


Detached chain stitches were added to make leaves.

Seed beads will top the stems in a later step.

Note: The pins in this photo were added at 1/2-inch intervals to help me space the next seam embellishment.


Seam 3: I planned to embellish along the center of this ribbon, but there was a flaw near the top that I needed to hide. 


Using another shade of green size 8 perle cotton, I worked pairs of detached chain stitches (leaves) with a straight stitch (stem) between each pair.

The flowers were made with 2 straight stitches and a French knot using size 8 pink perle cotton.


Seam 4: Sets of 3 French knots were evenly spaced beneath the ribbon using size 5 variegated pink/blue/purple perle cotton.


Seam 5: First, a feather stitch was added along the far right seam using yet another shade of size 8 green perle cotton.


Next, I worked from the bottom up adding detached chain stitches as seen in this photo. I skipped every third "stem" to add a flower.


To add the flowers, I stitched little stars made up of 4 straight stitches with pink size 8 perle cotton.

First, I made a "+" with two straight stitches.


Then, I stitched an "X" over the "+" with two more straight stitches.


This left one final seam to embellish.


Seam 6: Alternating sides of this seam, I worked a detached chain stitch (leaf), and then worked a curved stem stitch to create a flower stem. This was worked in green size 12 perle cotton.


Next, pink size 12 perle cotton was used to add two small detached chain stitches to make flower petals.


Motif: With the size of this block, I only added one motif. Spider webs were traditionally added to crazy quilts, so I added one to this ATC. I used size 12 white perle cotton.


Long straight stitches were carefully threaded beneath existing stitches to create spokes.


For this web, I looped the thread around the spokes and later tacked each into place with small stitches. (Pamela Kellogg and Kathy Shaw both have great tutorials on making webs.)
A spider's body and head were added with blue size 5 perle cotton. 


A detached chain stitch created the body. A straight stitch filled the center of the detached chain stitch (so the black fabric did not show through.) 

A colonial knot created the head. (These are slightly larger than French knots.)

The legs were made with a single strand of a matching of cotton embroidery floss. Each leg was created almost like a fly stitch. However, instead of making a "Y", I tacked the thread down making "V" stitches. 

Each leg stitch began between the head and the body and worked out. 

In the first spider photo you may see that the first set of back legs are almost even with the chain stitch. The first set of front legs extend just past the head. 

The second spider photo shows that the second set of front and back legs extend a little further out than the first sets of legs.


Beads: Dark blue Mill Hill Petite Glass Seed Beads were added to the pink flowers along seam 6.

Tip 1: I used a beading needle and a single strand of cotton floss in a similar shade to the bead.

Tip 2: To firmly secure each bead in place, I wrapped the thread through the bead 3 times. On the back side, I knotted the thread 3 times before moving on to the next bead. This takes a bit more time, but the beads are not loose on the card. And, if one comes off in the future, the others will remain.


Light blue seed beads were added to the flowers on seam 2.


I felt the feather stitched seam on the right looked a bit bare, so I added more detached chain stitches to make more leaves.

Now the block is ready to be finished into an ATC.  

Assuming our Internet does not crash again (it has gone out 4 times while creating this tutorial), I plan to share the final part of this tutorial tomorrow.

If any step of this process was unclear, please feel free to let me know or ask questions!

Thank you for stopping by.
Renee

Related posts:
Crazy Quilt ATC Tutorial Part 1 - Piecing
Crazy Quilt ATC Tutorial Part 3 - Finishing

Note: This post was updated on September 17, 2017 to add information about color schemes and securing beads and on September 18, 2017 to include the link to Part 3 above.

Tuesday, January 17, 2017

CQJP 2017 January Seams 4 & 5 - TAST 59 & 65


10 Year Anniversary of TAST!

This is the 10th anniversary for Take a Stitch Tuesday (TAST), offered by Sharon Boggon at Pintangle.com.  To celebrate a decade of TAST, she will be restarting the series of stitches beginning next Tuesday, January 24th.  You may read more about her plans, some fun challenges, and about her new book HERE.

Personally, I am still catching up with the most recent set of TAST stitches. (Next time, I may make an actual sampler, so I do not find myself stumped wondering what current project the current stitch will work with...) I practiced two new stitches this week.


TAST Stitch 65: Top Knotted Buttonhole


I thought it would be fun to use the top knotted buttonhole stitch on a curve to embellish this crazy quilt seam. (You may click on any photo for a larger image.)

An edge on one of Sharon B.'s Crazy Quilt Templates Set 1 was perfect for what I had in mind. 

DISCLAIMER: I am not affiliated with Sharon B.'s templates, but I received a set in exchange for an honest review and do love using them!

Using a mechanical pencil, I lightly marked dots along the curves onto the block. (I did not want to fully trace the lines, as I was afraid they may not be fully covered by the stitching.)

The stitch was worked with size 12 DMC #B5200 snow white pearl cotton.

Although I could have stopped there, I wanted to dress the seam up more.

Five straight stitches were added around each "knot" with size 8 Presencia Finca #1724 perle cotton to create flower petals.

Three small white buttons were secured within the curves of the seam using a strand of DMC #604 light cranberry floss.

I really enjoyed working the top knotted buttonhole stitch and building this seam!


TAST Stitch 59: Woven Detached Chain Stitch


I had a hard time deciding how I wanted to work the woven detached chain stitch. So, I followed several of the links that were shared in the comments on the tutorial post in 2013. I fell in love with the flowers Isabelle shared HERE on her blog. 


Using a ruler. I found the center of this seam and placed dots at the start and end points for five petals.

I worked the stitch with size 8 DMC #605 very light cranberry pearl cotton.

I was not sure if I should start the detached chain stitch in the center or the outer edge of the petal. This one began on the outside, but I started the rest in the inner circle of dots.

After completing the first "petal", I moved on to the next until all 5 were done.

I could have left it as it was, but decided to dress it up more.

A 4 mm silver bead filled the center beautifully.

Evenly spaced colonial knots decorated the remainder of the seam.

These are both stitches I see myself using in the future.

Thank you for stopping by!
Renee

What is TAST?

TAST stands for Take a Stitch Tuesday, a personal stitching challenge offered by Sharon Boggon at Pintangle.com. You may learn more about it HERE. There is an active TAST group on Facebook where participants share photos of the work they create with each stitch.

Other posts related to this project include:

3. Seams 2 & 3 

My CQJP 2017 project may also be found on this Pinterest board.

Note: Post updated June 2017 to remove outdated links.


Monday, January 16, 2017

CQJP 2017 January Block Seams 2 & 3

Here is a crazy quilting question... Do you plan out the work on your blocks, or do you just embroider whatever strikes your fancy in the moment?

I am guilty of both. For this block, I sketched out a plan in my bullet journal. 

As you may have guessed from my scribbles, I have already made a few changes from the diagram I drew. For easy reference, I numbered the seams in a clockwise fashion (except #15 because I forgot to sketch it.)

As I thought of an idea for a seam, I jotted down the corresponding seam number in my journal and listed the names of the stitches required and (if applicable) what inspired the seam. There is a separate page in my journal where I neatly list the supplies and stitches actually used to embellish each seam as I go.

DISCLAIMER: I have added links to a few supplies used for your convenience. Please note that if you visit Amazon through my blog and make a purchase, I do receive a small credit.

Seam 2

The second step on this block was to secure the lace.

I decided to dress this lace trim up with flowers.

I like the embroidery to extend off of the finished block on the outer seams. When I get to the assembly process, if I cut a 1/4-inch seam allowance, I do not want to cut my embroidery thread. So, I start and end most stitches roughly 1/8-inch outside my basted seam lines.


As you see here, I began a buttonhole stitch just outside the seam line. It was worked with size 8 DMC #320 medium pistachio green pearl cotton and I ended the seam just before the black fabric began.


Using the same green thread, I added "leaves" to the bottom of each "stem" along the seam. First, I added 2 straight stitches to the base of a stem. Then, I added a pair of detached chain stitches to the next one. I continued alternating stitches along the seam.


Using size 12 Presencia Finca baby yellow color #1211 perle cotton, I added a colonial knot to the first stem (with the straight stitched leaves.) 3 detached chain stitches were added to the top of the next stem. (I work the petal on the right, the petal on the left and then the center petal when creating these flowers.) I continued this pattern along the seam.


To complete the seam, a Mill Hill Petite Glass Bead Seed Bead #40123 Cream was added to the top of each of the detached chain stitched flowers. 

I love that Mill Hill has a conversion chart showing matching colors of DMC threads to attach their beads with. Following the chart, I passed through each bead 3 times with single strand of Ecru DMC floss and a beading needle. I knotted the floss in the back and then moved on to the next bead. (I prefer to secure each bead individually, so if one comes loose they will not all fall off.)


This is one of my favorite crazy quilt seam combinations and I love it with this lace.  (I later tacked the bottom of the lace down with tiny stitches and a strand of Ecru DMC floss.)


Seam 3

The next step was to secure this ribbon.

It moved slightly when the block was pieced, allowing a bit of the seam to show beneath the left side of the ribbon.


I pinned the ribbon so the visible seam lay parallel to it. Then, I couched a line of size 8 DMC #605 very light cranberry pearl cotton along the seam. (I used the same thread to couch the thread in place.)

Next, I pinned a strip of waste canvas over the lower edge of the ribbon. (Before I began stitching, I made sure the edge of the ribbon lined up with a single row of the waste canvas. It is slightly askew in this photo.)

Herringbone stitches were added using size 8 Anchor #926 (cream or ecru?) pearl cotton.

I worked the stitch from the edge of the black and pink fabric, and up just over the edge of the ribbon. I counted 3 squares of the canvas up and to the right for the first stitch. I brought the needle up one square to the left of the stitch at the top and counted diagonally down 3 squares of canvas. This process was repeated until a stitch ended about 1/8" past the basted seam line.

This is how it looked after removing the waste canvas. 


Using size 8 Anchor #225 light mountain meadow pearl cotton, I created stems and leaves for 2 small heart flowers.

First, I determined where I wanted to place both plants and made 2 straight stitches extending up and out from the same spot on the ribbon. Next, I added 3 detached chain stitches - one to the right, one to the left and one in the center of each pair of straight stitches.

Heart flowers were added with size 8 Anchor #052 pink pearl cotton and what I assume might be called an open detached chain stitch. I tried to capture the process in this photo.

This seam was copied from my work on a block embellished for Alexandra in 2014.


Mill Hill Magnifica Beads #10026 Old Rose were added between the herringbone stitches with a single strand of DMC 3688 floss to complete the seam.

This is how my January CQJP 2017 block looks with the first 3 seams embellished.

I am joining with Monday Stitchery Link Party #93 at Super Mom - No Cape! I do hope you will hop over and join the fun!

Thank you so much for stopping by!
Renee


In case you are wondering...


What is a bullet journal?
A bullet journal (sometimes referred to as a BuJo) is a customizable planning system designed by Ryder Carroll. You may learn more about it HERE.


What is CQJP 2017? 
It is a personal challenge to create one crazy quilt block a month. This year, the blocks must measure at least 8- x 8-inches square. (Which is the size of the block I am working.) You may learn more about CQJP 2017 HERE and you may see blocks others have embellished HERE.


Links to previous posts related to this block:


1. Piecing the Block 
2. Seam 1 Part 1 

My CQJP 2017 Project may also be found on this Pinterest board.