Showing posts with label Change Purse. Show all posts

Wednesday, December 14, 2016

Pink Spider Coin Purse

Embroidered spider web with pink beaded spider.

While looking through some photos this morning, I realized I forgot to share this project on my blog! Well... sort of.

The photo above was shared in this post, back in September of 2015, after the embroidery was completed. The spider and web were sewn onto denim recycled from an old pair of blue jeans.

I planned to create a coin purse (and 9 other projects) to finally stock my poor empty Etsy shop. (Did I mention I have a hard time with the idea of selling what I make?)

Coin purse with embroidered heart and pink beaded spider.

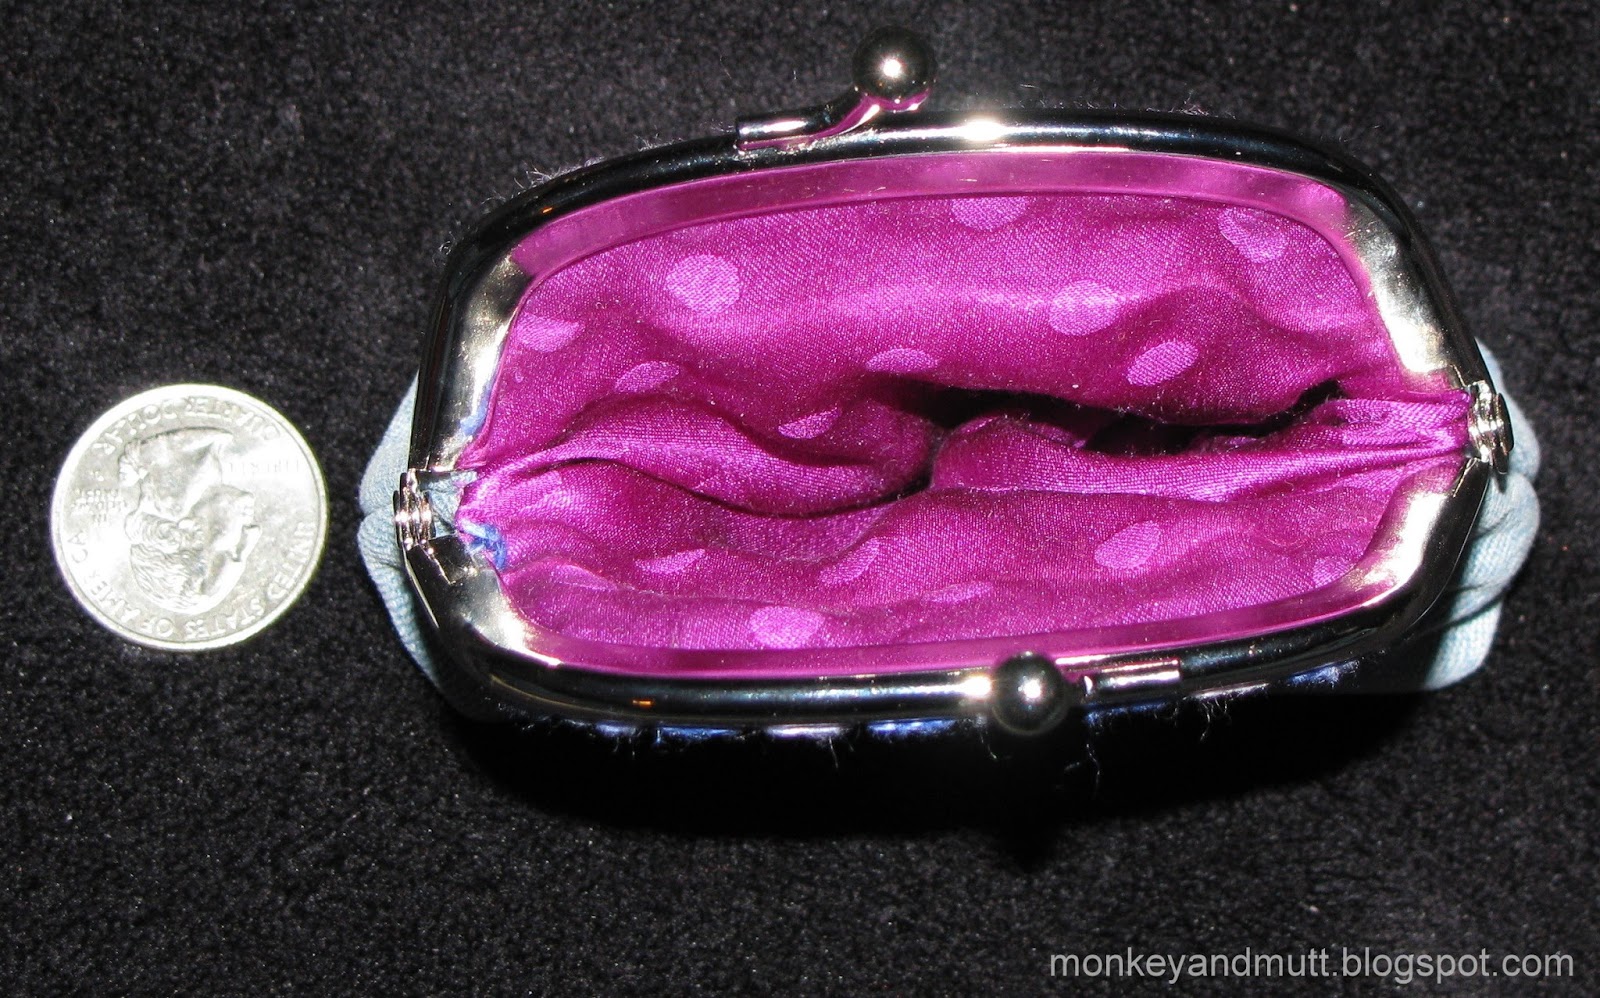
In January, I completed this and one other project (that will be shared soon - it will also be a gift.) I used the same variegated pearl cotton used to embroider the heart to sew the fabric onto the purse frame. The coin purse was created following this tutorial at Sweet Bee Buzzings.


For the inside lining, I used 100% silk in a purple polka dot print upcycled from the lining of a dress found at a thrift store.

While visiting us this year, a 12-year-old Dutch relative was sadly disappointed when her zipper-pouch coin purse broke. I was not sure if she would like this as a replacement or not, but I offered it to her. Her sweet reaction and the way she lovingly admired the spider and its web truly warmed my heart.

Thank you so much for stopping by! If you have any time for crafts right now, I would love to know what you are working on  - assuming it is not secret stuff. It is that secretive time of year!

-Renee

Monday, September 28, 2015

Monday Stitchery Link Party #25


I stem stitched this heart and couched down a spider web - with a heart center - for this pink beaded spider.


This will be the front of a denim change purse. I just need to sew it together and sew it into the frame.


I am linking up with the Monday Stitchery Link Party #25 at Super Mom - No Cape! If you hand stitch and have a blog, I encourage you to link up and enjoy the fun! There is a giveaway this week too. There is also a great free embroidery pattern. If you do not stitch, I still encourage you to stop by and see what everyone has been up to!

Thank you for stopping by.
-Renee


Thursday, October 30, 2014

A Thank You Gift for Kim

I wanted to send Kim at Wisdom with Needle and Thread a small token of appreciation for hosting the 2014 Halloween Exchange.  Unfortunately, I did not have time to stitch anything, so I went with the next best idea I could conjure up!

Not knowing what Kim might like, I decided to take a look at some of her work. The ornament Kim created for this exchange was a cute cross-stitch pattern of a witch. (It is the fourth photo in THIS post on her blog.)  So, I found this witch silhouette amongst my fabric stash and decided it would be perfect.

Above is a picture of the back side of the coin purse.

I am happy to note that every time I make one of these little coin purses, following the tutorial on Sweet Bee Buzzings, I get better at hiding the inside stitches from sewing the frame in.  (After following all of the directions on the tutorial, I thread a size 26 tapestry needle with a strand of size 5 perle cotton and work my way across the frame one last time to add a seed bead over each hole in the frame.)

Imagine my delight when Kim mentioned her desire to look up the tutorial to make one of these coin purses in a comment on my blog.  She had no idea one was already on its way to greet her. I hope she likes it and was able to use it between the time she received it and Halloween!

Thanks for stopping by!
Renee

Wednesday, October 22, 2014

WIP Wednesday 10/22/2014

This has been a very busy, productive week! (Enlarge any picture by clicking on it.)


I finished adding beads to the snowflakes in the upper-right-corner of my CQI Winter/Christmas Wall Quilt and began a beaded snowflake on the left side. (You may read more about this project HERE.)  It was not a lot of progress for this particular project; but, I'll take it!  Here is how it looks now:


 I am linking up with Work In Progress (WIP) Wednesday on pintangle.com.  To see what others have done this week, check out this link.

The real progress I made was on my list of short-term goals.

Thank you so much for stopping by!
Renee

 Last Week's List of Goals:

 Short-term: 

  1. The wall quilt I plan to create with all of my CQI Winter/Christmas blocks. Complete quilting so it is ready to add the back and bind. Progress seen above.
  2. Make a TAST post. I completed the Fern Stitch and the Triangular Buttonhole Stitch.
  3. Complete back for May CQJP 2014 block.
  4. Freebie Santa and the Mouse Ornament -  Heaven and Earth Designs chart by Michele Sayetta and artwork by Scott Gustafson. (I believe the ornament is a portion of the chart "Santa and the Mouse.") Complete 100 x-stitches by next week. Done! I worked on the cuff of the sleeve this week.
  5. Piece and embellish snowball for Kathy S. by September 30th as soon as possible. - An Africa theme - new for me. Completed, mailed and received by Kathy!  Please note, the elephant cross-stitch was adapted from the 1993 Graphworks International Inc. cross-stitch booklet, "Baby Afghan Safari" designed by Mary Bartley Stockett and Norman B. Brown. (I am not affiliated with the book, but if you purchase it from Amazon through my website, I earn a bit of credit toward a gift card. I made the Afghan for my eldest son many years ago.) If you missed my post about this snowball, you may view it HERE.
  6. Embellish block for CQI Hearts DYB Round Robin.  This will be the last rotation before my blocks return home!  Done! If you missed the post, you may view it HERE.
  7. Embellish snowballs for Nicki Lee and Donna by the end of October.
  8. Piece and embellish a snowball for Lori by end of October. 
  9. Mail gift and share pictures after it has been received. Mailed Friday, the 17th.
  10. On October 18th, participate in my first Halloween Linky Party - sharing the Halloween Ornaments exchanged through Wisdom With Needle and Thread.  (I am thrilled to know the ornament I made arrived safely in Ireland and the recipient liked it!) If you missed it, you may see my 2014 Halloween Exchange post HERE and/or follow the links to other blogs HERETHIS POST also shares photos of goodies Kim shared pictures of because Anna did not have a blog. This is the fantastic ornament I received from Evalina in Canada.
    And this is the ornament I made for Gaynor in Ireland.

Long-term: 
  1. Make a purse with my April CQJP 2014 block.
  2. Make a purse with my May CQJP 2014 block.
  3. My CQJP 2013 May block - better late than never?! (It is referred to as Block 4 if you follow this link.)
  4. Have a count of at least 50,000 words for my CampNaNoWriMo novel.
  5. Embellish July CQJP 2014 block.
  6. Piece August CQJP 2014 block. 
  7. Embellish August CQJP 2014 block.
  8. Piece September CQJP 2014 block. 
  9. Embellish September CQJP 2014 block.
  10. Embellish October CQJP 2014 block.
  11. Make a sew-in frame purse for my Etsy shop
  12. Piece and embellish a snowball for Lynne by November 15th. 
  13.  Paint guest bathroom.

This Week's List of Goals:

 Short-term:

  1. Complete the wall quilt I plan to create with all of my CQI Winter/Christmas blocks. Complete quilting so it is ready to add the back and bind.
  2. Make a TAST post. 
  3. Complete back for May CQJP 2014 block.
  4. Freebie Santa and the Mouse Ornament -  Heaven and Earth Designs chart by Michele Sayetta and artwork by Scott Gustafson. (I believe the ornament is a portion of the chart "Santa and the Mouse.") Complete 100 x-stitches by next week. 
  5. Embellish snowball for Nicki Lee
  6. Embellish snowball for Donna.
  7. On Thursday, share a post with a picture of the snowball I just received from Donna on Tuesday, 10/21/2014.
  8. Piece and embellish a snowball for Lori by end of October.
  9. Share pictures of the gift I mailed after it has been received. Mailed Friday, the 17th.
Long-term: 
  1. Make a purse with my April CQJP 2014 block.
  2. Make a purse with my May CQJP 2014 block.
  3. My CQJP 2013 May block - better late than never?! (It is referred to as Block 4 if you follow this link.)
  4. Have a count of at least 50,000 words for my CampNaNoWriMo novel.
  5. Embellish July CQJP 2014 block.
  6. Piece August CQJP 2014 block. 
  7. Embellish August CQJP 2014 block.
  8. Piece September CQJP 2014 block. 
  9. Embellish September CQJP 2014 block.
  10. Embellish October CQJP 2014 block.
  11. Make a sew-in frame purse for my Etsy shop
  12. Piece and embellish a snowball for Lynne by November 15th. 
  13.  Paint guest bathroom.

Friday, October 17, 2014

2014 Halloween Exchange Linky Party

Wisdom with Needle and Thread 2014 Ornament Exchange from Evalina to Renee
Kim, at Wisdom with Needle and Thread, hosted a first annual Halloween Exchange this year.

I love decorating for Halloween, so I just had to sign up for this swap, and I am SO glad I did.

Just look at this beautiful ornament.  It traveled to Oregon from Canada, and was made by Evalina of This and That...

At first glance, I thought the image was a fabric print.  The stitching is all so incredibly fine, it took my brain a moment to recognize it was actually cross-stitched!  I just love the owl on the tree branch (many of you know how much I love trees) and the full harvest moon. 

If you click on the image, it should enlarge for you.

Here is a close up of the stitching:

The words within the moon read, "A harvest moon so big and bright watch over us this Hallow's Eve night."

The decorative fringe around the edge and the wonderful ribbon hanger are perfect.  Thank you SO much, Evalina.  I absolutely love it!


The ornament I made was mailed to Gaynor  in Ireland.  (I encourage you to visit her blog at Stitchers Anon!) Although Kim let us know our ornaments did not need to be cross-stitched, I had picked the perfect cross-stitch pattern out.  Then, I made the mistake of  I was smart enough to ask my husband what he thought.  He told me he did not really like projects I made using cross-stitch patterns as much as the ones I make up as I go.  Back to the drawing board.

So, I crazy quilted a circle around a scrap of some haunted house fabric in my stash.

The spider web was stitched with glow-in-the-dark floss.  The eyes on the backing fabric also glow.  (I love glow-in-the-dark...)  I did not have any grey fabric, so I mixed black and white acrylic paints.  The resulting grey paint was applied to some white felt for the gravestones. 


I had so much fun making this for Gaynor!  I did worry though.  This was my first exchange with someone that did not include a list of things my swap partner liked and did not like.  (What if she hated spiders as much as my sister?!) So, I decided to add a small gift, too. (Oops.  It also had spiders...)
Front of Halloween Coin Purse
Back of Halloween Coin Purse
Inside Halloween Coin Purse - "Boo"
Thank you, Kim, for hosting such a fun exchange!  Evalina, I LOVE my ornament.  Thank you so much!

Please check out the 2014 Halloween Exchange Linky Party at Wisdom with Needle and Thread to see the other fun exchange gifts!

Have a great weekend!
Renee

Note: The coin purse was made using the tutorial for a sew-in-frame on Sweet Bee Buzzings.


Thursday, August 28, 2014

My OSU Coin Purse

My Oregon State University Pink Coin Purse

For some reason, projects I decide to make for myself are frequently set aside to work on more pressing projects.  So, I am happy to announce I finally completed the little coin purse I began a few months ago.  If it looks a bit familiar, it could be that you recognize the TAST stitches I used along several of the seams. Or, you may have seen pictures on my list of goals on a WIP Wednesday post.

The back of my Oregon State University Pink Coin Purse
As silly as it may seem, I am simply thrilled to have this in my purse.  I used it today, and it was SO much better than my previous change purse.  (My previous change purse had a zipper and if there were coins in it, the cramped space made it a bear to close without bills catching in the zipper.) 

The curves are still a bit tricky, but sewing the frames in without the stitching showing is getting easier with each sew-in frame. (I am not sure why I am pointing this out... You can click on any image for a larger view.  With this last photo if you look at the upper-right curve, you will see a bit of my frame stitching. It's for me, so I am okay with it!)

Now, I am off to see about finishing another project.

Thank you for stopping by!
Renee

Wednesday, August 27, 2014

WIP Wednesday 08/27/14

Wednesday's seem to arrive faster and faster every week.  (Can you believe there are only 17 Fridays before Christmas?! 2014 will be over in the blink of an eye...)
As you can see, I have made some progress on my Winter/Christmas Wall Quilt.  Next week, I will have Barbara's name finished.
I also managed to knock a few items off of my list of goals.  :)  I may have added a few new items - but the total number has actually decreased.  (The total went from 21 to 18, and one of those is nearly complete. Whew!)

This week, I also shared about my first experience entering items in the county fair.  If you missed it, you can read about that here. 

To see Sharon's beautiful progress on her hussif, and to see what others are up to this week, check out this post on pintangle.com and the links in the comments.

Last Week's Goals:

 Short-term: 

  1. The wall quilt I plan to create with all of my CQI Winter/Christmas blocks. Progress seen above.
  2. Make a TAST post. One stitch completed. View it here.
  3. Complete back for May CQJP 2014 block.
  4. Freebie Santa and the Mouse Ornament -  Heaven and Earth Designs chart by Michele Sayetta and artwork by Scott Gustafson. (I believe the ornament is a portion of the chart "Santa and the Mouse.") Complete 100 x-stitches by next week. As you can see, I barely touched it this week.  I will aim for 200 next week.
  5. Paint guest bathroom. Waiting to surprise my hubby.
Long-term: 
  1. Make a purse with my April CQJP 2014 block.
  2. Make a purse with my May CQJP 2014 block.
  3. My CQJP 2013 May block - better late than never?! (It is referred to as Block 4 if you follow this link.)
  4. Embellish crazy quilted hexagon to participate in my first swap with the World Wide Crazy Quilters Yahoo! Group No one has posted pics of theirs this year - I am not sure it is happening.
  5. A change purse for myself.  Almost done - I just need to sew the frame on.
  6. Have a count of at least 50,000 words for my CampNaNoWriMo novel.
  7. Embellish June CQJP 2014 block. Done! (I forgot to take a pic before making it into a purse.)
  8. Make purse with June CQJP 2014 block. This was a gift.  I will share pictures after it has been received.
  9. Embellish July CQJP 2014 block.
  10. Piece August CQJP 2014 block.
  11. Make a sew-in frame purse for my Etsy shop
  12. Piece and embellish snowball for Kathy S. by September 30th.
  13. Piece and embellish snowballs for Nicki Lee, Donna and Lori by end of October.
  14. Piece and embellish snowballs for Lynne by the November 15th. 
  15. Embellish next block for CQI Heart Round Robin. - Wow! Only 2 more blocks... I received the blocks on Friday!
  16. Complete and mail a gift.  Done, but I have one more to make.

This Week's Goals:

 Short-term: 

  1. The wall quilt I plan to create with all of my CQI Winter/Christmas blocks
  2. Make a TAST post. 
  3. Complete back for May CQJP 2014 block.
  4. Freebie Santa and the Mouse Ornament -  Heaven and Earth Designs chart by Michele Sayetta and artwork by Scott Gustafson. (I believe the ornament is a portion of the chart "Santa and the Mouse.") Complete 200 x-stitches by next week. 
  5. Paint guest bathroom.
  6.  Embellish next block for CQI Heart Round Robin. - Wow! Only 2 more blocks...
Long-term: 
  1. Make a purse with my April CQJP 2014 block.
  2. Make a purse with my May CQJP 2014 block.
  3. My CQJP 2013 May block - better late than never?! (It is referred to as Block 4 if you follow this link.)
  4. A change purse for myself.
  5. Have a count of at least 50,000 words for my CampNaNoWriMo novel.
  6. Embellish July CQJP 2014 block.
  7. Piece August CQJP 2014 block.
  8. Make a sew-in frame purse for my Etsy shop
  9. Piece and embellish snowball for Kathy S. by September 30th. - An Africa theme - new for me.
  10. Piece and embellish snowballs for Nicki Lee, Donna and Lori by end of October.
  11. Piece and embellish snowballs for Lynne by the November 15th. 
  12. Complete and mail a gift.

Monday, August 11, 2014

Hand Stitched Treasure

Last night, I finished this little coin purse.

The exterior was created with a re-purposed pair of blue/black denim jeans. 
 And the lining was created with a re-purposed 100% silk purple dress.

Hearts are my favorite shape, so I embroidered one on the front.  Well.. two if you count the one in the butterflies flight path.

Way back in my January "Grow Your Blog" post, you may remember I was toying with the idea of opening a shop on Etsy.  Well, today I finally did!  I am nervous and excited all at once.  And this little coin purse is the first item in my Hand Stitched Treasure Etsy Shop.  (I know, in January, I thought my little under the sea themed purse would be the first item.  However, that is currently checked in with the Clackamas County Fair - which opens tomorrow.  I do not expect any ribbons, but it was fun just to participate!)

Now, I am off to finish a few chores and try to work on a few more projects so this coin purse is not so lonely.

Thanks for stopping by!
Renee


Wednesday, July 30, 2014

Random Act of Kindness Swap with Crazy Quilting for Newbies Part 2

Keychain coin purse
On the 21st, I shared all of the wonderful goodies Lesa sent to me with the Random Act of Kindness Swap I signed up for with the Crazy Quilting for Newbies Yahoo! Group.

On July 25th, I mailed a package to another participant in the swap. She likes yellow and hoped to add more trims to her stash.

I have a habit of finding a trim or ribbon on sale every time I go to Michaels or JoAnn Fabric.  I also have a habit of forgetting to use them on my crazy quilting projects (though I am getting better about that!)  So, I snipped off a bit of this and a touch of that, hoping some of it would be to Jo's liking.  And it was SO MUCH FUN.  Again, it felt like Christmas in July - only on the giving end this time (my favorite part!)

I also wanted to make something special to send along with the trims.  I bought an Antique Bronze Keychain Purse Frame from CrazyQuiltingSupplies.com a while ago.  (I am not affiliated with the product or the shop.)  I knew the frame would be small, but once I saw it in person, I wondered if I would figure out how to make a little coin purse out of it.  This seemed like the perfect opportunity to give it a try!

I used the same tutorial I used to make my first coin purse at Sweet Bee Buzzings. But, this time, I had to draw my own pattern.  Let's just say, it took me some serious tweaking (and turning the lining/exterior right-side-out and then inside-out at least six times and tearing seams out and re-stitching them three times), but I finally managed to get the top section of the fabric to fit the frame. During the tweaking stage, I was certain this would be the last time I made a coin purse this small.  However, once it was finished, I wanted to order more frames.  (I never claimed I was sane! I still want to order more of these.)

Keychain coin purse
As you can see in the picture above, the lining is yellow, as is the embroidery. Try as I might, I could not quite hide all of the stitches on the inside of the purse from sewing the frame in.  Perhaps with more practice...??? (You can click on any photo for a larger view.)
Keychain coin purse

The photo above gives you a better idea of how small the coin purse is.  My husband insisted you would have to cut it open to get anything back out again.  (He loves to tease me.)  However, slightly pushing the coin from the bottom while holding the top worked like a charm.  Besides, if it were very big, the coin purse (filled) would make the keychain too heavy for car keys.

Based upon an email she sent to the group, I think Jo liked the goodies she received.  I certainly enjoyed putting it all together for her!  Again, I hope Lesa knows how much I appreciate her putting this swap together for the group!

Friday, May 9, 2014

My First Change Purse with a Sew-Purse Frame

Change purse made using tutorial at Sweet Bee Buzzings.
Well, I stepped outside of my comfort zone and finally made something with a sew-in frame.

I have wanted to try using one since I discovered the beautiful glasses cases at Humming Needles.

A few months ago, I bought a small sew-in frame at JoAnn Fabrics and searched on-line for a tutorial.


Special thanks to Bethany at Sweet Bee Buzzings for sharing a tutorial, complete with a pattern to help newbies like myself!  (Click on the link above to go to the tutorial.)

In the 5th grade, I made a wonderful friend.  I think I spent almost as much time in her home growing up as I did in my own.  Over the years, we have been separated by distance.  However, our friendship is one of those magical ones where regardless of the number of months or years that may have passed, every time we meet up it as if we just saw each other yesterday.

This friend is also wonderful about mailing me a birthday card and a Christmas card every year.  Sending cards is not one of my strong points.  She is always in my thoughts, but I rarely get a card out into the mail. So, this year, I thought I would surprise her with a gift.  (She should be all the more surprised, as it is arriving quite late.)


I traced the change purse shape onto muslin and basted this creamy white fabric into place. Then I stitched on a monogram. (I traced the "J" in reverse onto the back of the muslin with a very light lead pencil, using a monogram from The Magic of Crazy Quilting: A Complete Resource for Embellished Quilting by Marsha Michler.)


After stitching the "J", I added vines and flowers - hoping they would be far enough from the edges.  (In the future, I will stitch the bottom section one-fourth to one-half inch higher.)
Front of change purse
At this point, my gift had missed its deadline.  So, I gave myself a week to gather my courage to follow the tutorial and make the change purse.  (It was not as hard as I had feared!  Silly me...)

Back of change purse
A peek inside the change purse.
After sewing the frame in following the instructions on the tutorial (although I used size 8 perle cotton because I did not have size 5 in the right color), I went through with another strand of perle cotton and a size 28 tapestry needle to stitch a bead over each of the holes in the frame.

Now, I am eager to attempt more projects with sew-in frames!  (A good thing, as I ordered a couple from CrazyQuiltingSupplies.com that I am anxious to try out!  That is also where I picked up the size 8 pink perle cotton used to stitch the "J" above and the variegated pink used to sew in the frame, as well as the pink and green silk ribbon used on the "J".  Note: I am not affiliated with their website.)

-Renee

Updated 4/20/2015: This post was linked to the Monday Stitchery Link Party #2 at Super Mom - No Cape!