Showing posts with label Chain Stitch. Show all posts

Monday, February 19, 2024

TAST 2024 Week 4: Chain Stitch


Week 4 of Take a Stitch Tuesday (TAST) 2024 at Pintangle(dot)com was the chain stitch. So, I created two more chain stitched snowmen using size 8 white pearl cotton. 


I also used glow-in-the-dark Kreinik to chain stitch a moon. 

These were added to my February Crazy Quilt Journal Project 2024 block.

There were 2 Beyond TAST stitches introduced, but I was unable to think of a way to work them onto this block. The stitches were the Raised Chain Stitch Version 1 and Raised Chain Stitch Version 2. If I work these into another project this year, I will share photos at that time.

I will be honest, I was much happier with my snowman on the January CQJP block than I am with the two on this block, but that is okay. 

Do you have a favorite way to use the chain stitch?

Thanks for stopping by!
Renee


Monday, January 15, 2024

How to Embroider a Snowman Using Chain Stitches

 
Embroidered Snowman Using Chain Stitch

It has been a couple of years since I embroidered a snowman using the chain stitch. I had a hard time remembering exactly how I did it, so I thought I would make a tutorial to refer back to in the future.

First, I used a quarter (on the bottom), a nickel (for the body), and a dime (for the head) and traced them with light pencil marks on the back of the block.

Starting from the center of a traced circle, I made a triangle with three chain stitches. Then, I continued chain stitching in a circle until it was the desired size.

I used white DMC size 5 thread.

As seen in this photo of the back, my stitched circles ended up slightly off center. However, starting in the center of each circle and chain stitching in the same direction kept all three sections of the snowman lined up.

I ended the chain stitches at the bottom of each circle.


Once the body was stitched, I needed to decide on the face. I wanted this snowman to look up towards the moon on the block. 

Using 2 strands of a variegated DMC orange floss, I made a triangle pointing up towards the sky using 3 straight stitches.

Using the same floss, I satin stitched the nose. (I have found my satin stitches are a bit more even if I create an outline to stitch over first.)

Next, I attached size 10/0 black Czech glass seed beads, using a single strand of DMC black (#310) floss, to create eyes and a nose.

For the mouth, I couched 2 strands of the same black floss down using a single strand of black to tack it down. 

To be honest, I was nervous about adding a scarf and a hat. Using a single strand of a light blue embroidery floss and back stitches, I created outlines for them both. (I traced the outlines on the back of the block first to use as a guide.)

Using a variegated blue/purple/pink size 5 DMC thread, I satin stitched the hat (starting with the brim) and the scarf.

Next, using the same thread and Turkey Knots, tassles were added to the scarf and a fluffy ball was added to the end of the hat. 


Using a variegated brown DMC floss, I removed one strand (of 6) to couch down the remaining 5 strands to make arms for the snowman. Fly stitches were added to make the hands, using the 5 strands of floss.

You may have noticed the tree branches in the photo with the arms. I knew I wanted to add a tree, and decided to make that first so the arms on the snowman would use a brown in the tree. 

The tree was created using the Easy, Breezy Trees Tutorial on Kathy Shaw's blog (found here). A variety of threads were used. I cut lengths of Kreinik Metallics Pearl #4 Very Fine Braid, DMC Metallic white/blanc floss (all 6 strands), 2 shades of DMC variegated brown flosses (all 6 strands), and white DMC perle cotton in sizes 8, 5, and 3. I used a single strand of white floss to couch down most of the tree. Some of the brown branches were couched with a single strand of one of the brown variegated flosses.

Thank you for stopping by! If you use this snowman tutorial, I would love to see your creation.

Please note: 
1. You may click on a photo to see a larger image.
2. Directions for all of the stitches used for this tutorial (except the straight stitch) may be found in the Stitch Dictionary at Pintangle(dot)com here.


Wednesday, January 19, 2022

TAST 2022: Weeks 1 & 2


Sharon Boggon of Pintangle(dot)com is offering a new round of Take A Stitch Tuesday (TAST) this year. Every week, Sharon shares instructions for two new embroidery stitches. TAST offers basic stitches and Beyond TAST teaches a more advanced stitch.

Although I may not have time to complete every stitch this year, I decided to begin working on a fabric book with samples from the 2022 TAST and Beyond TAST stitches. (Click on any photo for a larger view.)

Chain stitches worked with white DMC size 5 pearl cotton created a snowman. Straight stitches with 2 strands of orange DMC embroidery floss added a nose. A single strand of black DMC embroidery floss was couched down to create a smile. And black size 10/0 beads created buttons and eyes.

A sample of the linked chain stitch was worked with 2 strands of DMC Coloris #4514 variegated embroidery floss. 

The beaded linked chain stitch was worked with the same floss and clear size 10/0 beads.

Ice-crusted snow was added to the snowman scene with the beaded linked chain stitch using a strand of white DMC size 12 pearl cotton and clear size 10/0 beads.

A single fly stitch was worked with 2 stands of Breezy Artiste variegated satin floss #769331. 

A fly stitched leaf was worked with a strand of green Anchor size 8 pearl cotton.

A single snowflake was created with a strand of DMC silver metallic thread.

Snowflakes were also added to the snowman scene using 2 strands of white DMC metallic floss. Clear Mill Hill Petite Glass Seed Beads added a little sparkle.

A sample of the Italian border stitch was worked with 2 strands of the Breezy Artiste variegated satin floss #769331. Clear blue size 10/0 beads were added where the two rows of the border stitch met in the center. 

If you are interested in learning hand embroidery, I strongly encourage you to check out TAST. You may find the TAST FAQs here or Sharon's Stitch Dictionary here.

If you are participating with TAST 2022, I would love to know!

Thank you for stopping by.

Renee

Tuesday, March 23, 2021

TAST 2021: Chain, Fly and Detached Chain Stitch


TAST is Take a Stitch Tuesday. It is a challenge offered by Sharon Boggon at Pintangle.com to learn a new stitch each week. There is no pressure and you can go at your own pace.


Week 1: Chain Stitch
I used Sharon Boggon's Stitching Templates to create this crazy quilt motif and used the chain stitch to create flower stems.

Flowers were created with sets of 5 detached chain stitches.

Week 2: Fly Stitch
Leaves were created with fly stitches.
Pink rhinestone beads were added to complete these flowers.

I also used the fly stitch to embellish a crazy quilt seam. Each fly stitch created a flower stem with leaves and pink glass seed beads created tiny flower buds.

Thank you for stopping by. I am wishing you all a fantastic week!

-Renee

Tuesday, March 3, 2020

TAST 2020 Chain Stitch


A new round of Take a Stitch Tuesday (TAST) began in January.

TAST is a personal challenge to learn a new hand embroidery stitch each week. The challenge is offered by Sharon Boggon of Pin Tangle. You may learn more about the challenge here.

Beyond TAST offers a more complex stitch for those that have completed TAST in the past or are more experienced embroiderers. (I have not worked these yet.)


TAST Week 1: Chain Stitch

This stitch was worked with size 8 Anchor red floss.

I then added size 12 cream Presencia Finca floss to create a whipped chain stitch (as seen in the photo at the beginning of this post.)


TAST Week 2: Fly Stitch

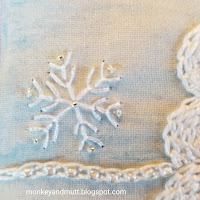
Eight fly stitches worked with size 12 DMC pearl cotton made a snowflake. 

A size 10/0 crystal glass seed bead was added to the center.

I need to work on my spacing, but I also worked a beaded fly stitched snowflake with the same DMC pearl cotton and crystal glass beads.


TAST Week 4: Stem Stitch

I traced a heart (using one of Sharon Boggon's Stitchers Templates Set 1) onto the foundation on the back of the block with a pencil (as seen below.)

Next, I used a pink Anchor size 8 pearl cotton to stem stitch around the heart.


TAST Week 3 was the Buttonhole Stitch. I have not used it yet this year, but I tend to use it to make flower stems (as seen in 2 of the seams surrounding the heart in my Stem Stitch photo.) 

Do you have a favorite way to use the the Chain Stitch, Fly Stitch or Stem Stitch? 


Tuesday, February 5, 2019

TAST 2019 - Stitches 1 & 2


This weekend I made some time to work on the Take a Stitch Tuesday (TAST) stitches that have been shared this year at Pin Tangle. The Chain Stitch and Fly Stitch were both worked onto a Valentine Fabric Postcard I am working on.

Click any photo for a larger view.

Stitch 1: Chain Stitch
I worked this stitch with size 8 pink perle cotton. I like the way the red fabric peeks out between the stitches.

Stitch 2: Fly Stitch
Fly stitches were evenly spaced above the chain stitches with size 8 green perle cotton to create leaves.

Straight stitches were added to make stems with the same thread.

The stems were topped with pink fly stitches (also size 8 perle cotton) to create flower petals.

Mill Hill Magnifica Glass Beads #10026 topped each flower.


TAST is a personal challenge to learn a new embroidery stitch each week. The challenge is hosted by Sharon at Pin Tangle.

Thank you for visiting!
Renee


Wednesday, February 7, 2018

TAST Weeks 5-6


This post is a day later than I intended, but for fun reasons. :) The time I scheduled to blog last night was spent planning a vacation later this year with dear friends. 2018 has a lot of big milestones for our family and this trip will celebrate one of them.


Week 5: Herringbone Stitch

Inspired by the work of Annie Bowers on the Facebook TAST Group, I used the herringbone stitch as a filler on my tree. It was a fun idea that I would not have come up with myself.

The outline of the tree was added to my Crazy Quilt Journal Project 2018 February block with a stem stitch, but I did not like all of the open space. This was a great solution!


Week 6: Chain Stitch

This arched seam was created with size 12 black perle cotton and chain stitches.

First, I traced the arches from one of Sharon B.'s crazy quilt templates. (Regular readers may recall I received them in exchange for an honest review. I still love using them!)

Next, I whipped the chain stitch with a variegated pink size 8 perle cotton. 


Working with these stitches was so much fun, I kept playing!

Using another stencil, I marked the foundation fabric on the back of the block. 

I used these dots as guides to create another herringbone stitched seam.

On one side of the herringbone stitched seam, I added small bullion knots. Small fly stitches were placed beneath each bullion. These were all made with size 8 variegated pink perle cotton. Blue seed beads were added to the other side of the seam.

For the motif, I used another stencil from Sharon B. to trace a stem with 2 leaves.

Using size 8 green perle cotton, I chain stitched the stem.

Next, I whipped the chain stitches and couched the same thread around the shapes of the leaves. Herringbone stitches filled them in.

A pink lace flower that I purchased from Raviolee Dreams a couple of years ago inspired me to create the stem and leaves. I couched it onto the block with a matching strand of pink floss and filled the center with blue seed beads.

Thank you for stopping by!
Renee

TAST stands for Take a Stitch Tuesday. It is a personal challenge to learn a new embroidery stitch every week.

You may learn more about TAST here and find the Facebook group here.

CQJP stands for Crazy Quilt Journal Project. This is a personal challenge to complete a crazy quilt block each month that is at least 8-inches square. You may learn more about CQJP 2018 and see the beautiful blocks other participants have created here.