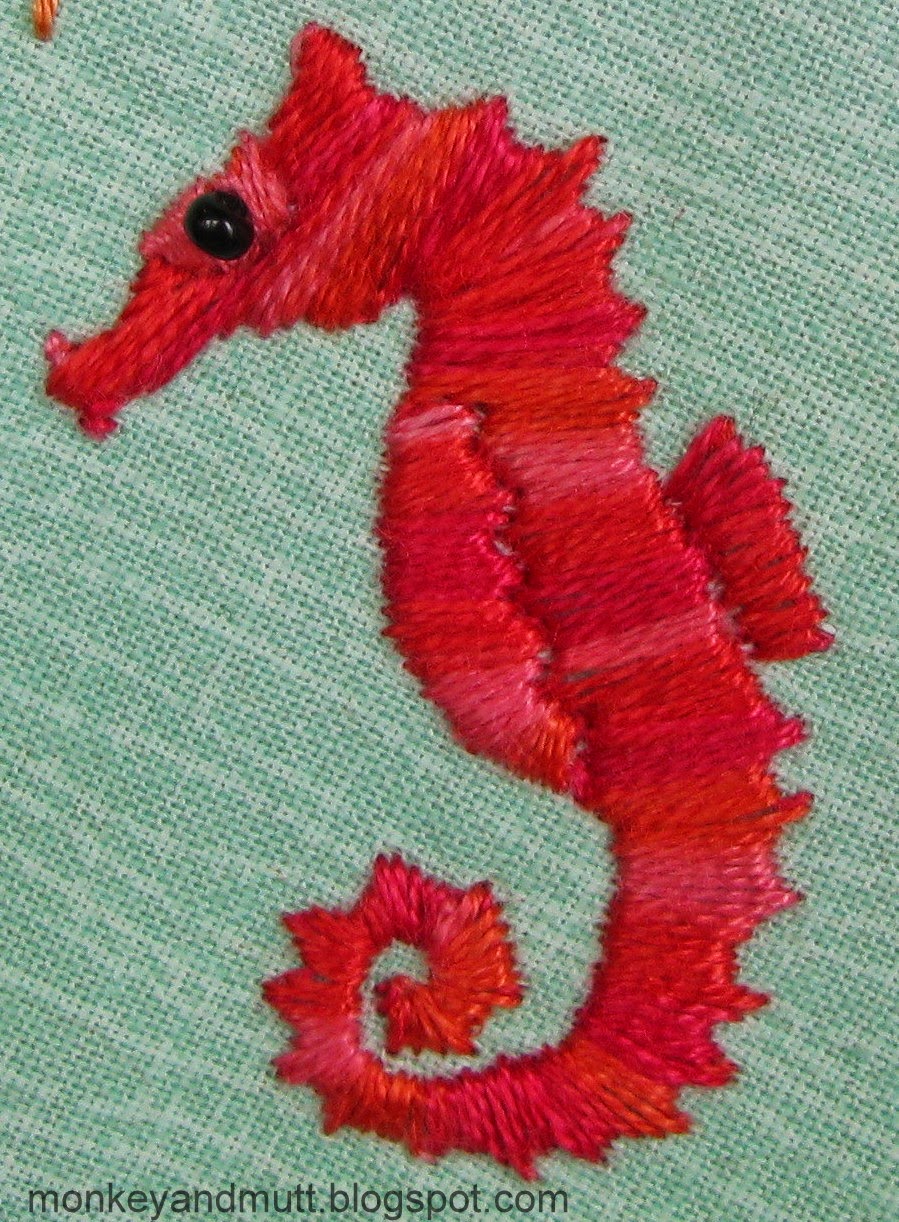
Showing posts with label UTS Block Step-by-Step. Show all posts

Friday, May 29, 2015

Under the Sea Block Step 8: The Final Details


This is the final post in a series explaining how I embellished Sandra T.'s block in the CQI UTS Round Robin we are in together. Links to previous posts in this series are below.
Step 1: Planning the Seams
Step 2: Planning Motifs
Step 3: Embellishing the Seams

The photo above shows how the block looked after adding the elements I originally sketched out for this block (with a few minor changes along the way.) As you can see, there are still some fairly bare areas that could use more embellishments. (You may click on any image for a larger view.)


I still needed to add beads to one seam, so I did that first. I individually secured Mill Hill petite glass seed beads to the tops of the button hole seam. (I passed the needle and thread through each bead 3 times with a single strand of matching floss and then secured the bead with 3 knots in the back so the knot would not pull through to the front of the fabric. One thing I like about Mill Hill beads is that they offer a conversion chart letting you know which DMC flosses match their beads.)


Next, I added more "seaweed" along the ocean floor using feather stitches.  One thing Sandra mentioned she would like on her block was glitter. So, I added a single strand of white DMC metallic floss to a couple strands of Waterlilies by Caron silk floss. (This was #207 Bermuda Reef - the same color used for the chain-stitched seam on the block.) I used this combination of flosses to fill in the far left side of the block with some seaweed. This extends the picture off of the block. I also added a section of this seaweed between the red and purple coral.

To me, it felt like the clear beads on the red seaweed in the lower-left corner looked... heavy for lack of a better word. I felt like I needed to add more beads on the right to balance out the block.  So, I used a size 5 DMC variegated purple floss to make another feather stitched section of seaweed coming in from the right of the block. I was careful to leave the "v" sections of the stitches at least one-fourth-inch away from the side of the block, so I could add purple seed beads without having them too close to the seam lines.

I also added 3 clear seed beads in front of the seahorse in a pattern resembling tiny air bubbles.


The remaining spaces were filled with more tiny fish. Some were made with the same variegated floss used for the fish seam in Step 3 of this series.


To add a bit more sparkle, I also created some of these fish using 2 strands of a blue-gray shade of DMC metallic floss.

Most of the variegated orange fish are swimming from the left side of the block to the right side. Most of the metallic fish are swimming from the right to the left. And a few of the fish are distracted by the "vegetation" within the block.
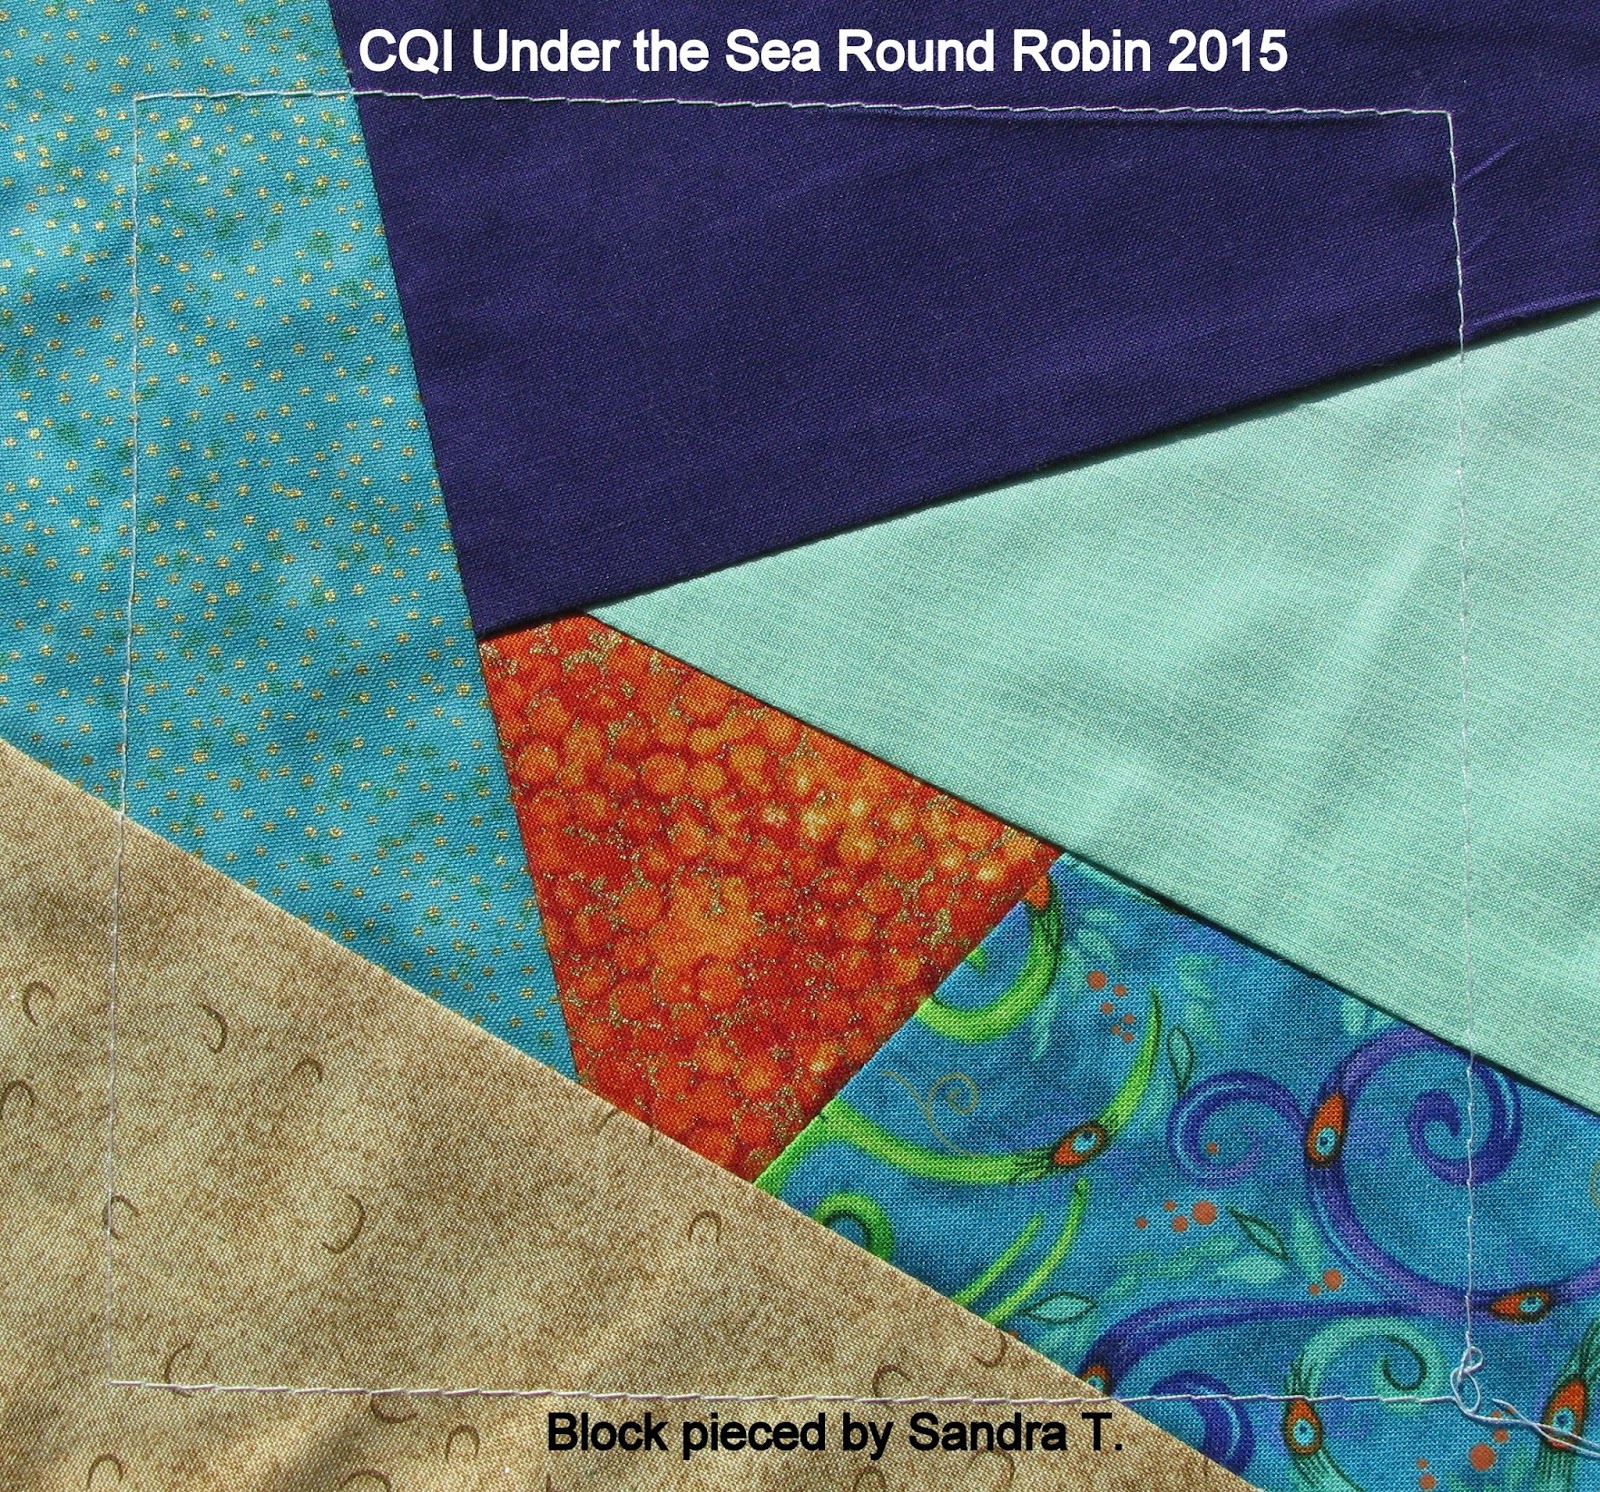

And that is how I transformed Sandra's lovely bare block (pictured above) into the scene pictured below.


There are so many ways to create an under the sea block. I must confess, I frequently second-guess the design elements of blocks I complete. But, I also look for elements I am happy with. On this block, I love the seahorse and am happy that I did manage to pull more of the orange and purple from the fabrics into the embellishments in a way that makes me feel the colors on the block are fairly well balanced.


Above is a photo of the blocks Kathy S., Nicki Lee S. and I embellished. Although our styles are all unique, I think we have managed to embellish blocks that go well together.

Thank you so much for stopping by and for sticking with me through such long posts! 
Renee

Thursday, May 28, 2015

Under the Sea Block Step 7: Ocean Floor Motifs

After adding the turtle and the jelly, this is how Sandra's block looked. Next, I opted to embellish the ocean floor.


Remember my sketch? Here is how I penciled this section in on my plans for the block.


First, I added "seaweed" using a feather stitch and 3 strands of the same variegated DMC floss I used to create the seahorse. 

I began with the top of the center section and worked my way down just beneath the basted seam line at the bottom of the block. 

Next, I added the section to the left, followed by the section on the right. The bottom of these sections met the bottom of the center section. NOTE: Because I planned to add beads to the tops of each of the feather stitches, I kept these stitches at least one-fourth-inch away from the basted seam lines.

There was enough space between the center and right sections to work another feather stitch down and connect it to the center section.


Then, I "auditioned" beads by laying one or two on the block. The petite glass beads I love so much barely showed up, so I went with these clear seed beads. (For the record, I worried the whole time that these beads were too big. I finally decided I tend to prefer subtle, small and delicate embellishments and I was stepping out of my comfort zone.) This step took me a while because I wrapped the thread through each bead 3 times and then secured each bead in the back with 3 knots. This way, the beads stay firmly in place and do not flop around easily on the block. And, if one bead comes loose in the future, all of the beads will not fall off because they were individually attached.


After that, I added a snail. The bead used for the body was purchased at Let it Bead in Portland, Oregon. Because this bead is rather thick, I placed it roughly an inch from the basted seam line. 

After securing the bead to the block, I brought a 6-strand segment of DMC 310 black floss up just behind the bottom of the snail's shell and then brought it down through the fabric where I wanted the place the snail's head. 

Using a second needle and a single strand of DMC 310 black floss, I couched this segment into place as the snail's body. Then, I secured the 6-strand segment behind the block. With the single strand of floss, I added two pistil stitches to make the small antenna to the head.


Coral, created with a few strands of variegated purple floss and French knots, came next. Now, I could pencil this in on the back (or front) of the block, but I usually just wing it when I add the coral. 


I began at the seam line and worked my way up with a tightly packed line of French knots. Then, I added small connecting lines of French knots, as seen here.


I continued adding lines and branches to create a shape that looked coral-like to me.


I just kept going until I felt it looked full.


When it reached the point pictured above, I felt this coral was complete.


As you can see, the sandy ocean floor still looked a bit bare. I needed to add more. I contemplated adding another feather stitched area to the right of the purple coral, but I need to complete the section just above it first.


I added a section section of coral here using the same method and using the same variegated floss used to create the fish embellishing a seam above.


Sea stars are great additions to fill in space. This one was created using 2 strands of floss (each strand was a different color to blend light and dark colors into the sea star.) I made 5 bullion knots that met in the center.


Whipped wheels also make great sea stars. Again, I used strands of 2 different shades to add lighter and darker aspects to the sea star.


This completed the plans I had sketched out for this section.


In fact, this completed the elements I had planned and sketched for this block. (Aside from the small beads I needed to add to the seam just above the sandy section.)


However, there were still several areas that could use a bit more embellishment. My next post in this series will share how I chose to fill in the block.

This post is part of a series explaining how I embellished Sandra T.'s block in the CQI UTS Round Robin we are in together. Links to previous posts in this series are below.
Step 1: Planning the Seams
Step 2: Planning Motifs
Step 3: Embellishing the Seams

Thank you for stopping by!
Renee

Tuesday, May 26, 2015

Under the Sea Block Steps 5 & 6: Turtle and a Jelly


Step 5: Turtle Motif

After creating the seahorse on Sandra's block for the Crazy Quilting International Under the Sea Round Robin (CQI UTS RR) I am participating in, I found a little turtle charm in my stash.

I felt this would be a perfect addition for a couple of reasons. 

First of all, if you remember my sketch, I had not added a motif to the center orange section of the block, as I was not sure how much space would remain after embellishing the seams to the right and left.

This turtle fit in that space perfectly!

Second, the block Kathy S. embellished for Sandra included two turtle charms. (They are along the sandy bottom seam. You may click any photo for a larger view.) So, adding a turtle charm to the block I embellished created a little more cohesion between these two blocks.

The turtle charm came with an additional metal ring attached to the small circle seen in the photo at the top of this post. I pried that ring open and removed it. Then, I tucked the remaining circle under floss from the feather stitched seam and sewed it in place using clear nylon quilting thread. After securely stitching the loop into place, I tacked down each of the four legs where they attach to the body. The clear thread made these stitches virtually invisible.

Step 6: A Jelly Motif

A dear family friend of mine spent years volunteering at the aquarium in Newport, Oregon. She has told me that starfish are not actually fish, so they are now called sea stars. Likewise, jellyfish are not fish, and they are now called jellies. I keep trying to remember!

I do not remember where I bought these clear, glittery, plastic buttons. However, they came in a package with three sizes. 

When I sketched out ideas for this block, I planned to use one of the smallest buttons to add a jelly to the left of the feather-stitched seam, near the top. (As seen in the photo of the sketch shared earlier in this post.) However, my feather stitches extended far enough to the left that I felt the jelly would look too crowded in that section. So, I opted to only use the medium sized button in the top purple section.

I placed the button on the block, being sure to leave plenty of room for the long tentacles, and stitched it to the block using clear nylon quilting thread. Next, I threaded two needles with a single strand of DMC metallic white floss. I created one tentacle at a time, beginning with a longer one, I used one threaded needle to create a straight stitch. Using the second threaded needle, I couched the straight stitch down, but I brought the needle up to the right or left of that original stitch to make a curvy tentacle. I created four longer tentacles and then added three shorter ones in between them.


After adding the turtle and the jelly, this is how the block looked.

This post is part of a series explaining how I embellished Sandra T.'s block in the CQI UTS Round Robin we are in together. Links to previous posts in this series are below.
Step 1: Planning the Seams
Step 2: Planning Motifs
Step 3: Embellishing the Seams

Thank you for stopping by!
Renee


Saturday, May 23, 2015

Under the Sea Block Step 4: Seahorse Motif

Before I explain how I created this little seahorse, I have to admit I still consider myself  a novice in SO many ways.

So... I have a disclaimer. I do not know if the method I use is a recommended way to add a satin stitched motif to a block.

I have seen tutorials that recommend stitching the motif onto a piece of muslin or onto felt (as felt does not fray), and then carefully cutting the motif out and attaching it to the block as an applique. (Gerry at Older Rose has a great Birds on Felt Tutorial that uses this method.)  

Every time I make one of these seahorses, I decide to try the applique method next time. And then I forget. Until I begin the next seahorse and see all of the tiny needle holes so close together (particularly in the tight little area inside of the neck), and begin to feel a bit panicked that I am ruining the fabric. Then, I remember I planned to try it as an applique next time. Of course, once it is done, it appears perfectly fine.

I tried searching for more information and advice on-line. All I found were multiple warnings that the satin stitch should be used to fill small motifs (about an inch in width or less) and reminders that the use of a hoop is important to keep the fabric taut enough to avoid puckering. 

If you make satin-stitched or short-and-long-stitched motifs, I would love to know how you make yours! (I will not be offended if you say I am doing it wrong.)

Correct or not, this is how I made my seahorse. (You may click on any picture for a larger image.)

1. Sketch the pattern.

I scanned my sketch and saved it as a PDF file, which allows me to print it at the original size, or change the percentage to print a larger or smaller image. Here is a link to the PDF for my Seahorse 2 sketch. (You should be able to follow this link to the PDF file, and then download and print it.)

2. Transfer the pattern.

Some people like to mark the front of their fabric. That makes me nervous, so I reverse the image, hold it up to a window or to a light box and trace the design on the muslin backing using light pencil marks. 

3. Stitch around the outline.

I made my first seahorse with a short and long stitch, so I used a single strand of floss and split stitch for the outline, as recommended in my book by Trish Burr. Out of habit, I used the split stitch again. I worked from the front of the fabric, but made sure my stitches followed the penciled pattern on the muslin back of the block. Around the inside section of the eye, along the inside of the belly, and along the back fin, you will see I have two rows of split-stitches so my satin stitches will have borders for each section.

4. Satin stitch the seahorse one section at a time.

I do not think it matters where you begin. Use a single strand of floss and the satin stitch to fill one area. I began with DMC 4200 on the belly. Each stitch began on the outside of the belly and ended between the two sets of split-stitches separating the belly and the body. 

Next, I used DMC 3706 to fill in the eye area.

The body was next, using a strand of DMC 4200 again. These stitches used the second rows of split stitches around the eye and the belly, and the first row along the fin.

Still using a strand of DMC 4200, I stitched the fin last.

5. Add a black bead for to the eye.

Using a single strand of DMC 310 (black) floss, I stitched a black seed bead to the center of the eye area. (I like my beads to hold firmly in place, so I passed the floss through the bead three times and then knotted the thread three times in the back.


That is it! This little guy took me somewhere between 4 and 5 hours to complete. I am still working on improving the tail on this pattern, but I am still happy with it. I do hope Sandra likes it!

After I made my first seahorse (which feels like ages ago), a friend asked if I could trace my sketch with a Sharpie and share it as a PDF. I was not sure how. At long last, here is a PDF file of my Seahorse 1 Sketch. Pictures of this pattern outlined and completed using a short and long stitch are below.


For this seahorse, the eye was satin stitched with a single strand of black floss.

If you like under the sea motifs, you might like to know that the Summer 2015 edition of the Crazy Quilt Quarterly magazine has a couple of amazing seahorse tutorials and an incredible octopus tutorial. (I am not affiliated with the magazine.)

This post is part of a series explaining how I embellished Sandra T.'s block in the CQI UTS Round Robin we are in together. Links to previous posts in this series are below.
Step 1: Planning the Seams
Step 2: Planning Motifs
Step 3: Embellishing the Seams

If you make an under the sea themed block using a tutorial in the magazine or using one of my seahorse sketches, I would love to see your work! 

Thank you for stopping by!
Renee


Monday, May 18, 2015

Under the Sea Block Step 3: Embellishing the Seams

I am currently participating in a Crazy Quilting International Under the Sea Round Robin (CQI UTS RR) and working on a block for Sandra T. This is the 3rd in a series of posts explaining my work on this block, step-by-step from start to finish. Links to the previous steps are at the end of this post.

It is photo heavy post. 

You may click on any picture for a larger image. And, I apologize. I tend to be verbose!

1. Trace Seams or Motifs if Needed

Before I make that first stitch, I think about any seams or motifs that need to be marked on the block to stitch them well. On this block there were two items.

A. The swirly seam. Using my sketch (and thinking hard to reverse the swirls) I lightly penciled the seam in free-hand on the back of the block.

B. The seahorse. I taped a sheet of paper with my seahorse drawn in black sharpie to a bright window. (Make sure the window is clean if it has had flowers growing near it. On a previous block, I failed to notice pollen on the window until I saw yellow smears on the fabric. It came out, but it was stressful!) Then I positioned the block over the paper so the seahorse outline showed through the block where I wanted it and at an angle I liked. As you can see in the photo below, I took care to leave plenty of room for seam treatments so they would not interfere with the seahorse.


There are several ways to transfer images onto a block. This is my preferred method. If the fabric had been too dark to see the drawing, I could have cut out the seahorse and traced it that way.

Note: I will share my seahorse pattern (if I can figure out how to add a document to a post) in a later post in this series. There are also a couple of great seahorse tutorials in the Summer 2015 edition of the Crazy Quilt Quarterly I hope to try out soon!

2. Select the First Seam

For this block, I looked at my sketch. The buttonhole seam will have the feather-stitched seam, the fly-stitched seam and the French knot coral motif overlapping it; so, I chose to embellish this seam first.


The seam was created using 3 strands of DMC 4050 variegated green floss and a buttonhole stitch, varying the height and angle of each stitch. I chose this floss because it pulls colors from 3 patches of fabric on this block and because it shows up along the seam without being too dominate. 

If you enlarge the picture, you will see I began and ended the seam slightly outside of the seam lines. This will ensure the full seam is embellished when the blocks are assembled. However, the seams are not far enough out to risk the threads being cut when the block is trimmed down. 

The tops of the buttonholes are at least one-fourth-inch away from the seam lines because small beads will top each stitch. I will wait until the two seams and the motif that will overlap this seam are completed to add the beads so they do not hinder the stitching.

2. Select the Second Seam

Next, I chose to complete the fly-stitched swirly seam. Completing this seam would eliminate the risk of my feather-stitched seam accidentally overlapping my sketch for this embellishment.


This seam was created with a fly stitch using a single strand of DMC gold metallic floss. 

I began the first stitch slightly above the top of the center curl. The tops of each "v" are slightly to the left and right of sketched line. The straight stitches follow the traced line on the back. 

After the initial stitch, the "v" stitches began about halfway between the top and bottom of the straight stitch. This placement is easiest to determined from the front. 

Bring the needle up at the bottom of the straight stitch from the previous fly stitch, catch the floss, and check the sketch on the back to see where to end the straight stitch. (I hope that makes sense...)


Confession: I wanted this seam to be bold and shiny like the feather stitched section Kathy S. created for Sandra.

Kathy's work on Sandra's block.
So, I began using 4 strands of metallic floss, but could not get the strands to stay even for 2 stitches. I cut back to 3 strands. Even with a larger needle, the metallic floss frayed within 3 stitches. (The seams have more layers of fabric for the floss to pull through. I assumed that was part of the problem.) I tried 2 strands. Same problem. So... I went with 1 strand and made a very subtle embellishment. My hat is off to Kathy for creating such a lovely motif with metallic floss!

3. Select the Third Seam

The seam consisting of chain stitches and beads was next because I needed to know I would not accidentally place any fish or feather stitches in the way.


First, I created a chain-stitch using 3 strands of Waterlilies by Caron silk floss. The color is #207 Bermuda Reef. The trick here was to make the stitches large enough to add the beads later and not to pull them too tight, or leave them too loose. 


Next, I added Mill Hill Petite Glass Beads #42010 at the larger end of each loop. (These may be found at most cross-stitch stores. I have also purchased mine at Amazon.) Note: I did not add a bead to the loop ending at the seam.

Select the Fourth Seam

I want the fish embellishing the upper-right seam to journey all the way across the block. So, I chose to complete the feather-stitched seam next. That way, I will know where to place the fish.


This seam was created with 4 strands of DMC 4060 variegated floss. I began the feather stitch at the top of the block, and worked my way down. Additional columns were added that met up along the way. 

Select the Fifth Seam

Fish will decorate the final seam on this block.  A couple of people have asked how to create these fish and I am happy to say they are super easy.  I like to make them with variegated floss, so they are not all the same. 

I used 2 strands of DMC 4120 variegated floss because it has several hues of orange and the block needs those to balance the colors.


First, I made a detached chain stitch. This one is almost pulled too tight. If pulled tight, the stitch closes and creates more of a line than a loop, something you want to avoid. (To make a larger fish, I could have added a second detached chain stitch around the outside of this one.)


Next, I added a small straight stitch to the open end of the detached chain stitch.


A second straight stitch created a fish!


I could have ended there, but I opted to add a straight stitch in the center of the loop to fill in the center. 


I began at the edge of the purple, above the orange, because I wanted the fish to miss the orange fabric (where they would not show up well.) I was also very careful about watching the back of the fabric to make sure my seam would not interfere with the seahorse I plan to add later.

As my husband pointed out, a "conga line of fish" is not exactly realistic. But, I think it is a fun way to dress up a UTS seam.

Sorry for the super long post! My next post in this series will cover an individual motif.

Previous Steps in this Series:

Under the Sea Block Step 1: Planning the Seams
Under the Sea Block Step 2: Planning Motifs


Today, I am linking up with the Monday Stitchery Link Party #6 at Super Mom - No Cape. I encourage you to check it out. Today's free pattern has butterflies! If you have a blog and share photos of your hand stitching, I encourage you to join in the fun. 

Thanks so much for stopping by!
Renee