
Showing posts with label Crazy Quilt Templates. Show all posts

Tuesday, March 23, 2021

TAST 2021: Chain, Fly and Detached Chain Stitch


TAST is Take a Stitch Tuesday. It is a challenge offered by Sharon Boggon at Pintangle.com to learn a new stitch each week. There is no pressure and you can go at your own pace.


Week 1: Chain Stitch
I used Sharon Boggon's Stitching Templates to create this crazy quilt motif and used the chain stitch to create flower stems.

Flowers were created with sets of 5 detached chain stitches.

Week 2: Fly Stitch
Leaves were created with fly stitches.
Pink rhinestone beads were added to complete these flowers.

I also used the fly stitch to embellish a crazy quilt seam. Each fly stitch created a flower stem with leaves and pink glass seed beads created tiny flower buds.

Thank you for stopping by. I am wishing you all a fantastic week!

-Renee

Tuesday, October 16, 2018

TAST Week 14


Week 14: Buttonhole Wheel
During Week 14 of TAST, the Buttonhole Wheel was shared as Stitch 13 in this post at Pintangle.com. (There has been one break week.)

I used one of Sharon B.'s Stitcher's Templates and marked the foundation side of my crazy quilt block to help keep my buttonhole wheels evenly spaced.

My stitches were worked with a single strand of DMC #605 size 8 perle cotton. As you can see, I still need practice keeping these stitches even...

Black seed beads completed the seam.

TAST stands for Take a Stitch Tuesday. It is a personal challenge offered by Sharon B. at Pintangle.com to learn or work a new stitch each week.

Please note: I am not affiliated with Sharon B.'s templates. I did receive a set for an honest review, and I truly love working with them. My full review of the templates was published in the Summer 2016 Crazy Quilt Quarterly Magazine. (I am not affiliated with the magazine either.)


Sunday, September 16, 2018

CQJP 2018 March Block


If you follow me on Instagram or if you follow the Crazy Quilt Journal Project 2018 blog, then you have probably seen this block.

My theme for this year's Crazy Quilt Journal Project (CQJP) is my favorite things. I love the beach and had so much fun creating this block.

First, I colored white fabric with Crayola crayons and set the color. (The process I use was explained in this post.)

Then, I cut the fabric between the sky and water sections and between the water and sand sections. I sewed each section together. 

Next, I traced a heart on the paper side of ThermOWeb HeatnBond Lite and adhered it to the fabric. I cut the heart out leaving 1/4-inch extra. I clipped the curves of the extra fabric and carefully ironed them toward the back of the heart. Then I fused the heart to the black background fabric and used a slip stitch to tack the edges down.

The sandy beach section was a bit smaller than the sketch I drew to plan out the block, but I think it all worked out okay.

Figuring out how to create the foamy waves on the beach was tricky. In the end, I decided to use French knots using 2 strands of floss. First, I used DMC 4020.

Then, I added white French knots.

A bullion stitched starfish was added next, using 2 strands of DMC 4120 variegated floss.

Feeling the ocean needed something more, a few straight stitches were added with size 5 DMC 4140 perle cotton to create a boat.

A straight stitch with size 5 DMC white perle cotton, and 2 straight stitches and a few satin stitches with size 12 DMC white perle cotton completed the sailboat.

Stem stitches with 2 strands of DMC 4020 floss created ripples of waves on the calm ocean.

A single strand of black DMC floss created this island and palm tree. The island was outlined with a split-stitch and then filled with a satin stitch. Stem stitches created the palm tree. (This island was inspired by the one Sandra Todd added to one of my blocks in an Under-the-Sea Round Robin in 2015. You may see it here.)

For the sun, I lightly traced a half circle around a spool of thread with a pencil.

Using a single strand of DMC 4077 floss, I followed the outline for the sun with a split-stitch.

The sun was then filled in using a single strand of the same floss and a satin stitch.

The seagulls were created with 2 strands of DMC 648. Using a needle, I punched holes through the birds in the sketch I had drawn (pictured above). I positioned the sketch over the heart on this block and made light pencil marks on the sky fabric through the holes in the paper. Those tiny marks were the guides used to make the birds.


Using 2 strands of DMC 4160, the heart was outlined with buttonhole stitches. To keep these stitches even, I used one of the templates I received from Sharon B. 

(I received the templates in return for an honest review and I love using mine! The full product review may be found in the Summer 2016 Crazy Quilt Quarterly Magazine, available at Magcloud.com. I am not affiliated with the templates or the magazine.)

The Crazy Quilt Journal Project (CQJP) is a challenge to create one crazy quilt block each month. The goal is to complete a 12-block crazy quilt by the end of the year. It is a personal challenge. You may learn more about it here. Sign ups usually open in November, if you think you might be interested in participating in 2019.

My block looks more like it is for an art quilt than a crazy quilt, but when the blocks are all assembled, I plan to add a crazy quilted border.

My April and May blocks have both been pieced, so there is hope I might finish CQJP 2018 before 2019 arrives. We shall see...

I hope you all have an amazing week. Thank you for visiting!
Renee


Related Posts:
Embellished CQJP 2018 February block - here
Embellished CQJP 2018 January block - here

My CQJP 2018 progress may be followed on this Pinterest board.

Tuesday, July 3, 2018

TAST Week 12


Week 12: Chevron Stitch
Week 11 was a break week, so the 11th stitch of this round of TAST is the Chevron Stitch. It was introduced on March 20th in this post and the directions for this stitch may be found here.


I followed this edge on one of Sharon B.'s templates to keep my stitches relatively even.*


I used size 8 pink perle cotton for the Chevron Stitches. I used this stitch to couch down a black velvet ribbon on the messenger bag I am working on. After the seam was stitched, I created flowers along the ribbon with clusters of pink and blue seed beads. (I like to individually secure each bead by passing the thread through it 3 times and then knotting the thread 3 times on the back. This holds each bead securely in place, and if one bead falls off in the use of the bag, the others will not all fall off.)


TAST stands for Take a Stitch Tuesday. This is a personal stitching challenge offered by Sharon B. of Pintangle.com. You may learn more about TAST here.

This week, stitch 25 was announced, so I will be playing catch up!

* I am not affiliated with Pintangle or with Sharon B.'s crazy quilt templates. However, I did receive my templates free of charge, in exchange for an honest review. I truly love using mine!


Tuesday, February 20, 2018

TAST Weeks 7-8


Week 7: Feather Stitch

The feather stitch was added to my messenger bag with a green strand of size 8 perle cotton.

To dress it up, size 8 variegated pink perle cotton fly stitches were topped with French knots, creating flowers.

Next, detached chain stitches were added with the same shade of green to make leaves. 


Week 8: Stem Stitch

This heart was embroidered using the stem stitch.

First, I outlined the shape from one of Sharon B.'s crazy quilt templates. (These were given to me for an honest review and I just love using them.)

Thank you for visiting!
Renee
TAST stands for Take a Stitch Tuesday. It is a personal challenge hosted by Sharon B. of Pintangle to learn a new embroidery stitch each week. You may learn more about it here and find the Facebook TAST group here.


Wednesday, January 3, 2018

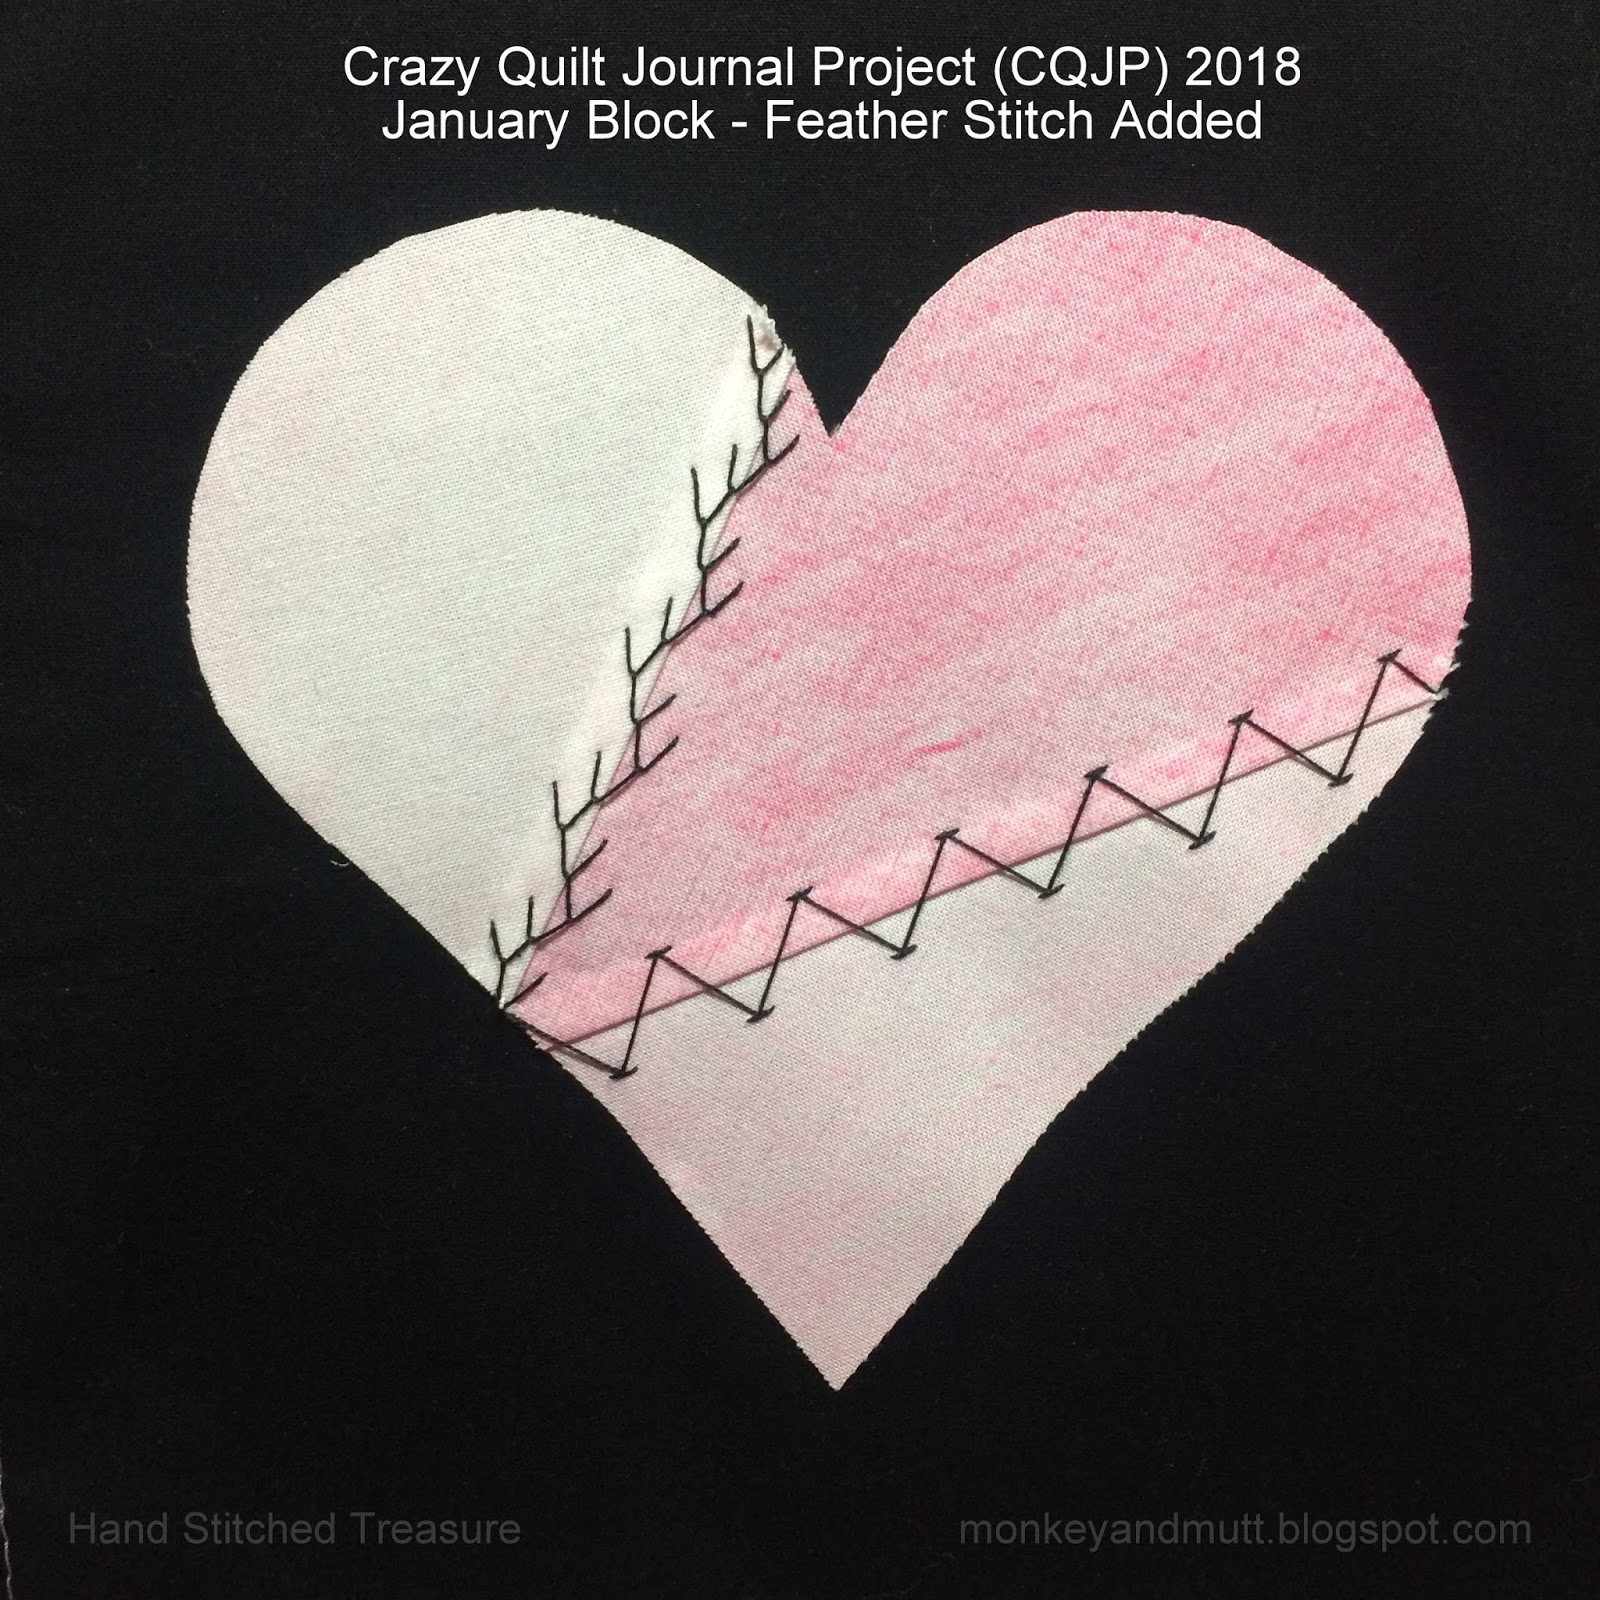
January CQJP 2018 - 2 Basic Seams


CQJP 2018 January Block Seam 1
The first seam was embellished with black size 8 perle cotton and a Chevron Stitch.
This seam will be built up with more embellishment later.


To keep my stitches even, I placed one of Sharon B.'s Crazy Quilting Templates (from Set 1) along the seamline and used a pencil to lightly mark the upper-most and lowest points.


CQJP 2018 January Block Seam 2
Using the same perle cotton, the second seam was embellished with a feather stitch. More embellishement will be added to this seam after I cover the applique edges of the heart with stitching.

Thank you for visiting!
Renee


Notes:
CQJP 2018 = Crazy Quilt Journal Project 2018. It is a challenge to embellish one crazy quilt block a month. Find the CQJP blog here.

Disclaimer: 
I recieved my CQ Stencils from Sharon B. in return for an honest review. I really enjoy using these stencils and look forward to creating more with them this year!


Sunday, October 22, 2017

CQJP 2017 March Block Motif 5


This is the 5th motif added to my Crazy Quilt Journal Project (CQJP) 2017 March block. I had a bit of fun playing with Sharon B.'s Stitchers Templates making this one. 

Click on any image for a larger view.


First, I traced a few of the wavy vine lines from the templates onto the back (muslin foundation) of my block with a pencil.

The vines were created with whipped chain stitches.


A chain stitch was added following the lines of one of the vines with size 8 DMC #954 perle cotton. Size 8 DMC #125 perle cotton whipped around the chain stitches.


After giving some thought to the way I wanted the vines to wrap around one another, I continued adding chain stitches to the other vines. 

In this photo of the back, you may see that I wanted the vine sketched on the left to cross over in front of the middle vine on the lower junction. So, I embroidered the middle vine first. On the upper junction, I wanted the middle vine to be in front, so I stopped just below where those lines met and embroidered the vine to the left before continuing the middle vine. 


I did not whip these two vines until both had been embroidered with chain stitches. 


You may also note that I did not follow the entire shape from this vine. I wanted leave enough room to add the flowers.


After whipping the chain stitches, I added a pearl bead to the top of each stem, and then added rice beads for each of the "spokes" I had traced on the back. For these flower petals, I added the middle "spoke" first and then added two beads to each side, to be sure they all fit together well.

Small straight stitches were added to the vines with the variegated green thread to add a bit more detail.

This was such a fun motif to create!

Thank you for stopping by!
Renee


Notes: 

I am not affiliated with Sharon B.'s templates. However, I did receive them in exchange for an honest review and have so much fun playing with them!


CQJP stands for Crazy Quilt Journal Project. You may find the CQJP 2017 blog here.


Related Blog Posts:

CQJP 2017 March Block Seams 1 & 2 and Motif 1 - here
CQJP 2017 March Block Seam 3 and Motifs 2, 3 & 4 - here
CQJP 2017 February Block Tote - here
CQJP 2017 January Block - here

On this Pinterest board, I am saving each step of my CQJP 2017 progress. 

Wednesday, June 14, 2017

A Floral Seam & A New Book

Last night, I had a lot of fun playing with one of Sharon B.'s Crazy Quilt Templates. (This template is from Set 1. I am not affiliated with the templates, but did receive them in return for an honest review and I truly love them!)


First, I traced the wavy line along the seam on the foundation side of my fabric using light pencil marks. (I held it up to the light to be sure it was sitting where I wanted it.)

Then, I used a stem stitch and a strand of DMC white metallic thread to embellish the seam.


After that, I stem stitched curved stems shooting off of the top of each "hill" on the wavy seam. 

Detached chain stitches created leaves along the vine and flower stems.

Note: I use shorter strands of metallic threads than cotton. These threads fray easily, particularly if they are going through several layers of fabric (as found along seams). Using shorter strands decreases the likelihood the thread will fray, knot, and/or break while stitching.


Using red DMC metallic thread, I added sets of 3 detached chain stitches for petals at the tip of each stem and topped each of these flowers with a Mill Hill Petite Glass Seed Bead #42010.

Today, I am excited to say, I finished this block. I hope to get better photographs of it to share tomorrow.

(I have shared more progress photos on Instagram. And you may find links to other posts related to this project here.)


Even more exciting! Today I received my copy of Sharon Boggon's new book: The Visual Guide to Crazy Quilting Design: Simple Stitches, Stunning Results. (Please note, although I am not affiliated with the book, if you go to Amazon through my blog and make a purchase, I do earn a small credit. The cover price on the book is $29.95. At the time of this post, it is only $19.33 on Amazon here in the US and for Amazon Prime members, shipping is free. This book may be found here on Amazon.)

I have not read much of the book yet, but I have looked through all of the photographs. Just seeing all of the luscious colors and textures is inspiring me to work on more crazy quilting. So far, I would recommend the book just for the eye candy.

(Confession: I grinned seeing the template I used for the floral seam shared above on page 70 of Sharon's book.)

When I ordered the book (on the 12th), I was delighted to see it was the #1 New Release in Needlework. At the moment I am typing this post, it is listed on Amazon as the #1 Best Seller in Embroidery. Sharon, if you happen to read this post, congratulations!!! I am so excited for you.

Thank you all for stopping by!
Renee