Showing posts with label Christmas Stocking. Show all posts

Friday, December 22, 2017

Polymer Clay Snowman Motif


The polymer clay snowman I made is now attached to my son's 
crazy quilt Christmas stocking!


After sewing him on, I added a few simple snowflakes 
with size 8 white perle cotton.

He looks so cheerful!

I added a few more snowflakes around the cross-stitched snowman at the top and that completed the embellishing for this stocking!

Note: for the cross-stitch, I reversed the "Magical Ride" pattern in the Stoney Creek Collection: Cool Friends Book 211, so the snowman would fit on the striped fabric.


Thank you for visiting!
Renee

This is Day 22 of the 31 Day Blog Writing Challenge hosted by www.muppin.com.
You may find more details and other participating blogs here.

Thursday, December 21, 2017

A Snowy Night


A snowy scene with a Christmas Star was added 
to the crazy quilt stocking I am making for my son.

Click any photo for a larger view.


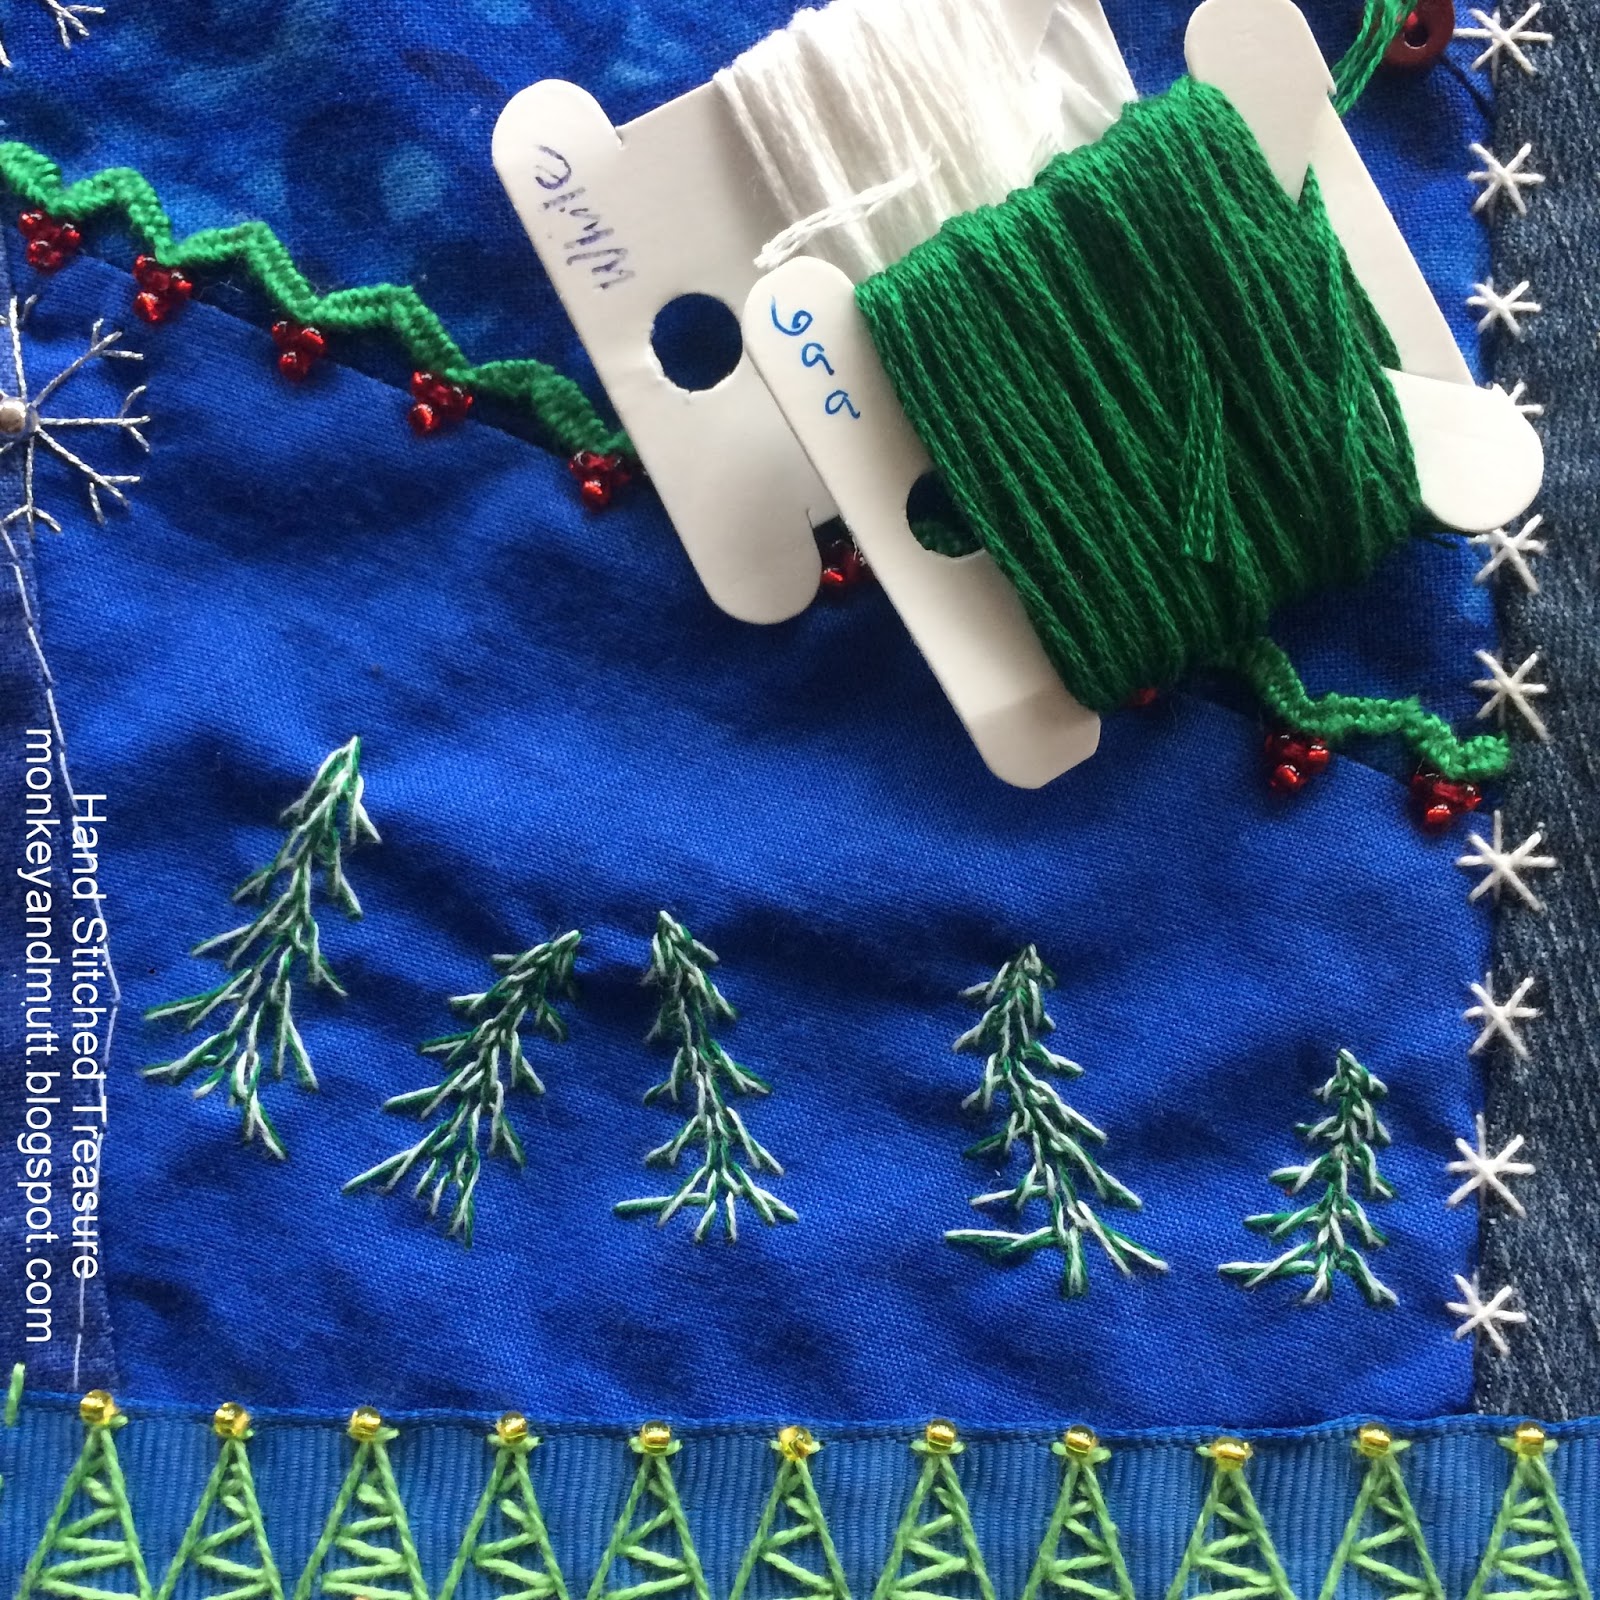
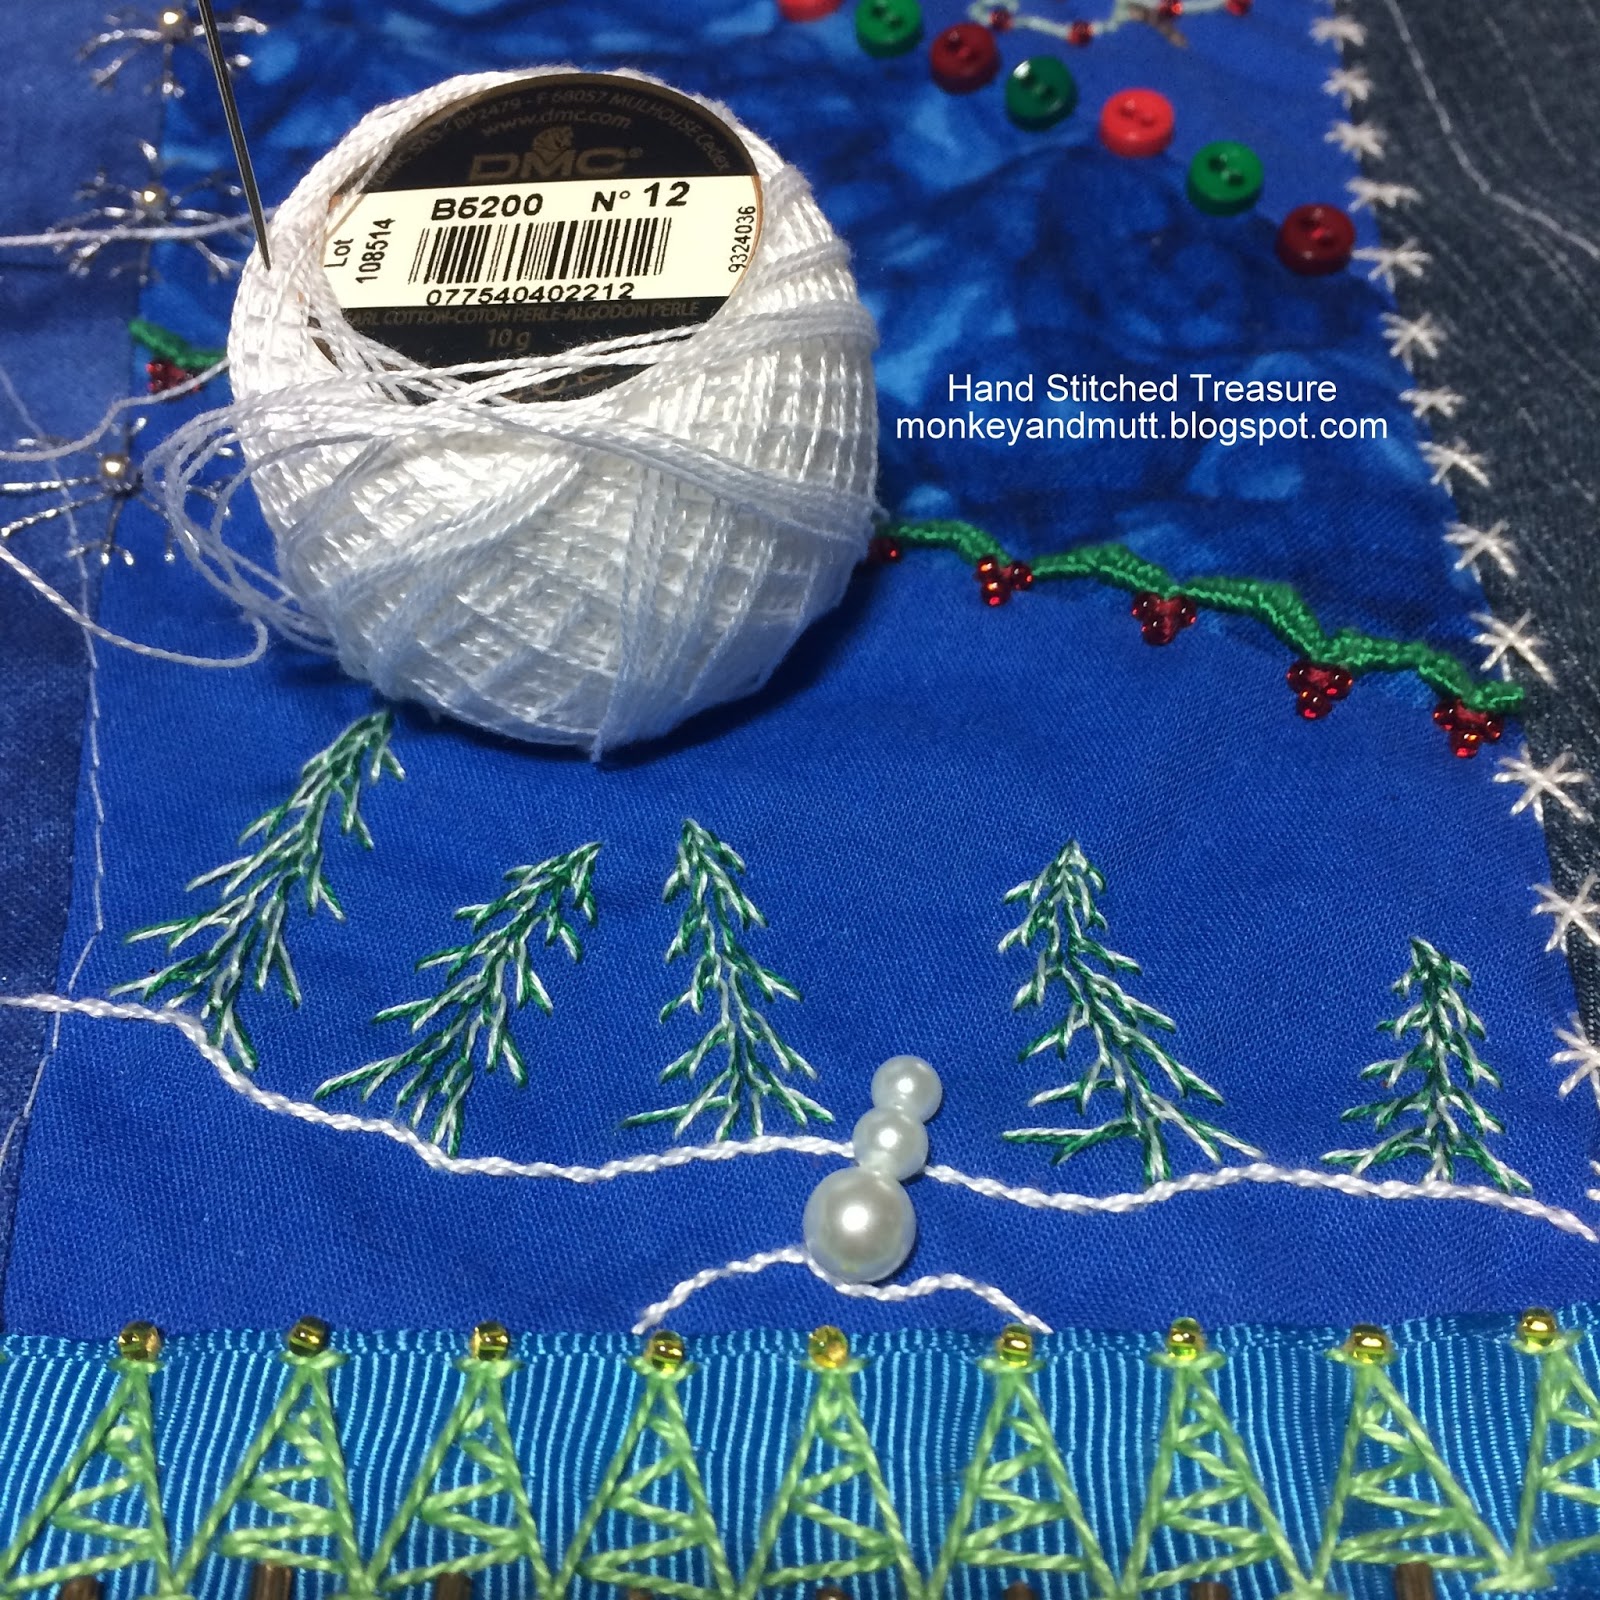
First, I used a strand of white and a strand of green thread to create snowy crossed buttonhole stitches trees. 

The trees were inspired by the work of Annelise, a member of the TAST Facebook Group. You may see the trees she made on her blog, here. My first attempt is here.


Next, using size 12 DMC B5200 perle cotton, I stem stitched a blanket of snow beneath the trees.


A large pearl bead and 2 smaller pearl beads created a snowman.

It was a little tall in comparison to the trees, so I placed it in the foreground to put it in better perspective.


More stem stitches were added beneath the snowman to make a little snowy hill.


A star bead went on next. Metallic sewing thread straight stitches were placed around the star.


Size 12 DMC B5200 was used to add French knot snowflakes.


I asked my husband's opinion and he agreed the snowy ground should be filled in.

Size 5 DMC B5200 perle cotton French knots were added to fill in the snowy hill for the snowman.


Size 8 Anchor white perle cotton was used to fill in the background blanket of snow with more stem stitches.

This completed the little scene.

Thank you so much for visiting!
-Renee


TAST stands for Take a Stitch Tuesday. It is a personal challenge hosted by Sharon B. of Pintangle to learn a new stitch each week. You may learn more about it here. A new session of TAST will begin in January 2018. It is a great way to learn new embroidery stitches and you may go at your own pace - no pressure!

This is Day 21 of the 31 Day Blog Writing Challenge hosted by www.muppin.com. Find more details and other participating blogs here.

Note: Edited 12/22/17 to add a link to see the inspiring trees Anneliese created.

Tuesday, December 19, 2017

A Poinsettia

The poinsettia added to my son's crazy quilted Christmas stocking is not perfect, but for a first attempt, I am not complaining!


While using the open base needlewoven picot stitch to make a sea star in 2015, I thought about how well it could work for a poinsettia on a Christmas crazy quilt.

In January of this year, I saw some of the beautiful flowers Michelle of MooshieStitch created using this stitch and knew I would add one to this stocking. Following the layout in this tutorial that Michelle shared at Feeling Stitchy, I created this poinsettia.

Size 8 red and green perle cotton was used to create the petals and the leaves. Gold Mill Hill petite seed beads were used to fill the center and to embellish the background of this motif area.

Thank you so much for stopping by!
Renee

This is Day 19 of the 31 Day Blog Writing Challenge hosted by www.muppin.com. You may read more about it and find other participating blogs here.


Sunday, December 17, 2017

Buttons and a Wreath


The final seam on the crazy quilt stocking I am making for my son is another quite simple one. 

Red and green buttons were sewn on.

For a motif, I disassembled an earring.

Using clear polyester quilting thread, I attached the wreath to the stocking.

There are three more motifs I need to add to the stocking to complete the embellishments.

It should be finished before Christmas Eve.

I am wishing you all a wonderful week! Thank you for visiting.
-Renee


This is Day 17 of the 31 Day Blog Writing Challenge hosted by www.muppin.com.

You may find more details and other participating blogs here.


Thursday, December 14, 2017

Tree Seam

Three fly stitches and a straight stitch was all it took to make each tree for this seam. 

I placed a red French knot between each tree.


Slowly, but surely, this crazy quilt stocking is filling up. 

I have one seam and three motifs left to complete. 

Thank you for visiting!
-Renee

This is day 14 of the 31 Day Blog Writing Challenge. You may find more details and other participating blogs here.

Wednesday, December 13, 2017

JOY

I added "JOY" to my son's crazy quilt Christmas stocking. Literally. 

First, I printed the word out the size I wanted it to be.

Next, I poked holes in the letters using a pin.

Then I placed the word reversed on the muslin back of the pieced stocking and used a mechanical pencil to mark through the holes created with the pin. You may see the reversed pencil marks on the muslin in the photo above.

Using the marks on the back as a guide, I chain stitched the word "JOY" on the stocking with size 5 white perle cotton.

Next, I whipped around the chain stitches with size 8 red perle cotton floss. (The directions for a whipped chain stitch may be found here.)

This addition was inspired by the work of Barbara Nicki Lee Seavey. The JOY she added to the block featured on the cover of the Winter 2018 Crazy Quilt Quarterly Magazine is just stunning. (You cannot see that part on the cover photo.)

The 3rd weekend of the month is International Hermit and Stitch Weekend. The event is described here at Random Ramblings. There is now a Facebook Group for the event that may be found here.

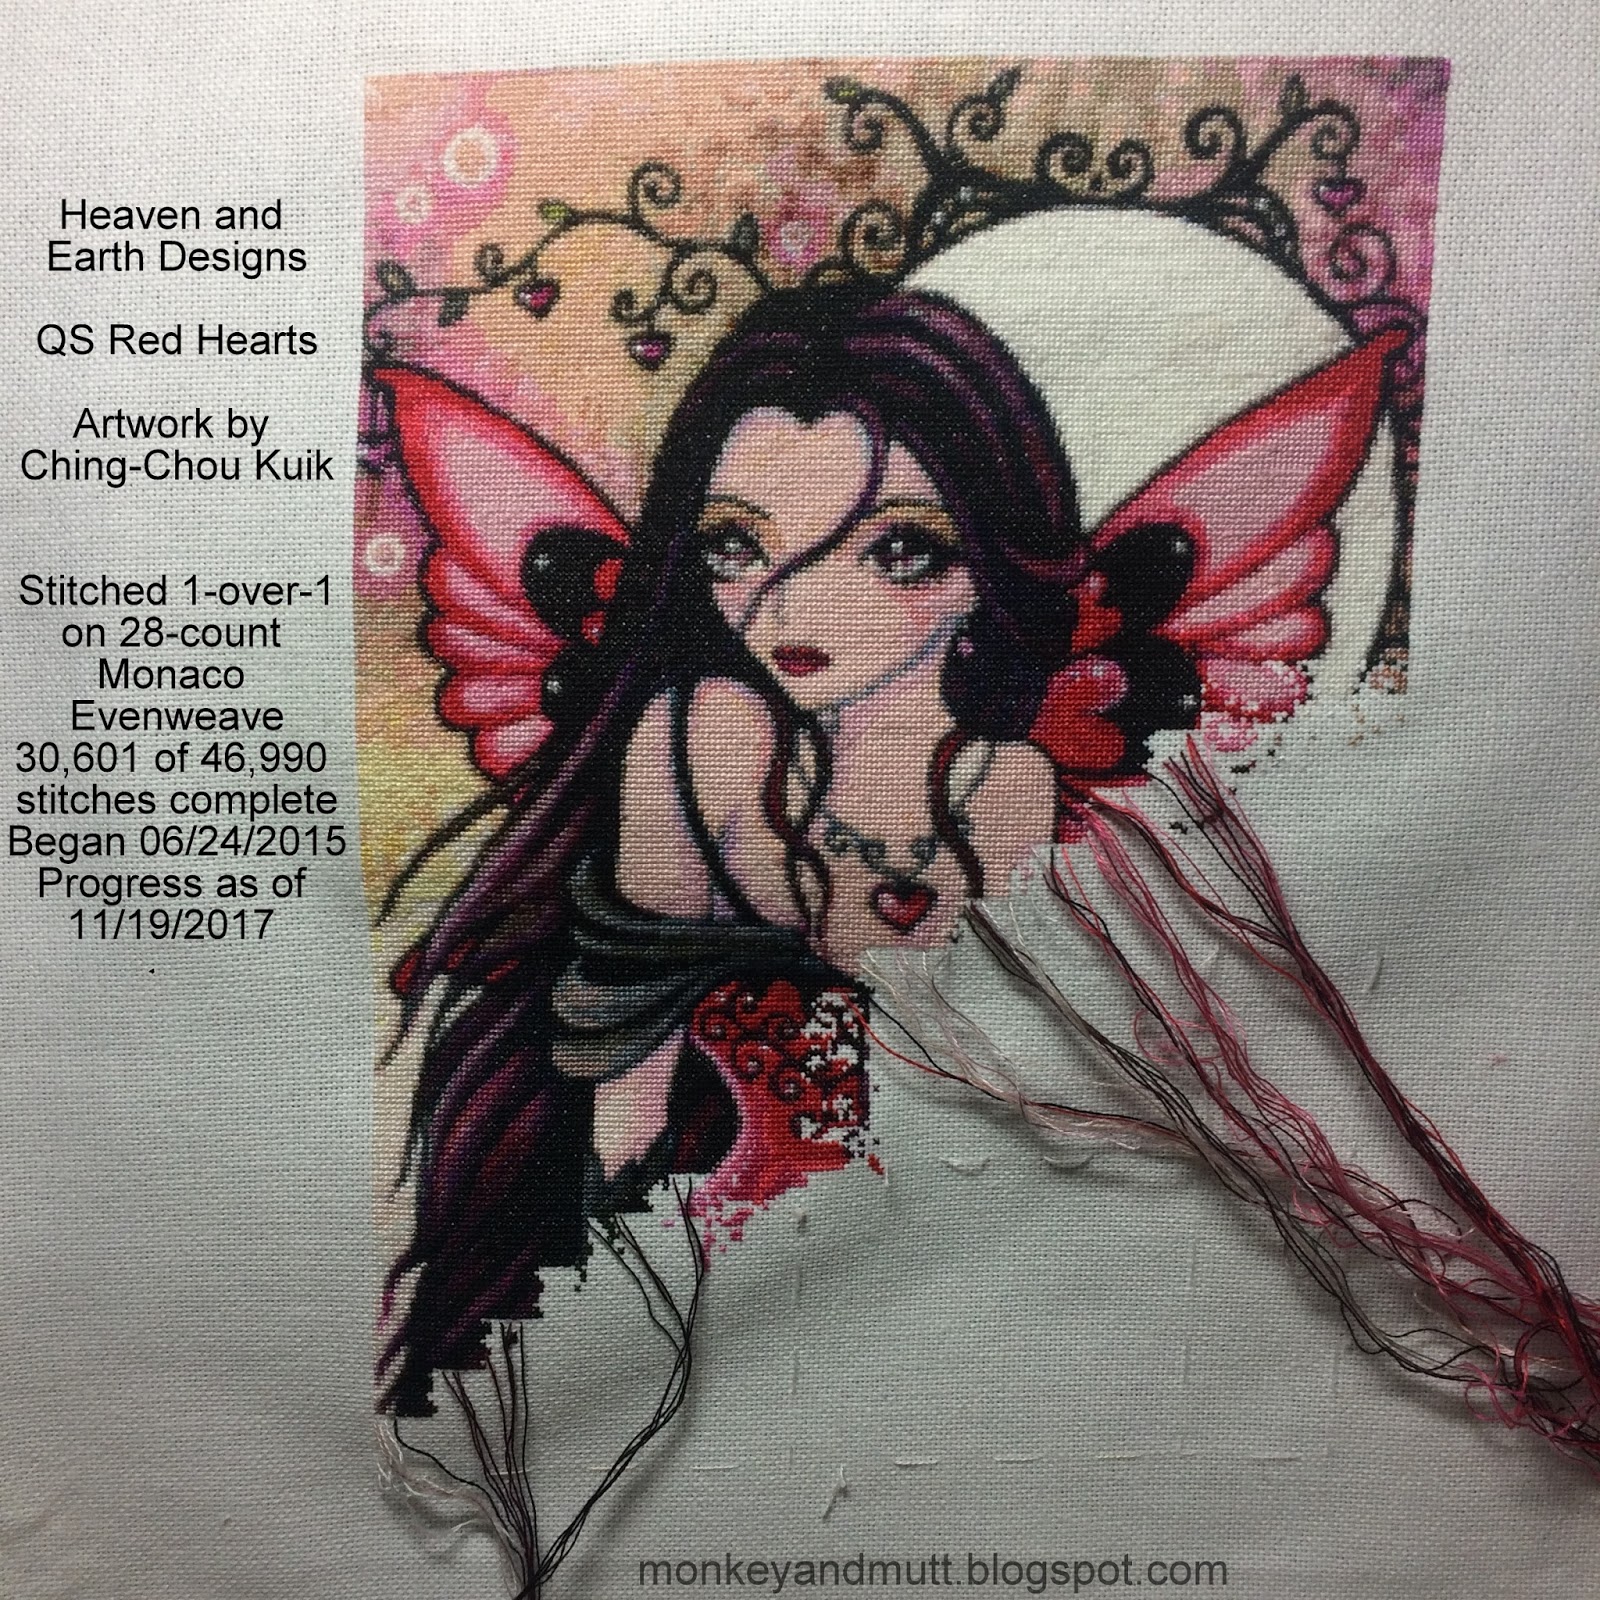
This Friday, Saturday, and Sunday, I will be working on my Heaven and Earth Designs "QS Red Hearts" piece based on the beautiful artwork of Ching-Chou Kuik. This was my ending photo last month, which will also be my beginning point this month. 

Thank you for visiting!
-Renee


This is day 13 of the 31 Day Blog Writing Challenge hosted by www.muppin.com.

You may find more details and other participating blogs here.


Tuesday, December 12, 2017

A Christmas Tree!

A Christmas tree was added to the stocking I am making for my son.

Unfortunately, the lighting makes it difficult to really see the shades of variegated green.

First, I sketched out several Christmas trees. 

After finding one I was happy with, I poked holes in it with a pin.

Next, I lined it up where I wanted it (reversed) on the muslin back of the stocking.

Using a mechanical pencil, I marked dots through the holes made with the pins.

Carefully following these marks and using a stem stitch, I stitched the tree with variegated green perle cotton and the trunk with variegated brown. Red seed beads and a star bead created the ornaments.

Have you been working on anything crafty today? If so, I would love to hear about it.

Thank you for stopping by!
Renee 


This is day 12 of the 31 Day Blog Writing Challenge hosted by www.muppin.com. 

You may find more details and other participating blogs here.

Sunday, December 10, 2017

Polymer Clay Snowman for the Stocking

I am happy to say that cooking my polymer clay snowman charms went well!

This one will not be attached to the stocking until all of the embroidery has been completed.

However, this is how the stocking is looking so far.

I am also happy to say my eldest son likes it. 

Thanks so much for visiting!
-Renee

This is day 10 of the 31 Day Blog Writing Challenge hosted by www.muppin.com. You may find more details and other participating blogs here.

Saturday, December 9, 2017

Another Snow Seam


Another snow seam was added to the crazy quilted stocking I am making for my eldest son. 

Three snowflakes were created using silver metallic floss and straight stitches. 

A silver bead was added to the center of each.

Thank you for stopping by!
Renee


This is day 9 of the 31 Day Blog Writing Challenge hosted by www.muppin.com. You may find more details and other participating blogs here.


Friday, December 8, 2017

Stocking Snow Seam

This snowflake seam was very simple to stitch.

Using straight stitches and size 12 white perle cotton, I stitched a "+" and then made an "x" over that.

There are 3 seams and 7 motif areas left to fill in this week on the stocking I am making for my eldest son.


Thank you so much for stopping by.
-Renee


Today is day 8 of the 31 Day Blog Writing Challenge hosted by www.muppin.com. You may read the details and find other participating blogs here.

Sunday, December 3, 2017

Angel Seam


Happy Sunday!

An angel seam was added to the crazy quilt stocking 
I am making for my son.


Working from left to right, I angled buttonhole stitches to make triangles for the angel bodies.


Pairs of detached chain stitches were added 
at the top of the triangles to create wings.

French knots were placed between the wings for the heads.


This is one of my favorite seams to add to Christmas crazy quilts.
It was inspired by a seam in An Encyclopedia of Crazy Quilt Stitches and Motifs by Linda Causee.

Wishing you a fantastic week!
-Renee

This is day 3 in the 31 Day Blog Writing Challenge 
hosted by Cheryl at www.muppin.com. 
You may find more information and other 
participating blogs here.

Saturday, November 11, 2017

TAST Stitch 75

TAST Stitch 75: Raised Herringbone Band

I am still catching up with some of the TAST stitches that did not easily work into projects I was working on as they were introduced. 

It is a bit difficult to see in this photo, but after piecing this crazy quilt stocking for my son, I realized I forgot to trim the selvage from the solid blue fabric and that it was showing beneath the blue striped fabric. Rather than ripping the seams out, cutting the selvage off, and sewing the fabric back in place, I decided I could easily hide the selvage with a ribbon, trim, or with embroidery. The raised herringbone band came to the rescue!

First, I stitched the foundation with straight stitches using size 8 blue perle cotton.

Next, herringbone stitches were added with a light blue size 8 perle cotton thread. (I used the stripes in the fabric above to measure the distance between my stitches to keep them relatively even.)

Two strands of a variegated blue cotton floss were then laced through the herringbone stitches, as I wanted that to be rather subtle.

When I finished, my husband entered the room and peeked over my shoulder. He said it looked cool. I thanked him and said the blue foundation stitiches were the most time consuming. His response was hilarious.

"Wait, that dark blue is all stitched? Seriously?" he asked, taking a closer look. "That's insane. There has to be a faster way," he said.

I explained there were faster ways. I could have used ribbon or another trim beneath the herringbone stitches, but then it wouldn't be the raised herringbone band.

He shook his head, mumbling something about that being ridiculous or insane.

"So... you don't like it?" I asked, trying not to laugh.

His eyes grew wide and he shook his head.

"Are you kidding me? I think it looks amazing! But that's just crazy," he replied.

One person's crazy is another person's fun, I guess! (Perhaps that is why it is called crazy quilting?!)

Thank you for stopping by.
Renee

TAST stands for Take a Stitch Tuesday. It is a personal stitching challenge offered by Sharon B. at pintangle.com. You may read more about it here. There is also a TAST Facebook group you may find here.

The next round of TAST will begin in January. There will be TAST for beginners and Beyond TAST, for those that have completed TAST in the past. You may read more about plans for TAST next year here.

For those of you that may be interested in joining TAST next year, Sharon shared a great article about the supplies you will need. She shared several money saving ideas. You may find that article here.

Please note, I sometimes share sneak peeks of my work on Instagram and on Facebook.


Tuesday, August 1, 2017

August 2017


July had its ups and downs. One of the best memories of the month was participating in a Paint Nite event with my mother-in-law, sister-in-law, and my husband. I like the sunflower I painted last year better than my beach scene on a crate (mine is the one on the right), but I had a great time. And, I love the scene my husband created!

As for my July goals, here is how I did...


#4 A holly seam was embellished on the crazy quilt stocking I am making for my son. 


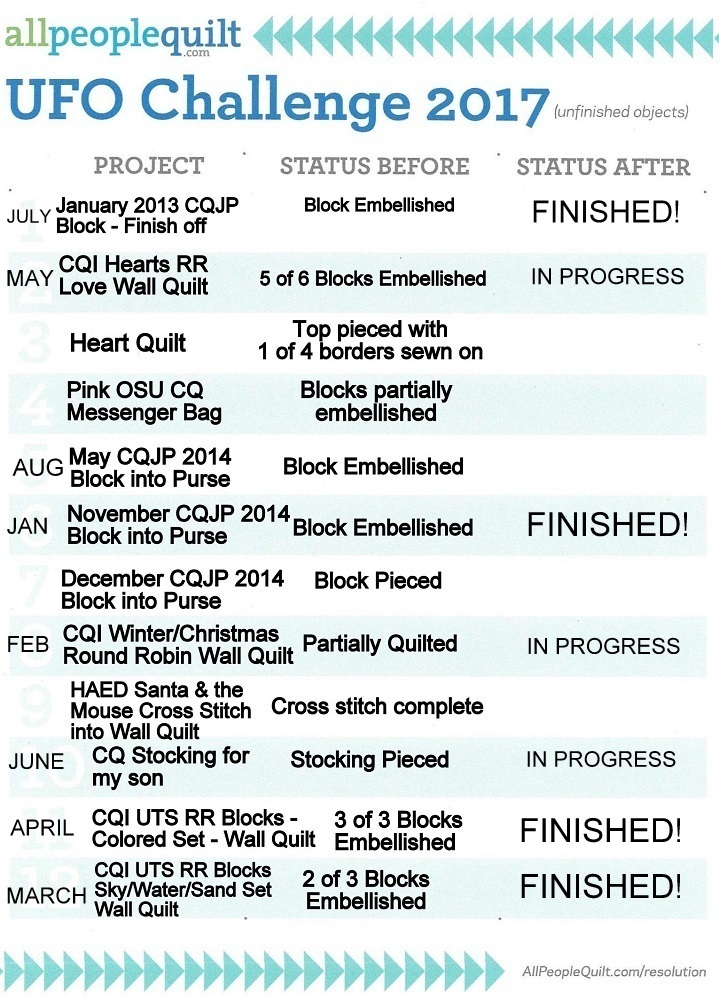
#5 A zipper pouch with a wristlet was created with my CQJP 2013 January block. This was my 4th finish with the APQ 2017 UFO Challenge. You may read more about it here

#8 Although I did not stitch every single day, I made a lot of progress and had a lot of fun participating with The Stitching Hour 2017  hosted by Ambitious Stitches on Instagram. You may see my posts on Instagram here.

Here is my updated list for the APQ 2017 UFO Challenge. (My original post about the challenge is here. It includes photos of all 12 items on my list.)


August Goals:

1. Complete 2 items for Etsy shop, including an under-the-sea eye glasses case.

2. Finish a gift for my friend's daughter. All of the pieces have been cut out now - it just needs to be sewn together.

3. Sew together the wall quilt with the 6 blocks from the CQI Hearts Round Robin. (This was #2 on my APQ UFO Challenge and was selected for May.)

4. Finish embellishing the stocking I am making for my eldest son. (It is pictured above. This was #10 on my APQ UFO Challenge and was selected for June.)

5. Finish the buttonhole stitches and other embroidery on block 5 of the Sun, Sand, and Sea Block of the Month hosted by Amy at Sew Incredibly Crazy and friends. And finish the fish border, which is block 6. 

6. Finish block 7 of the Sun, Sand, and Sea Block of the Month. It is super cute and may be seen here

7. For August, #5 was selected as the project to complete for the AQP UFO Challenge. So, I need to sew my May CQJP 2014 block into a purse. (You may read more about this block here.)


Top 5 Posts Viewed in July:

1. 4th Annual Piggy Bank Savings Challenge - here
2. July 2017 - here
3. June 2017 - here  (The #1 viewed post in June.)
4. May 2017 - here
5. Twilight Duel Update #20 - July 2017 - here 

Thank you for stopping by!
Renee