Showing posts with label Coloring Fabric. Show all posts

Sunday, July 15, 2018

Treasure Chest Tutorial Part 3: Coloring Fabric


This post will show how I colored white fabric for the treasure chest fabric postcards. I used the same colors for the crazy quilt option and the mixed media option.

I used a box of Crayola crayons with 96 colors. However, you really only need white, brown, and blue.


Click on any photo for a larger view.

If you missed the first steps for this tutorial, I have provided links at the end of this post.


1) Color the entire piece white.  
I colored the treasure chest first (as seen in this photo) and then colored the rest of the piece. The lines of your drawing do not look as crisp when you color over them, but it will look better after the color is heat set.


Note: Sometimes when I am coloring, the freezer paper begins to separate from the fabric. I find that holding the piece as seen in this photo and coloring in the small section between my finger and my thumb makes this less of a problem.

2. Color the sand.
If your freezer paper is not as secure after you color the fabric white, you may skip to step 5 below and then return to this step. It will heat set the white and also secure the freezer paper to the fabric again.

First, I tested the colors on a scrap of the white fabric. I selected a light shade to use for the sand and 3 shades I felt went well together for the treasure chest.


The sand was colored with "tumbleweed" for this postcard. 

If you only have one basic brown crayon, color the sand in as lightly as possible.

3. Color the treasure chest. 
If using a basic brown, begin coloring your treasure chest in lightly and then color areas in a bit darker to add shadows and detail.


First, I filled the entire treasure chest in with the "raw sienna" crayon.


Next, I used "copper" to color in the metal lock.


Then, I used "sepia" to color around the edges of the treasure chest. I also colored in a bit along the bottom edges of the boards.


Finally, using "brown" I colored in a bit more around some of the corners of the treasure chest and made some faint lines to give an indication of the grain of the wood on the boards. You could also darken the area inside the treasure chest, as it would have the most shadows. I do not plan to leave much (if any) of that visible, so I did not darken that area on my blocks. However, the inside of the lid would be more shadowed...

4. Color the ocean water. 
This may be done with one shade of blue. Color the water in lighter near the top of the block, where light would be hitting the water, and darker near the treasure chest. 
NOTE: If you are making the crazy quilted postcard, find blue crayons that go well with the blue fabrics you are using. (I wish I had done this!)


I used two shades of blue.
First, "blue green" was used around the edges of the treasure chest and along the sandy bottom. I left some blank areas to fill in with the lighter shade of blue.


Then "turquoise blue" filled in the water.


5. Heat set the piece to melt out the wax and set the color in the fabric.
First, place your paper bag on your ironing board. IMPORTANT: be sure there are no glued sections on your paper bag (on the handles or the seams), as these may make a mess when you iron over your fabric. 

Second, place a paper towel (I use a double layer) on the paper bag. (As seen in the photo above.)


Third, place your colored fabric on the paper towel so the colored side is down on the paper towel and the freezer paper is on top.

Heat your iron to a dry (no steam) cotton setting. 

Press the freezer paper. This melts the wax out of the fabric and into the paper towel. The paper bag protects your ironing board if the wax goes through the paper towels.
NOTE: the iron may move quickly over the freezer paper, so be careful.

Check the paper towel. If colors have ironed onto it, replace the paper towel and press again. Repeat this process until no color transfers to the paper towel.

If you feel any sections are too light, you may color over those areas again and then repeat this step to set the color.


Once you finish this step, you may remove the freezer paper from the back of your fabric. 

You are now ready to prepare the postcard for embellishment!


As stated in a previous post, I learned to color fabric by combining information from the following tutorials. I am not affiliated with their websites.
QuiltingBoard.com
Urban Threads
Knot-y Girl's Stitchery Club

Related blog posts for this tutorial:
Treasure Chest Sketch
Treasure Chest Postcard Tutorial Part 1: Gathering Supplies
Treasure Chest Postcard Tutorial Part 2: Design Transfer


Saturday, July 14, 2018

Treasure Chest Postcard Tutorial Part 2: Design Transfer


Yesterday's blog post shared the list of supplies needed to create a fabric postcard featuring a colored treasure chest.

This tutorial will share two postcard options.
1. Crazy Quilted Option - the postcard will be pieced with a colored treasure chest and other fabrics.


2. Mixed Media Option - it will be one piece of colored fabric embellished with embroidery, beads, and possibly other small buttons and/or charms.  


How to Transfer the Design to Your Fabric:
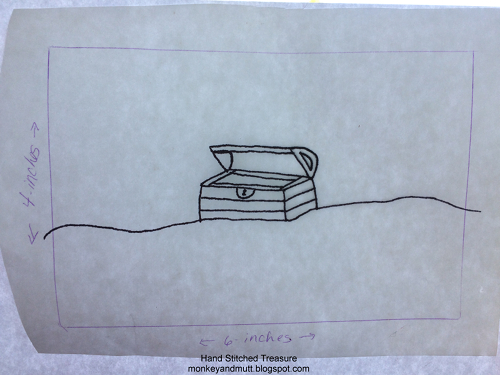
1. Tape the Treasure Chest Sketch to a bright window. 
NOTES: The image will be reversed on your fabric. 
I only used the top sketch for this tutorial.

2. Cut your freezer paper.

  • Crazy Quilt Option - cut a 3.5" x 4.5" rectangle
  • Mixed Media Option - cut a 5" x 7" rectangle and draw a 4" x 6" rectangle in the center on the dull paper side (not the shiny side) of the freezer paper.


3. Tape the freezer paper over the sketch. The paper (not shiny) side should be facing you.


Crazy Quilt Option - center freezer paper over the treasure chest. 


Mixed Media Option - I centered the treasure chest in the 4" x 6" rectangle. If you want more sand or more ocean in your postcard, position the treasure chest to meet your needs.

4. Trace the design onto the paper (dull) side of the freezer paper with a dark permanent marker. I used an ultra fine point Sharpie.


Crazy Quilt Option - Your freezer paper may not cover the entire sketch. That is okay.


Mixed Media Option - I extended the line for the sand so it reached both edges of the rectangle.


5. Iron freezer paper to the wrong side of the white fabric following steps 5.1 - 5.4 below.

5.1 Iron your white cotton fabric. NOTE: The fabric must be washed and dried first (with NO fabric softeners) for the color tinting to set permanently.


5.2 Place the white fabric on your ironing board with the right-side-down. 

5.3 Place the freezer paper sketch on the fabric so the shiny side is down touching the fabric, and the paper side (the dull side) is up.
NOTE: For this step, when placing the freezer paper on the fabric, I leave enough fabric around the design to fit my embroidery hoop.


5.4 Set your iron to the cotton setting with no steam and carefully iron the dull side of the freezer paper. The freezer paper will adhere to the fabric to provide stability while marking and coloring the fabric. It will easily peel off after the coloring has been heat set. 
NOTE: The iron will move faster over the paper than it does over fabric, so use caution during this step.

6. Trace the sketch onto the right side of the white fabric.

With the white fabric side up, you should be able to clearly see the sketch you drew on the freezer paper. If you cannot see it well, taping it to a bright window should help for this step.


Using your fabric marker, trace the image onto the white fabric. (I traced the line for the sand. You may prefer not to do this. The line on your freezer paper should show through enough to guide you when coloring the sand and ocean water in the next step of this tutorial if you want a more subtle look.) 

I used a Pigma Micron 05 Black marker. The ink is permanent on fabric after being heat set. To heat set the ink:
Place the sketch - white fabric side up - on your ironing board. 
Set your iron on the cotton setting.
Iron the fabric, running the iron over the entire image. (Optional: place a scrap of fabric over the design in case any ink transfers and then remove the scrap and iron directly over the image. I have never had Pigma Micron ink transfer to the scrap of fabric, but it would protect the iron if it did.) 

Do not remove the freezer paper. 

Your fabric is now ready to color!

Please Note:
My sketches are not perfect. The traced lines are not perfectly straight. I like to remind myself that a wooden chest would warp under water, so curvy lines are okay. I do not consider myself an artist or an expert. I simply enjoy creating and learning as I go. When someone asks, "How do you...?" I share a tutorial to let them know. I guess my point is - don't get hung up on perfection. If you want to give something a try, have fun with it!

I will share how I colored my fabric in my next post. If you want to start before then, a few of the tutorials that I turn to when I want to color fabric are listed below. I am not affiliated with any of these websites.
Quilting Board Tutorial
Urban Threads Tutorial
Knot-y Girl's Stitchery Club Tutorial


Links to My Related Blog Posts:
Treasure Chest Sketch
Treasure Chest Postcard Tutorial Part 1: Gathering Supplies

Wednesday, July 11, 2018

Treasure Chest Postcard Tutorial Part 1: Gathering Supplies


As promised, I am sharing step-by-step instructions for a project using one of the treasure chest sketches I shared. The tutorial is for a fabric postcard.

If you follow this tutorial to create a fabric postcard, I do hope you will let me know. I would love to see what you create!

I tend to be verbose, so I am breaking this tutorial down into several posts.

Supplies you will need:

  • Computer and printer 
  • Cardstock (white, tan, or light blue) - this will be for the back of the postcard. I cut mine to 8 1/2" x 11" and print 2 postcard backs. However, you may cut a 4" x 6" back and create the back by hand.
  • Sewing machine
  • Thread for sewing machine
  • Rotary cutter, cutting mat and ruler
  • Scissors
  • Iron and ironing board
  • A printout of the treasure chest sketch PDF shared here
  • Embroidery hoop or q-snap large enough to hold a 4" x 6" design
  • At least 6" x 9" piece of muslin fabric (this is for the foundation - make it big enough to fit your embroidery hoop or q-snap frame)
  • White cotton - minimum of 5" x 7" (washed and dried - do NOT use fabric softener)
  • Freezer paper 
  • 4" x 6" of a sturdy fusible stablizer (I use Pellon 72F Peltex II Ultra Firm 2-Sided) 
  • Crayons - you will need white and brown. Additional shades of tans, browns, blues, and greens are optional
  • OPTIONAL: Scraps of tan, brown, blue, and/or green fabrics for sand and ocean water (you may just color the white fabric instead)
  • Paper Towels
  • Brown paper bag
  • Bright window or light box (to help transfer design onto fabric)
  • Tape (to tape the sketch to the window)
  • Permanent Marker to transfer chest onto freezer paper (I use an ultra fine point black Sharpie)
  • Permanent Fabric Marker to draw the treasure chest onto the white fabric (I use a black Pigma Micron 05)
  • Optional - fabric glue (A friend likes to use Aleene's Original Tacky Glue. I use Fabric Fuse Quick Bond Fabric Adhesive. If you have a favorite, you may use it. Or you may prefer to simply sew the cardstock back to your postcard.)
  • OPTIONAL: Clear mailing envelope (I found size A6 clear plastic envelopes through Amazon. They are 4.75" x 6.5" and have worked great for mailing fabric postcards. You may mail them without an envelope. I feel more comfortable with a bit more protection.)

Embellishing Supplies (to be covered better in another step of this tutorial):
  • Embroidery needles
  • Embroidery floss and threads (Floss, Perle cotton in sizes 5, 8, and/or 12 - colors may vary. I use black floss or size 12 perle cotton to outline the treasure chest. For other colors, think of coral, sea vegetation, fish, etc. I like shades of green, yellow, purple, blue, orange, pink, red and variegations of these colors.)
  • Beading needle
  • Seed beads and/or petite glass beads (Think SMALL - the finished postcard cannot be more than 1/4-inch thick. To fill the treasure chest, I tend to use gold, white, and perhaps a few red, blue, and/or green beads - I recommend adding your favorite gem color. )
  • Optional: needle threader 
  • Optional: charms or buttons (again, think small and thin)

Tomorrow's post will share how to transfer the treasure chest to your fabric.


Tuesday, February 27, 2018

Another Snowman Mug Rug


While having my tires rotated today, I finished sewing the binding onto this mug rug. 

I printed the "Snowman" digital stamp from The Paper Shelter onto fabric and colored it at the same time I printed the mug rug I finished last month. And I am happy to say that the black ink from the inkjet printer washed beautifully. 

As part of the 1 X-mas Item a Month Blog, I am striving to complete at least 12 Christmas items this year. You may see what others are creating here.

Saturday, February 10, 2018

Embellished CQJP 2018 February Block


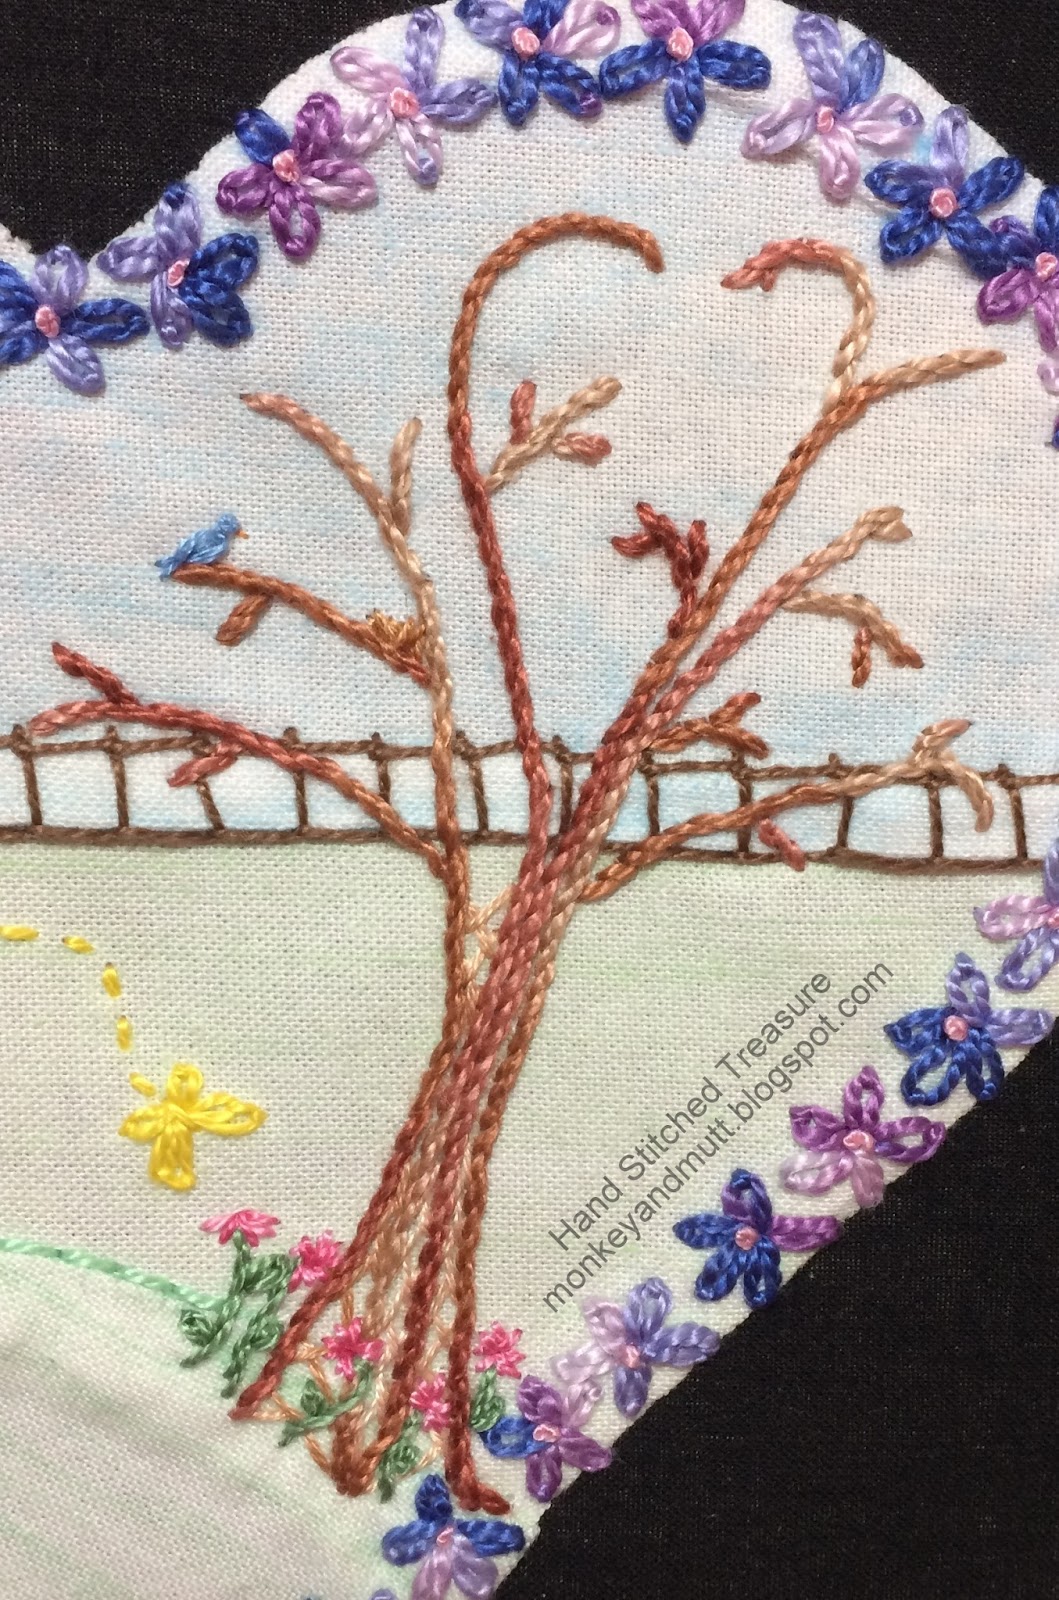
My 2nd CQJP 2018 block is now complete! The theme for my CQJP 2018 project is "My Favorite Things" and I love trees, flowers, butterflies, birds, hearts and snailmail.

Click on any photo for a larger image. 

A snail was added by couching size 5 variegated brown perle cotton in a circle. Size 8 brown perle cotton straight stitches created the snail's body.

My attempts to embroider a mailbox this small did not work out, so I drew one on the block with a black Micron pen, colored it in with a crayon and heat set the pigments.

Next, size 8 yellow perle cotton created a yellow butterfly with detached chain stitches and a straight stitch. Running stitches created a flight path. 

Size 5 variegated blue and purple perle cotton and detached chain stitches were used to make a flower border around the heart. Size 8 pink perle cotton French knots were added to the center of each flower.

Size 8 green perle cotton stem stitches created flower stems around the base of the tree. Small detached chain stitches were added to create leaves. Tiny straight stitches filled each leaf. 

Size 8 variegated pink perle cotton straight stitches creaed flower petals.

A detached chain stitch, 2 tiny straight stitches, and a French knot made with 2 strands of blue embroidery floss created the body of a bird. A tiny straight stitch with a strand of light orange floss made the beak.

Straight stitches with 2 strands of floss (one light and one medium brown) made the nest.

Running stitches created with silver metallic thread made a snail trail.

To keep these flowers subtle, I used a single strand of light green floss. The flower stems and leaves were made with a fly stitch and a straight stitch. The flower petals were made with 2 strands of a light variegated yellow and pink floss. A French knot was placed on the tip of each stem. And a tiny fly stitch was added just beneath the knot.

This completed block 2.


Thank you so much for visiting!
Renee


CQJP stands for Crazy Quilt Journal Project. It is a challenge to complete a crazy quilt block each month that is at least 8-inches square in size. You may learn more about it and see blocks others have created for CQJP 2018 here.

Related posts:
CQJP 2018 Block 2 - here
TAST Weeks 5-6 - here
Embellished CQJP 2018 January Block - here

Monday, January 29, 2018

Pink Snowman Mug Rug


Today, I finished hand sewing the binding on this mug rug. 

The "Snowman" is a digital stamp from The Paper Shelter. After reading on-line that the black ink in most inkjet printers is permanent, I printed the stamp onto a sheet of cotton fabric. Then I colored the design with crayons and heat set the color (using the same process described with these Valentine fabric postcards.) 

I do plan to wash this mug rug before adding it to my Christmas gift stash for December, just to make sure the printer ink is colorfast. I hope so, as I plan to finish a similar mug rug next month. I will let you know how well it washes with that post in February!


Thank you for visiting!
-Renee


This is my 4th year participating with the 1 X-mas Item a Month Blog. You may see what others are working on here.

Friday, December 15, 2017

A Quilt Label

One of my UFOs (unfinished objects) is a quilt I made back in 2005. 

It is going to be gifted, but needs a label and a hanging sleeve.

Tonight, I finished the label. This is how it looked before adding the recipient's name.

Sometime prior to 2005, I purchased this little book at The Stitchin' Post in Sisters, Oregon. Make Your Own Quilt Labels: Volume 4 was written by Kim Churbuck. It contains several darling sketches and easy to follow instructions.

Now, I just need to sew this and the hanging sleeve onto the quilt. (I was a complete novice when I made the quilt this will be added to. It became a UFO when I realized it needed a hanging sleeve and learned that should have been sewn on with the binding... Wish me luck!)

Thank you for visiting!
-Renee

This is day 15 of the 31 Day Blog Writing Challenge. You may find more details and other participating blogs here.

Wednesday, February 8, 2017

Valentines Made with Colored Fabric

Hand Embroidered Fabric Postcard Valentine for Mom

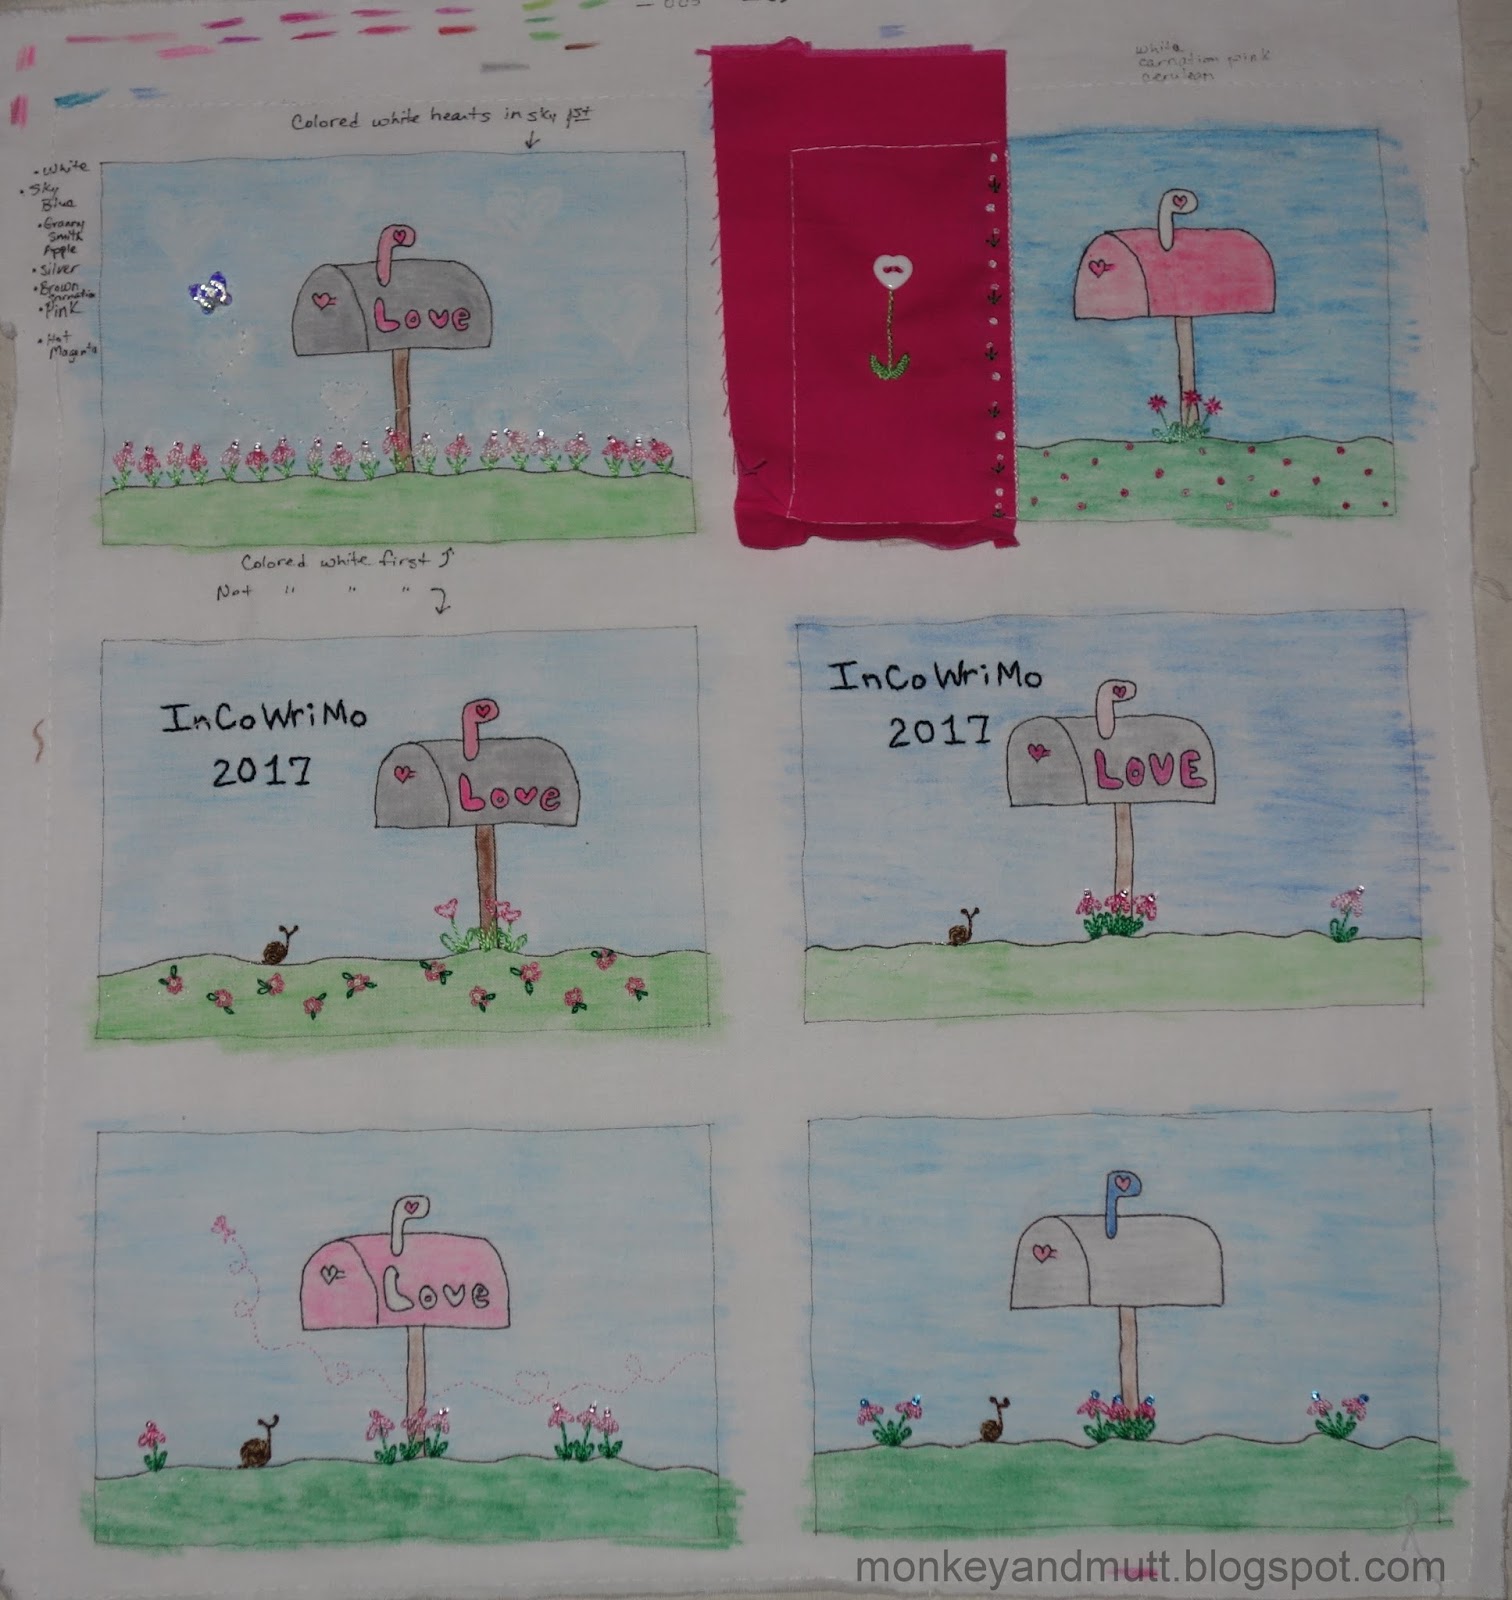
Last week, I was playing with Crayola crayons and fabric.

I thought it would be fun to make a few fabric postcards and maybe a zipper pouch or mug rug.

First, I sketched a design in my Bullet Journal.

Then, I traced that design onto a piece of paper. I taped the paper to a bright window and traced the reverse image on the back of the paper.

Using an extra fine tip Sharpie marker, I drew 6 rectangles measuring 4" x 6" onto the paper side of freezer paper. I then traced the design into each rectangle.

Next, I ironed the wrong side of PRE-WASHED white cotton fabric to the waxy side of the wax paper. (I used a cotton without steam for 5-10 seconds. The paper was slick for the iron. Sometimes it moved faster than anticipated, so I kept my hands well out of the way.)

After that, I taped the wax paper and fabric to a bright window (on our back door) and used a Sakura Pigma Micron 03 pen to trace the design onto the right side of the white cotton. (Please note: the FAQ page for these pens recommends using a 05 or 08 size on nubby fabrics, and using short strokes.)

Pigma Micron markers may be heat set to fabric to be permanent. So, I took the piece back to the ironing board, placed a scrap of fabric over the ink and ironed it for about 5 seconds, romoved the fabric, and ironed it another 5-10 seconds. Now, it was ready to color.

I have colored on fabric before, following this tutorial at the Quilting Board. Since then, I read other tutorials like this one at Urban Threads and this one at Knot-y Girls Stitchery Club. Some tutorials recommend coloring the fabric with a white crayon first. (Luckily, I found a box of white crayons at Amazon. I used almost one full crayon in one day.) 

Out of curiosity, I did not use crayon on one of the rectangles. The colors came out slightly different, but I opted to use the white crayon first on another project I was coloring too.

After coloring everything in, I put a paper bag on my ironing board. (A past experience taught me to tear the bag open and be sure any spots of glue used to hold the bag or handles together were torn away.)

With the fabric side up and the wax paper on the bottom, I sat the panel of colored pieces on the paper bag. Then, I layered a clean paper towel on top of the colored area and ironed it with a dry cotton setting. I replaced the paper towel as needed. This melts the wax and leaves the pigment of the crayon behind. (The tutorials I read recommended Crayola crayons, as they have more pigment than some of the cheaper crayons.)

I pieced the smaller mailbox that was on a separate scrap for a postcard to send to my mom. (Her favorite color is pink. Several years ago, my youngest declared her gifts should all be pink, soft and fluffy. We stick with that as much as possible.)

After adding embroidery, I created a fabric postcard. 

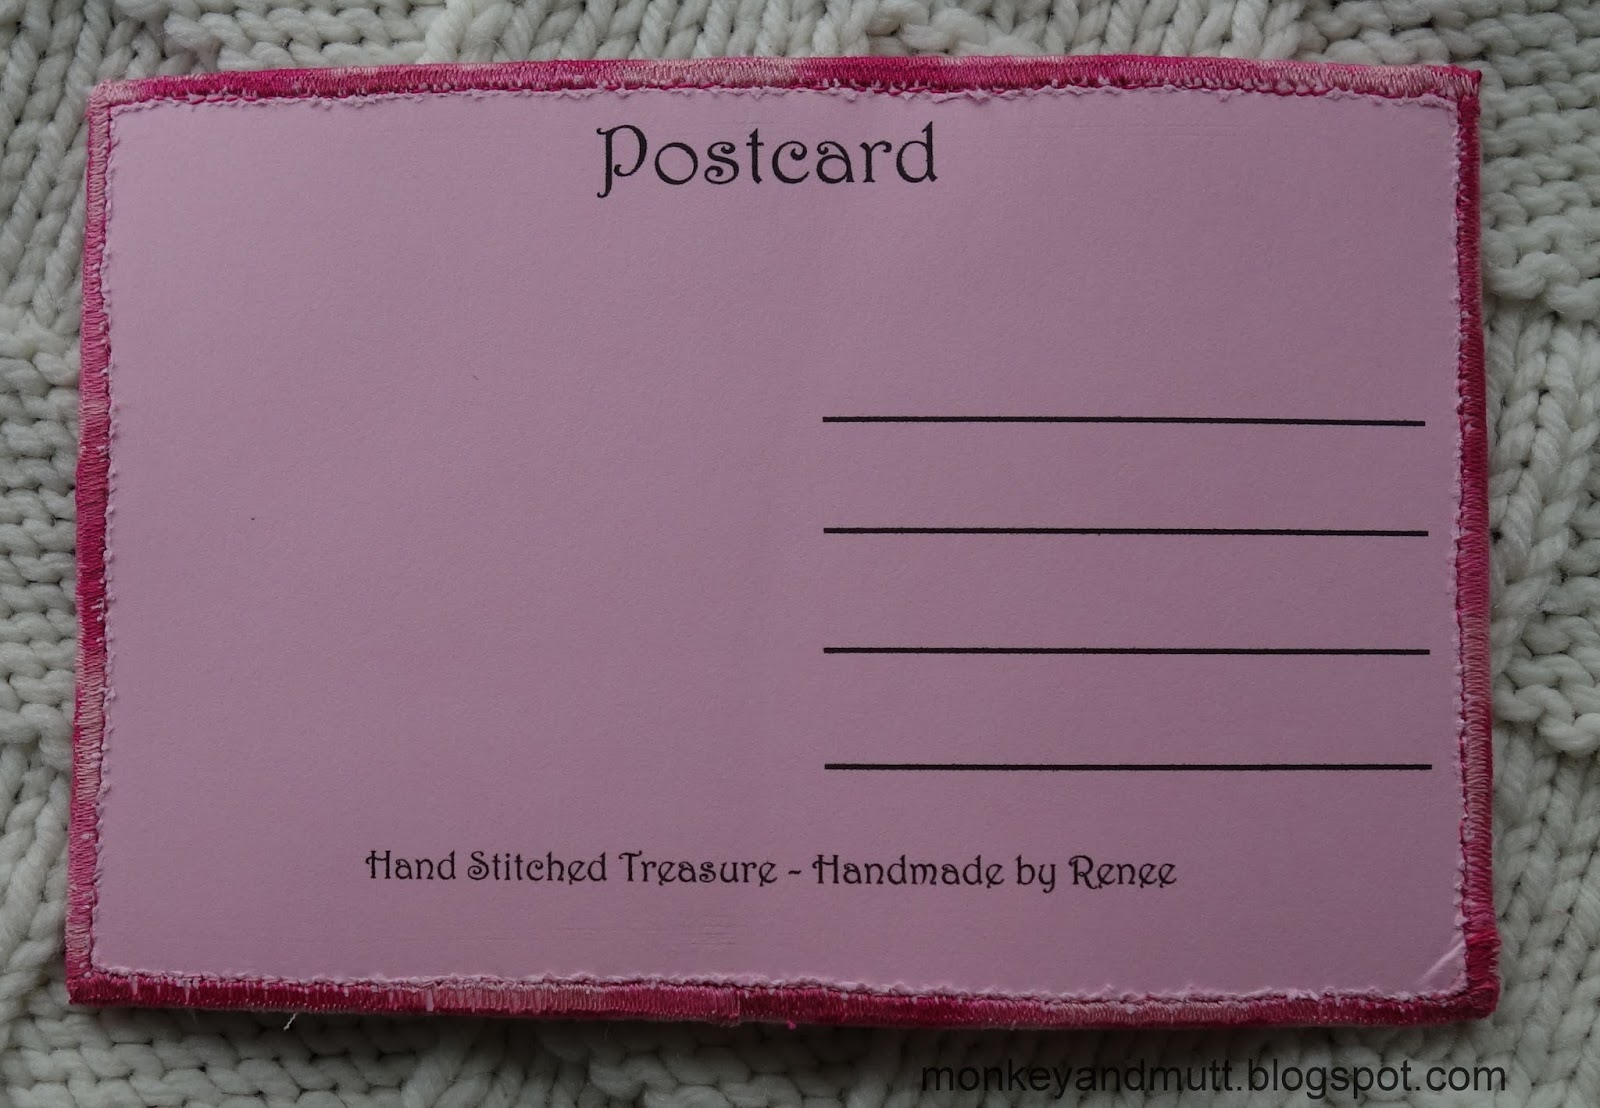
I printed this text onto a sheet of pink card stock for the back. (It fit 2 postcard backs on 1 sheet of card stock.)

My mom received it in the mail last night and loves it. (I was a little worried. It usually takes 1-2 days for mail to travel from my home to hers. This one took 5 days.)

All of the embroidery is finished on the panel of 6. Now to play with my sewing machine to make a few more items... 

If you are interested, I can share how I make these into fabric postcards, mug rugs and zipper pouches in later posts. Just let me know.

Have you been making Valentines? If so, I would love to hear about them!

There may be sneak peeks of items shared on the Facebook page I set up this week, too. You may find it here.

Thank you for stopping by!
Renee