Wednesday, April 29, 2015

WIP Wednesday 04/29/2015


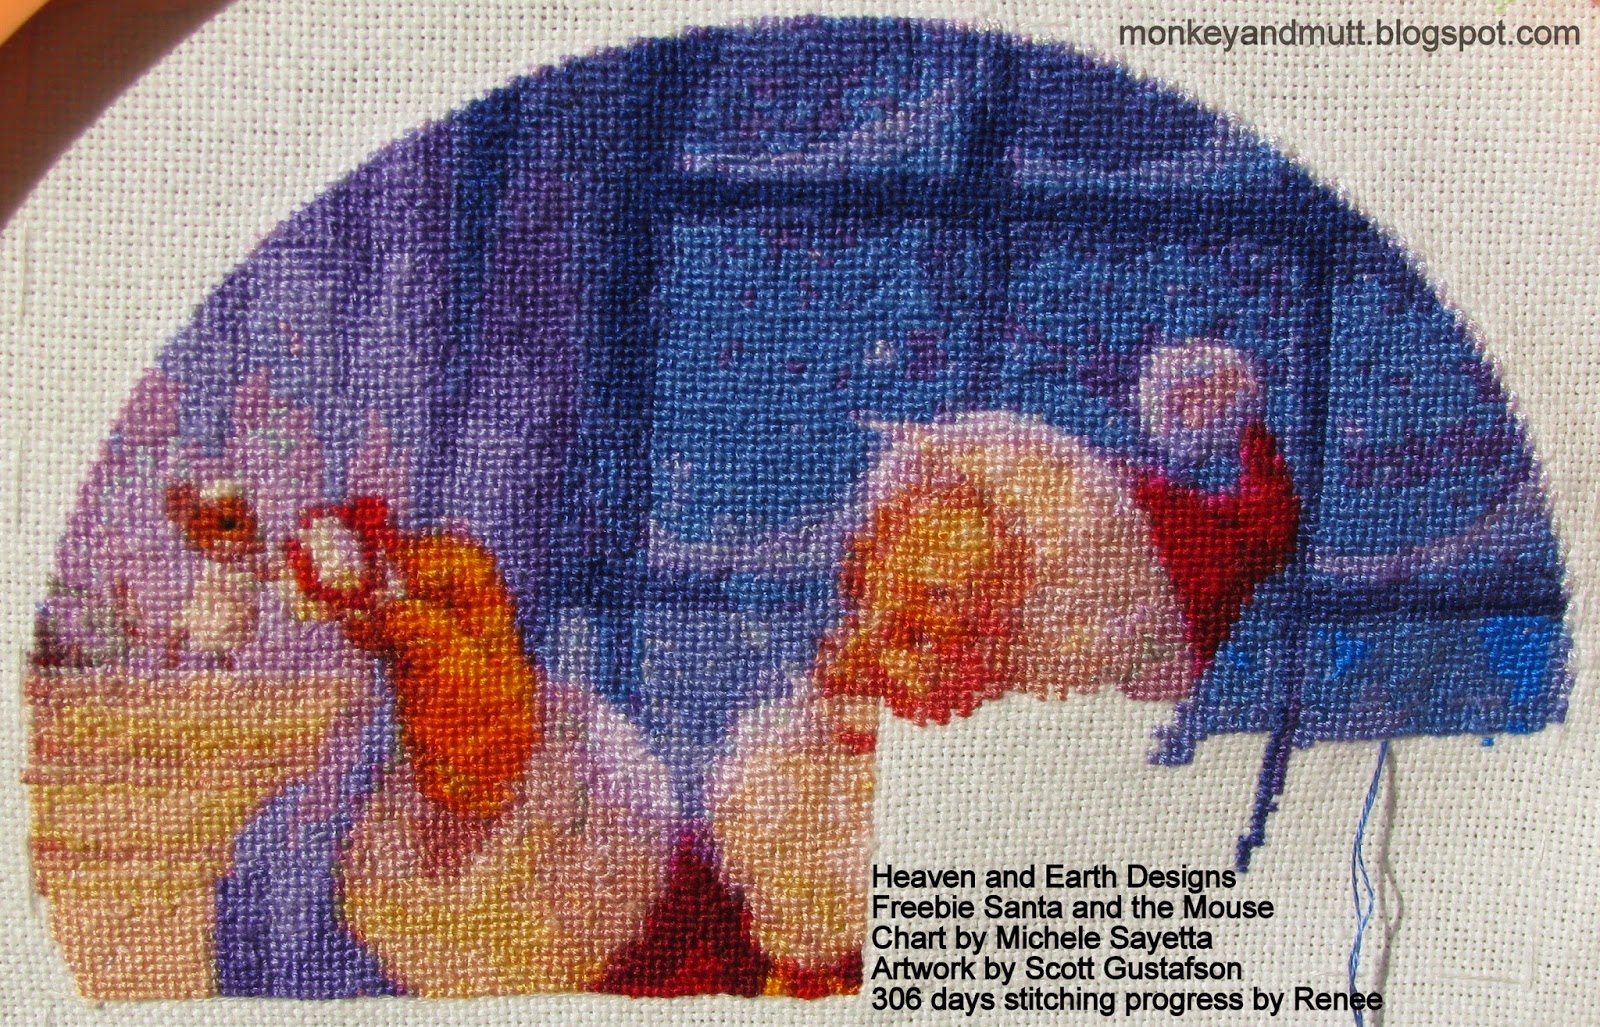
In spite of a fun and busy week full of waltz lessons, student-parent conferences, family birthdays and my husband's corporate party, I did manage to make some stitching progress. 


As you can see in the photo above, I filled in more of the sky in the window section. Below shows how it looked last week.


Below is a picture I shared on April 1st. I managed a bit of progress this month.
Thank you for stopping by!

Oh - Heaven and Earth Designs has a 45% off sale on their charts through May 3rd for Mother's Day, if you are interested.

Last Week's Goals:
1. Complete 250 x-stitches on the HAED Santa & the Mouse chart (which is no longer available, but it is a part of this chart at Heaven and Earth Designs.) 251 stitches completed. Photos above.
2. Complete the block requested in exchange for my son's senior pictures. It is not done yet, but I have made a fair amount of progress. Soon...
3. 
Get as close to 50,000 words for NaNoWriMo as possible. Life being life, this did not happen. I do plan to make a weekly goal for writing so I continue working on this projects and complete a rough draft by the end of the year.
4. Share pictures of Sandra T.'s CQI UTS RR blocks and create a plan for the one I plan to embellish. I ended up with a LOT of posts this week. I will share this next week.
5. Share 1 Xmas Item a Month post on April 25th. (It is already typed up and ready to go!) Done! If you missed it the post is here

6. Link up with the Monday Stitchery Link Party at Super Mom No Cape on April 27th. (If you missed out on what was shared on Monday, April 20th, you may check it out here!) Done! If you missed it you may see the post here. Below is a picture of the fun Halloween Block Kathy S. (aka Clothqueen) made for me! 

7. Link up with Stop Pinning and Make Something at A Focused Journey. Done! If you missed it, the post is here.

This Week's Goals:
1. Complete 250 x-stitches on the HAED Santa & the Mouse chart (which is no longer available, but it is a part of this chart at Heaven and Earth Designs.) 
2. Complete the block requested in exchange for my son's senior pictures.
3. Add a minimum of 1,750 words to my novel this week
.
4. Share pictures of Sandra T.'s CQI UTS RR blocks and create a plan for the one I plan to embellish.
5. Link up with the Monday Stitchery Link Party at Super Mom No Cape on May 4th. (If you missed out on what was shared on Monday, April 27th, you may check it out here!)

Tuesday, April 28, 2015

Stop Pinning and Make Something April 2015

Link Party at A Focused Journey

If you are like me, you LOVE the variety of recipes, craft ideas and do-it-yourself tutorials to be found on Pinterest. Sometimes, it is easy to lose so much time finding and pinning those ideas that we do not have time to actually make any of them.  

Last month, Diane at A Focused Journey began a new monthly link party, encouraging readers to stop pinning and make something.  If you have made something from Pinterest this month, I encourage you to read about the link party here and link up to the April party here.

I have already shared several items I made on Pinterest this month in previous posts. There are a few new ones here, too.


Hearty Beef Soup (Click here to go to the pin.) 


Friday, I tried out this AMAZING soup recipe from The Slow Roasted Italian. Okay... mine was more of a stew because I made a big-time oops. But if it tasted this great (even though I forgot to lower the temp back to a simmer for the final 40 minutes), then it must be out of this world cooked correctly! It will definitely be a "make again meal" in our home.

Things I substituted to make this dairy and gluten free, and to use items in my pantry:
I used Chianti instead of Entwine Cabernet Sauvignon.
Substituted three-fourths of a white onion for the shallot.
Substituted Bob's Red Mill Gluten-Free 1 to 1 Baking Flour for flour.
Substituted Earth Balance Soy Free Buttery Spread (it is vegan (no dairy) and gluten-free) for butter.
Substituted russet potatoes for red potatoes.
Sliced and peeled regular carrots for baby carrots. (I have stomach issues and prefer to avoid baby carrots - which require a chlorine bath to prevent food-borne illness - even the organic ones.)

Notes: It took me more than 5 minutes to trim fat and such from the meat. And I was not sure if the final 40 minutes were to be covered or not. (Luckily, I left it covered because I forgot to turn the heat back down after I added the potatoes and carrots and brought it back to a boil.)


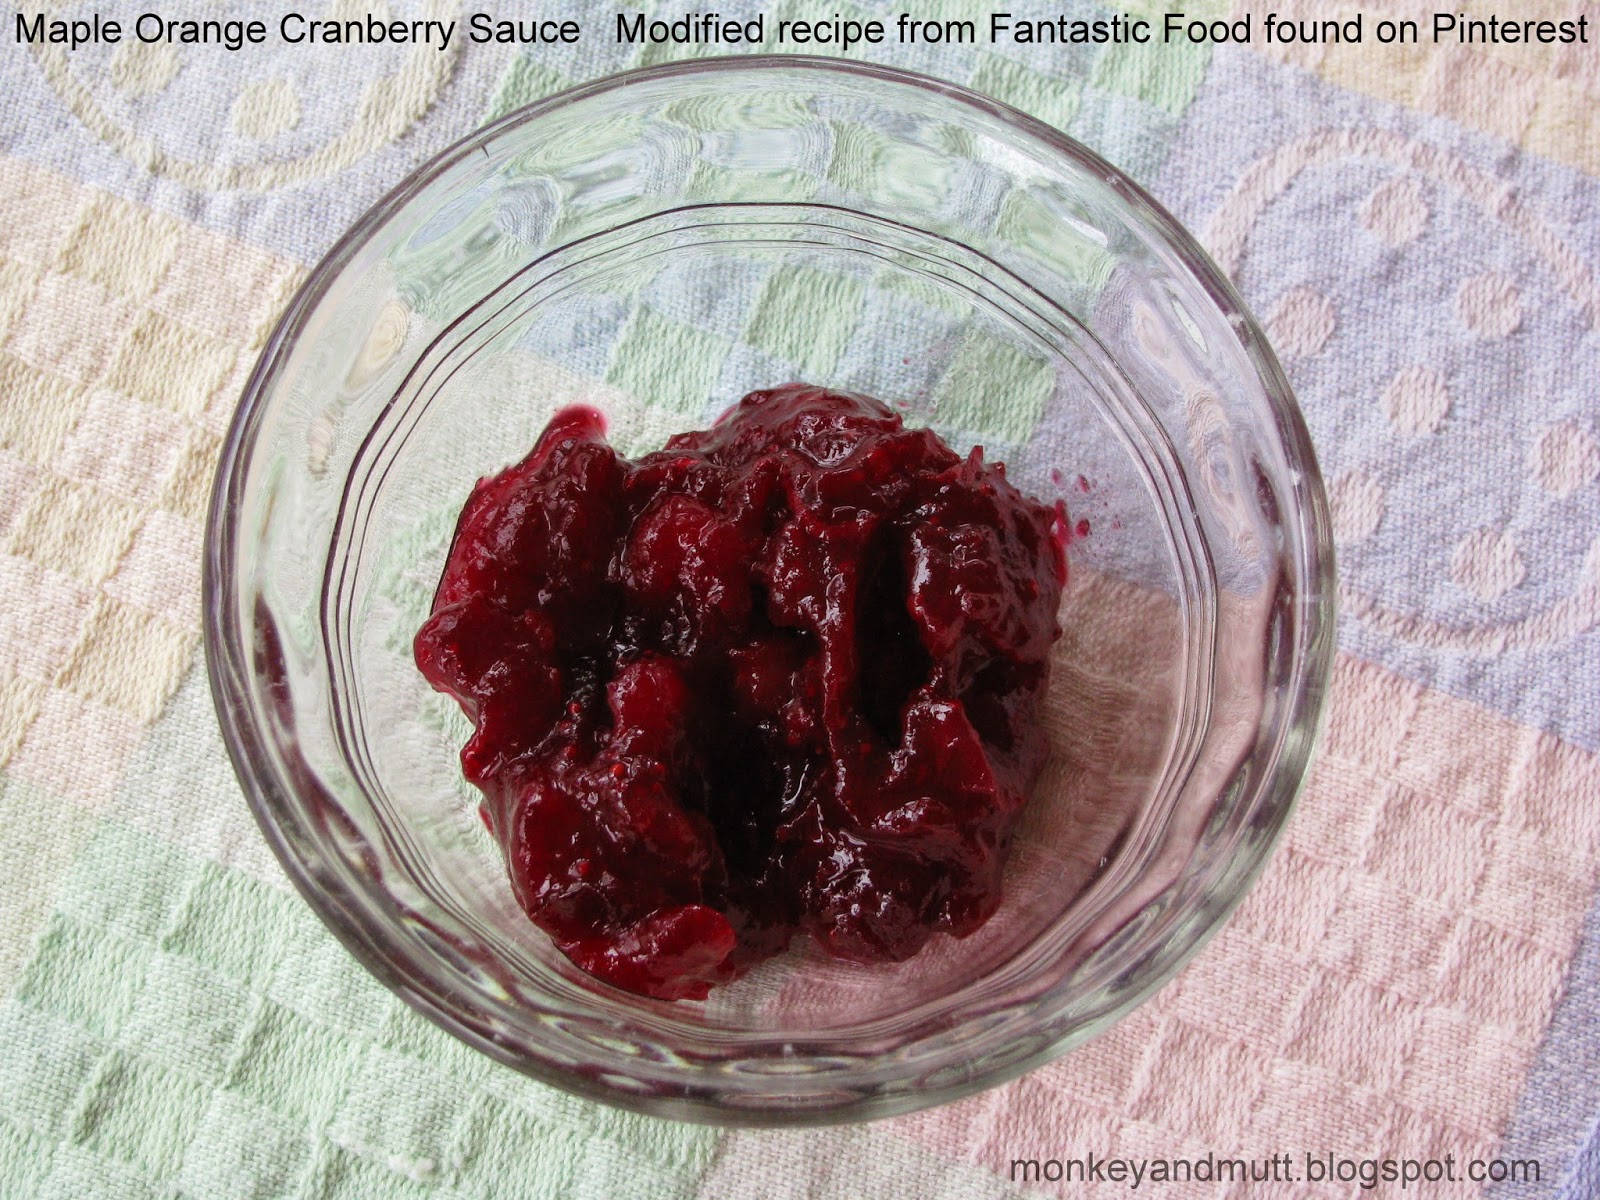
Maple Orange Thyme Cranberry Sauce (Click here to go to the pin.)

I made this to go with a turkey we smoked and cooked on our Traeger grill. (This was all that was left when I remembered to take a picture!)

Things I changed: I omitted the thyme, fearing my youngest son would not eat it that way. And, I only had 1/4-cup of maple syrup so I used that and 1/2-cup of sugar (half the amount of sweetener called for in other recipes.) 

My youngest thought it was too tart. My husband declared, "I don't know what you did different with this cranberry sauce, but it's great!" He normally avoids left-over cranberry sauce, but he took the left-overs in his lunch the next day. I plan to make it again with only maple syrup as the sweetener.


Grab Bag (Click here to go to the pin.)


Last month, I saw a couple of Japanese Grab Bags showcased on blogs. After seeing this gorgeous bag at Oldbury Cottage, I was intrigued. About a week later, I could not remember where I had seen the bags or if they included tutorials or not. So, I decided to do a search on Pinterest and found this free Better Homes and Gardens pattern. I decided it would be a perfect project for the Have a Latte Blog Hop arranged by Madame Samm at Sew We Quilt (which I believe is now Sew We Stitch). I love this Clothworks line of fabric designed by Dan DiPaolo.  You may see my blog hop post here and the full schedule here.

This is my first grab bag, and I love it! 

Challenges I faced: I oopsed the first time sewing the handles. I did not fully understand the image in the pattern and sewed all 4 layers of the lining and outer fabric together, rather than the front to the lining on both sides. (Seam rippers can be wonderful tools!)

Things I would change: I would make the pockets larger - running from mid bag to the bottom of the lining. I have a small (not smart) phone that will fit in the middle pocket section on it's side, but if I slide it in upright, it flips over because the pockets are so short. My license and debit card do the same thing.

Tissue-Pack Cover (Click here to go to the pin.)


This Better Homes and Garden pattern was SO quick and easy, that I made one for the Have a Latte Blog Hop and three more for my 1 X-mas Item A Month projects. 

Things I changed: Following the directions would have left raw edges exposed within the case. I worried with lots of use, inserting and removing tissue-packs might cause the fabric to fray. 
So, I folded under 1/4-inch of the inside fabric, ironed it flat and then stitched the case together.
These were SO quick and easy. I love mine! If you want to see a couple more, my friend, Kim, at Wisdom with Needle and Thread made a couple that are absolutely adorable!

Quick and Easy Sunglasses Case (Click here to go to the pin.)

This pattern from Crazy Little Projects was SO incredibly fast and easy. I love it! The size is large enough for a much larger pair of sunglasses. If you have a small pair of glasses, like me, you could take a suggestion made by Tink's Mom on my Have a Latte Blog Hop post. She made one of these cases, but sewed a seam down the length about one-third of the way in. She can now carry her pen and her glasses in the same case. Genius!

Did I mention that I love Pinterest?!  Thank you, Diane, for creating this link party. I hope to see it grow in future months!

Renee 

Monday, April 27, 2015

Another Snowball Swap with Kathy S. in MD!

Just look what arrived in my mailbox on Saturday! Kathy S. (also known on-line as Clothqueen) and I arranged another snowball swap for this month. I asked for an autumn or Halloween themed square "snowball" this time to begin a new collection and I just LOVE this wonderful block she created!!! (If you missed the ten beautiful snowman/winter themed snowballs I have received, you may check them out here.)

In exchange, Kathy requested a black and white themed square snowball. It is about 4 and 1/4-inches. She emailed me pictures of a couple of blocks she planned to piece this snowball together with and they both had a touch of pink and green. I opted to stick with mostly black and white, but did add a tiny touch of soft pink.


Above is the bare block I created. I wanted more than one section of white fabric, but felt the white in the upper-left made the block unbalanced. Rather than tear it apart, I added a wide black ribbon before I began stitching. Below is the completed block I mailed to Kathy. (I am glad to say she said she just loves it. I was hoping it would work for what she had in mind!)
I cut a square out of a piece of paper and used the paper as a frame for the photo here. (My youngest son could not see my basted seam-lines and thought I had left way too much un-stitched until I showed it to him this way.)

Someone recently asked me how I made something on one of my blocks, so the following photos include information about the floss, beads, and stitches used for each section. (You can skip reading if that does not interest you!)
In my opinion, the black ribbon in the upper-left really helped balance out the block. 

I used a magic chain stitch to create a black and white seam. The seam below that is a cretan stitch with shiny silvery-gray seed beads. Butterflies were created with detached chain stitches (wings), straight stitches (bodies and antennae and for the flight paths), and French knots (tips of antennae.)


White perle cotton was used to create a cable chain stitch and silver seed beads were inserted to dress it up. Two strands of black and white DMC floss were used to make French knots for these little flowers. I used a single white strand of floss to make detached chain stitched leaves.


I wanted the seams to use black or white floss. The trick here was getting the floss to show up on both sides. So, I threaded a needle with two strands of size 12 perle cotton - 1 black and 1 white - to create this alternating buttonhole seam. I added detached chain-stitched leaves with only a single strand of black or white and used small black and white beads to create flowers at the top of each "stem."

The flower motifs also used black and white perle cotton for the detached chain-stitched petals. A clear Mill Hill petite glass seed bead went in the center of each. For the stems, I used a single strand of black or white floss to couch down a strand of black or white size 12 perle cotton. The leaves were also size 12 perle cotton, as were the straight-stitched blades of grass.


This is one of my favorite seam combinations and it is super easy to create. I used a single strand of white size 12 perle cotton to create a buttonhole seam. Three detached chain-stitches top each buttonhole "stem". (I usually make one on the left, one on the right and then one in the center that overlaps them both. The stitches begin centered just above the "stem" created by the buttonhole.) I topped each flower with a light pink Mill Hill Petite Glass Seed Bead. 

The flower is one I purchased from Thearica at Crazy Quilting Supplies. (I am not affiliated with her shop, but am a happy customer! Some of my perle cottons are from her shop, as well.) I tacked the petals down with white floss (careful to only catch the fabric beneath the petals so the tacking stitches did not show on top.)


I found this lace in my stash and thought it would also help balance the white and black in the block. I tacked it down with a single strand of white DMC floss and added a pale pink bead to the center of the flower within my basted seam lines.

This was another fun block to put together! I really enjoyed only using two colors of fabric and floss.  And, I am just thrilled with the Halloween block from Kathy!

Thanks for stopping by! I am linking this post with the Monday Stitchery Link Party #3 at Super Mom - No Cape. I do hope you will hop over to see what others have shared!

Renee

Sunday, April 26, 2015

One Lovely Blog Award


On Thursday, I finally visited a blog or two. I was not at all surprised to discover Kim at Wisdom with Needle and Thread had been nominated for the One Lovely Blog Award. However, I was very surprised to see my blog listed with her nominations. Thank you, Kim! You are entirely too sweet.


The purpose of this award is for bloggers to nominate fellow, mostly newer, bloggers that they wish to recognize. The goal is to bring attention to blogs that we think are "lovely" and enjoy reading. We hope others will enjoy reading these blogs also.

In order to accept the award, the nominated blogger must follow these rules:

  • Thank the person who nominated you & link back to them in your post
  • Share seven facts about yourself
  • Nominate 10 other bloggers for the award 


Here are my seven facts:

1.  I am married to my best friend (this year will be our 22nd anniversary) and we have two amazing boys. If you ever wonder why the url for my blog is monkeyandmutt.blogspot.com, Monkey is my 18-year-old's nickname and Mutt is my 15-year-old's nickname - though his is only used on my blog.

2. My love of crafting was inspired by a dear family friend. During middle school, my younger sister and I became "littles" in the local Big Brother Big Sister Program. Our "big sister" was Diane. She ran the program for several years and my sister and I were incredibly blessed to have her in our lives. Diane and her husband, Dick, made an effort to introduce my sister and I to experiences we might not have otherwise had. We went to a photography club meeting, the county fair, a ballet performance, miniature golf, etc. Diane taught me how to knit. (I made a scarf in high school, but have completely forgotten everything I learned!) And, she taught me how to cross-stitch. My love of embroidery has only grown over the years, and I doubt I would crazy quilt now without the foundation Diane built when I was a teenager. She also gave my sister and I a sewing machine. The one rule was that we use it. My sister was not horribly interested, so my mom and I gave it a great workout. The motor finally gave out a couple of years ago, but I still have it and intend to have it repaired.

3. I love Christmas decorations and I love snowmen. I created the button snowman below on a block for Lynne F. in MA.

4. I love to read. My non-fiction tastes include books on gardening, personal finance, autobiographies and crafts. (Cookbooks used to be my biggest passion, but with my dietary restrictions now, most recipes will not work for me - lol!) My fiction tastes include mysteries (Mary Higgins Clark and Elizabeth George), romances (Jane Austin and Sandra Brown), young adult (Stephenie Meyer and Suzanne Collins), and my guilty pleasures are science fiction/paranormal/horror stories (I am embarrassed to admit that pretty much anything with a vampire or telekinetic abilities will intrigue me. Why embarrassed? Who knows - lol!)

5. I love Halloween decor and fabrics. In fact, I met Kim at Wisdom with Needle and Thread through her 1st annual Halloween Ornament Exchange in 2014. The ornament I created is pictured below. (I will be sharing another Halloween themed block tomorrow!) 

6. Handmade gifts are my favorite to give and to receive.

7. My mother crochets beautifully. I have never had the patience to learn. However, this summer I think I would finally like to try. 

This is the hard part. There are sooo many wonderful blogs that I follow. Only selecting 10 newer blogs is not easy! (Going with newer blogs with less than 200 followers might make it easier... I hope!) I hope you enjoy a visit to these lovely blogs as much as I do!


Queeniepatch - Queenie's Needlework


Christine - Patchwork Allsorts


Carrie - Crafting Paws


Thank you so much for visiting!
Renee

Saturday, April 25, 2015

1 Xmas Item a Month April 2015 Finish


This month has been insanely busy. However, I did mange to create 3 quick items.
Tissue-Pack Covers - front view
Using this tutorial at Better Homes and Gardens that I found on Pinterest, I created 3 Christmas themed tissue-pack covers.  They were incredibly quick and easy to make and will make a wonderful addition to a gift basket - or gift tote, as the case may be!
Tissue-Pack Covers - back view
If you know me, you know I love snowmen. So, it should be no surprise I plan to keep this lovely for myself.
Snowman Tissue-Pack Cover - For Me to Keep!
In May, I hope to finally piece my Alma Lynne Santa cross-stitch into a crazy quilt stocking! 


Thank you for stopping by! To see what others have created this month, please hop over to 1 Xmas Item A Month.

Thank you for stopping by!
Renee


Wednesday, April 22, 2015

WIP Wednesday 04/22/2015


This week, I added almost 200 stitches to Santa and the Mouse. Considering how busy the week was and everything else I accomplished, I am pleased with that amount. (My bar graph on the right jumped up from 61% to 62% complete!)

You may click on any photo for a larger image.

Above shows the section I am currently working on. Below shows how that section looked last week.

I hope you have all had a wonderful week! Thank you so much for stopping by.

Last Week's Goals:
1. Complete 250 x-stitches on the HAED Santa & the Mouse chart (which is no longer available, but it is a part of this chart at Heaven and Earth Designs.) 

2. Work on a block requested in exchange for my son's senior pictures. I finished this seam and am off to the next!

3. 
Write at least 13,860 words this week, for a total of 32,206 words for Camp NaNoWriMo. (That is an average of 1,980 words per day. If I am closer to 35,000, all the better!) Nope. Not a word. This week was all about catching up on my stitching obligations, spending time with family members, and learning to waltz with my 18-year-old for an upcoming Senior-Parent Waltz at his high school's May Day Celebration. (It's the school's talent show. My son and his girlfriend will be two of the MCs - fun times!)


4. Complete and mail out the snowball for Kathy S. Done! I will share a picture after she receives it. Here is a tiny sneak peek.

5. Complete and mail out Kathy's CQI UTS RR block. Done! If you missed the post, it is here.


This Week's Goals:
1. Complete 250 x-stitches on the HAED Santa & the Mouse chart (which is no longer available, but it is a part of this chart at Heaven and Earth Designs.) 
2. Complete the block requested in exchange for my son's senior pictures.
3. 
Get as close to 50,000 words for NaNoWriMo as possible.
4. Share pictures of Sandra T.'s CQI UTS RR blocks and create a plan for the one I plan to embellish.
5. Share 1 Xmas Item a Month post on April 25th. (It is already typed up and ready to go!)
6. Link up with the Monday Stitchery Link Party at Super Mom No Cape on April 27th. (If you missed out on what was shared on Monday, April 20th, you may check it out here!)
7. Link up with Stop Pinning and Make Something at A Focused Journey.

Friday, April 17, 2015

CQI Under the Sea Round Robin - Kathy's Completed Block

Note to self... When updating a post, do not close without saving changes if you accidentally hit revert to draft. It lost the whole post... Oops! Here goes another attempt...


Today, I finished embellishing Kathy's gorgeous block! Adding lace elements is a bit out of my comfort zone, and I feel like I need to keep working on balancing out the design. However, I do love this lace seaweed! It was hand dyed by Nicki Lee of Raviolee Dreams.

Below is a picture of the bare block. You may click on any picture for a larger image.


I have wanted to try making a clown fish for a long time; however, I was not sure I could pull it off. I finally decided to sketch one and give it a go. Not too far along, I was certain I would need to tear the whole thing out. I was so convinced it would not work, I took a picture of it in progress - just so you could see why, in the unlikely event it did work. (The outline was penciled in on the muslin backing.)


It went from the photo above, to the photo below. It is not a perfect clown fish, but I was delighted with how it turned out. (I felt like doing a happy dance!)


I also wanted to add a seahorse, but I did not want it to be the same as the one I have stitched in the past. I thought about just changing the color, but opted to make a completely new sketch.


He was a lot of fun to stitch!


Above is a picture of the beautiful block Nicki Lee embellished for Kathy in March. Below is a picture of our two blocks together.


I do hope Kathy likes her blocks!

Thank you so much for stopping by!
Renee

P.S.
If you are looking for the Have a Latte Blog Hop, the full schedule is here and my post is here.

Wednesday, April 15, 2015

Have a Latte Blog Hop Day 4 - My Day to Present


When Madame Samm at Sew We Quilt announced the Have a Latte Blog Hop, I simply had to sign up! And, I do not know about the rest of you, but I always find myself in awe of Joan's work at Moose Stash Quilting, so finding out she would be our cheerleader was an added bonus.


Have a Latte Fabric designed by Dan DiPaolo for Clothworks
I fell in love with this gorgeous line of fabrics designed by Dan DiPaolo for Clothworks. I purchased the 6 prints pictured above, but only used 2 for this blog hop. However, I do have plans for the others! 


Have a Latte Grab Bag
I have seen a few Japanese Grab Bags showcased on blogs recently. They intrigued me, as they are unlike any other purse I have used. So, I searched Pinterest and discovered this free pattern from Better Homes and Gardens. It was designed by Bonnie Kozowski. (The handle directions were a little confusing for a novice like me, but in the end I figured it out!)


Have a Latte Glasses Case
This matching eye glasses case was created using this Easy Sunglasses Case Pattern at Crazy Little Projects. I found this on Pinterest, too. It was such a quick and easy project! It is also roomy enough for a much larger pair of glasses.

The quotes on this fabric make me smile. :)


Have a Latte Tissue-Pack Cover Front
Have a Latte Tissue-Pack Cover Back
My third project was this tissue-pack cover. I have wanted to make one for a while now, and what better excuse than to make it a matching accessory to a new bag?! When I found a link on Pinterest to the free pattern and realized it was also a Better Homes and Gardens pattern. It felt destined to be. (I do confess, I wish BHG would do away with the pop-ups. Once you get past them, the patterns are great!)


Have a Latte Set - Grab Bag, Tissue-Pack Cover, and Eyeglasses Case
I just love the aroma of fresh brewed coffee. (To be honest, I love the smell more than the flavor.) In my home, we tend to drink Yuban Dark Roast ground coffee. 


Tissue-Pack Cover and Eye Glasses Case in the Grab Bag
However, I believe my favorite coffee is roasted by Caravan Coffee in Newberg, Oregon. If you are ever in the area on a Friday morning, you may be lucky enough to visit one of their Public Coffee Cuppings. Their blog's News and Upcoming Events tab will let you know if one is being offered. I found the coffee cupping I attended at Caravan Coffee to be incredibly informative and rather fun. It was my first experience comparing unroasted coffee beans to roasted coffee beans; not to mention intentionally tasting black coffee. It also made me want to try roasting our own coffee beans. Some day... 


Have a Latte Set - Grab Bag, Tissue-Pack Cover, and Glasses Case
I know some of you are purists and love your coffee black. I need my flavored creamer. Now that I cannot have any dairy, I am incredibly thankful for So Delicious French Vanilla Coconut Milk Creamer and Silk Vanilla Almond Creamer. In fact, on the rare occasions my hubby and I go out of town, I make sure I take the coffee cup pictured above (a gift from my youngest son) with me. If we go out for breakfast, I pour some of my dairy-free coffee creamer into the cup so I can enjoy a cup of coffee with some fresh fruit and a side of bacon while my hubby enjoys a more traditional breakfast. (Gluten-free, dairy-free, egg-free breakfasts out can be tricky, but I try to make it work!) Now, I will have a bag and accessories to match my cup!

Special thanks to Clothworks and Dan DiPaolo for this fantastic line of fabric, to Madame Samm for organizing this blog hop, and to Joan at Moose Stash Quilting for cheering us along!

I hope you will pour yourself another cup of coffee and visit the other presenters today.


 April 16
Living my Dream - you are here

If you leave a comment, I am curious... 
How do you take your coffee?
Have you ever used a grab bag? If so, how did you like it?