Showing posts with label Valentine's Day. Show all posts

Tuesday, February 5, 2019

TAST 2019 - Stitches 1 & 2


This weekend I made some time to work on the Take a Stitch Tuesday (TAST) stitches that have been shared this year at Pin Tangle. The Chain Stitch and Fly Stitch were both worked onto a Valentine Fabric Postcard I am working on.

Click any photo for a larger view.

Stitch 1: Chain Stitch
I worked this stitch with size 8 pink perle cotton. I like the way the red fabric peeks out between the stitches.

Stitch 2: Fly Stitch
Fly stitches were evenly spaced above the chain stitches with size 8 green perle cotton to create leaves.

Straight stitches were added to make stems with the same thread.

The stems were topped with pink fly stitches (also size 8 perle cotton) to create flower petals.

Mill Hill Magnifica Glass Beads #10026 topped each flower.


TAST is a personal challenge to learn a new embroidery stitch each week. The challenge is hosted by Sharon at Pin Tangle.

Thank you for visiting!
Renee


Wednesday, February 14, 2018

Happy Valentine's Day!


I wish you all a very happy Valentine's Day!

This can be a rough day for many people.
I am sending big cyber hugs your way!

If you would like to enjoy a bit of eye candy,
head over the Crazy Quilting International blog.
The ladies made beautiful fabric Valentine postcards.
Just click here.

Monday, February 5, 2018

InCoWriMo 2018 Days 1-6


InCoWriMo 2018 has been fun so far!

For Day 1 I wrote a note to a dear family friend on the 
postcard in the photo above. 
(You may recognize it as one I began last 
February - here, and finished in October - here.)


For Days 2-6 I am sending Valentine cards out that I printed using the digital stamp "You Have Mail" from The Paper Shelter.

I love that these digital stamps come with an outline you may color and with a colored image that you may just print.

In Picasa (free photo software), I added text to personalize each image. The images were then inserted into a Microsoft Word document and printed onto blank white cards.

Have you written any "snail mail" letters or cards recently? It is kind of fun knowing the recipients are not expecting them!

Thank you for stopping by!
Renee


Saturday, February 11, 2017

Happy Mail!


Look at the wonderful treasures that arrived in my mailbox last week!

I received a card from my best friend since 5th grade. (She is sooo much better at staying in touch than I am!)

This gorgeous dragonfly card arrived from my crazy quilting friend, Sharyn. She is also participating in InCoWriMo (International Correspondence Writing Month.)

Just look at the sweet laces she sent for me to play with. I am feeling quite spoiled. 

And I love the wax seal on the envelope!

My blogging friend from Creatology offered to swap letters with me during InCoWriMo. Imagine my surprise when this beautiful fabric card she created slipped out of the envelope. I just LOVE it! It is so pretty.

And, as part of the CQI 2017 Valentine Postcard Swap, I received this beautiful piece of art from Diana Williams. I love the Valentine fabrics, the tiny beads around the heart buttons, and the little Valentine letters the sweet birds are carrying. It's just gorgeous!

I hope Diana doesn't mind me sharing her sweet note. Several of my recent posts have discussed making fabric postcards. The back of this one is made with fabric. I love that it is personalized and also mentions her name, the name of the swap, and the year for me to look back upon. 

I do hope you are all having a wonderful weekend! Thank you for stopping by.
-Renee


Wednesday, February 8, 2017

Valentines Made with Colored Fabric

Hand Embroidered Fabric Postcard Valentine for Mom

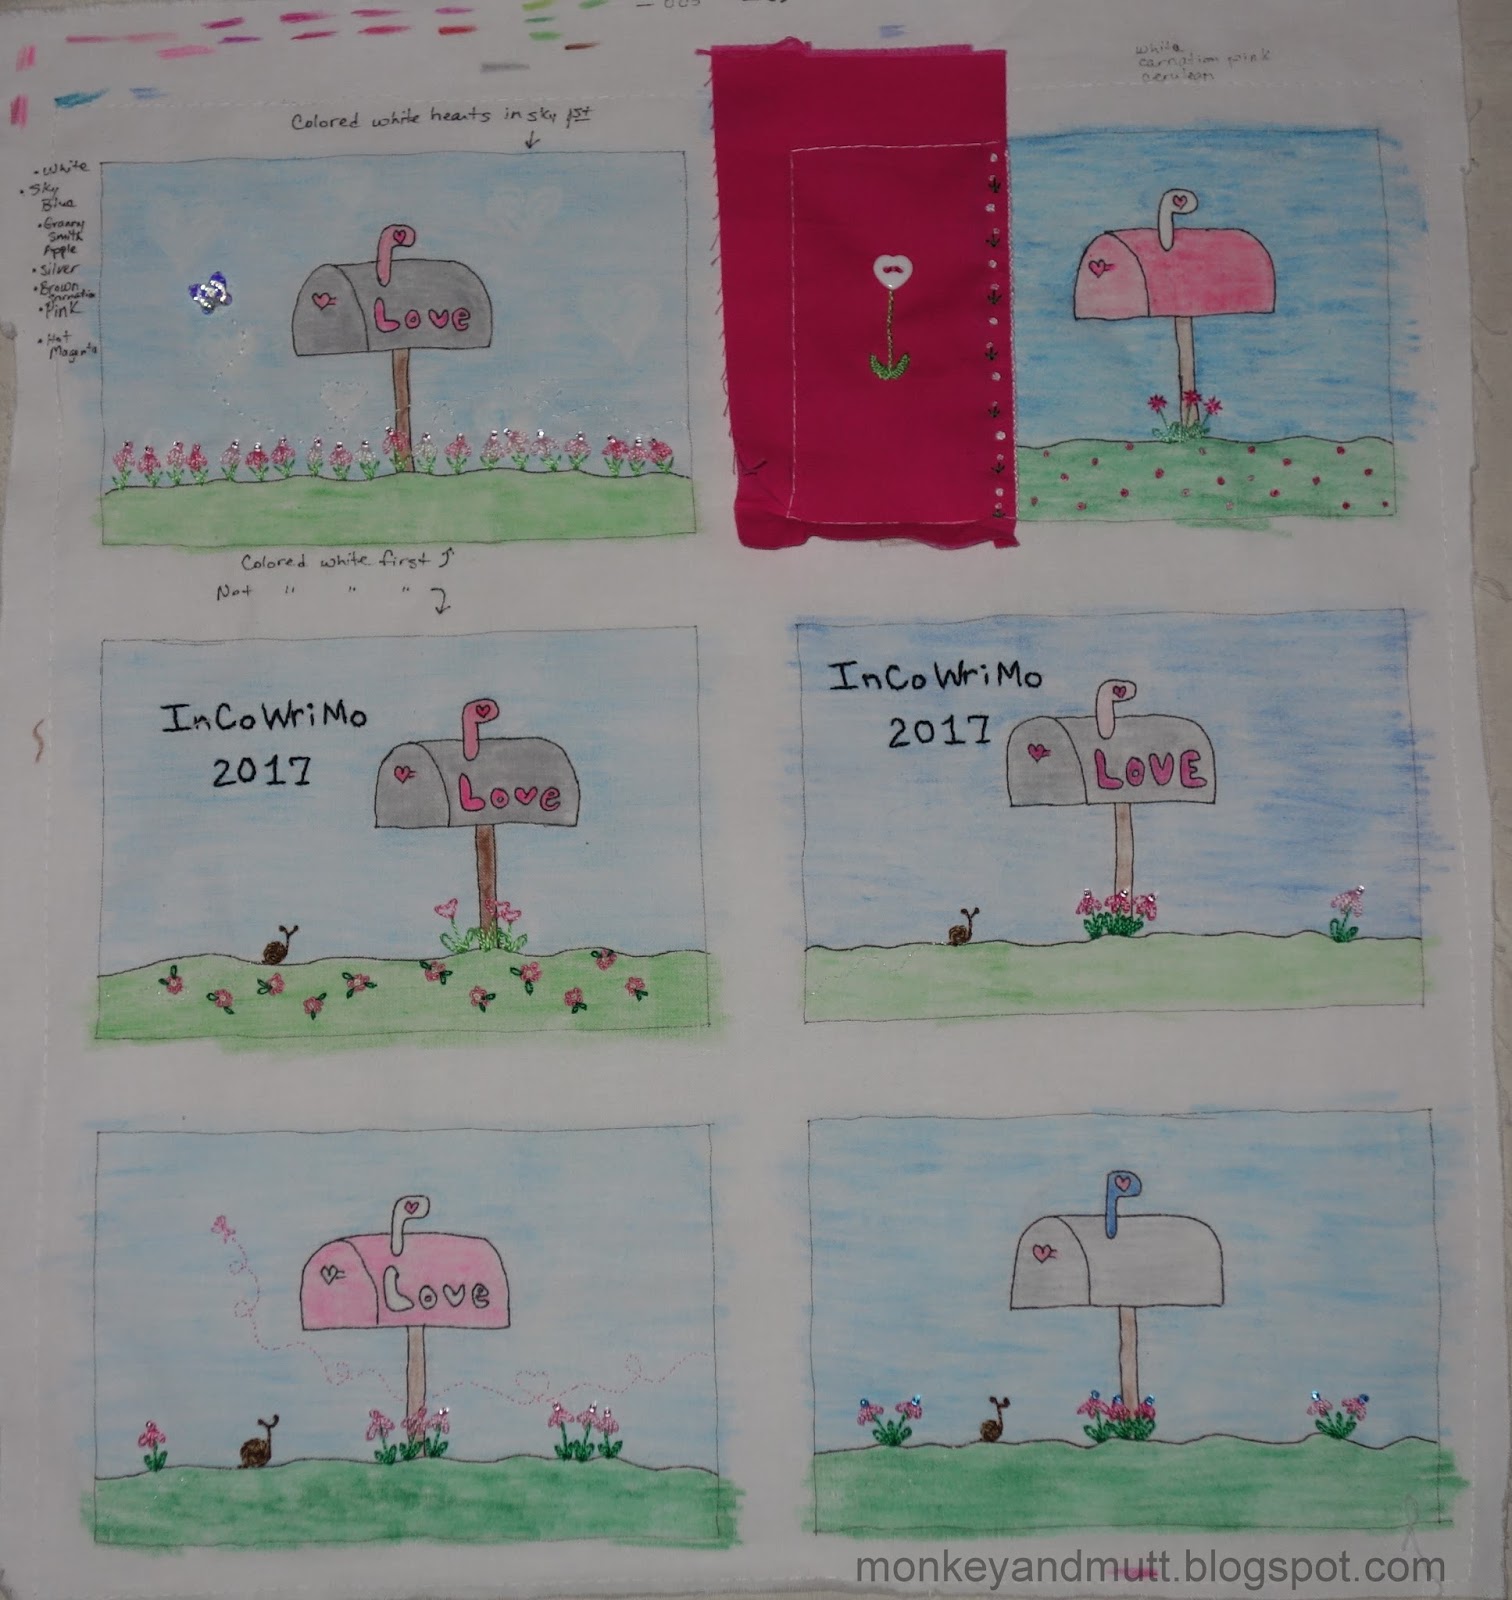
Last week, I was playing with Crayola crayons and fabric.

I thought it would be fun to make a few fabric postcards and maybe a zipper pouch or mug rug.

First, I sketched a design in my Bullet Journal.

Then, I traced that design onto a piece of paper. I taped the paper to a bright window and traced the reverse image on the back of the paper.

Using an extra fine tip Sharpie marker, I drew 6 rectangles measuring 4" x 6" onto the paper side of freezer paper. I then traced the design into each rectangle.

Next, I ironed the wrong side of PRE-WASHED white cotton fabric to the waxy side of the wax paper. (I used a cotton without steam for 5-10 seconds. The paper was slick for the iron. Sometimes it moved faster than anticipated, so I kept my hands well out of the way.)

After that, I taped the wax paper and fabric to a bright window (on our back door) and used a Sakura Pigma Micron 03 pen to trace the design onto the right side of the white cotton. (Please note: the FAQ page for these pens recommends using a 05 or 08 size on nubby fabrics, and using short strokes.)

Pigma Micron markers may be heat set to fabric to be permanent. So, I took the piece back to the ironing board, placed a scrap of fabric over the ink and ironed it for about 5 seconds, romoved the fabric, and ironed it another 5-10 seconds. Now, it was ready to color.

I have colored on fabric before, following this tutorial at the Quilting Board. Since then, I read other tutorials like this one at Urban Threads and this one at Knot-y Girls Stitchery Club. Some tutorials recommend coloring the fabric with a white crayon first. (Luckily, I found a box of white crayons at Amazon. I used almost one full crayon in one day.) 

Out of curiosity, I did not use crayon on one of the rectangles. The colors came out slightly different, but I opted to use the white crayon first on another project I was coloring too.

After coloring everything in, I put a paper bag on my ironing board. (A past experience taught me to tear the bag open and be sure any spots of glue used to hold the bag or handles together were torn away.)

With the fabric side up and the wax paper on the bottom, I sat the panel of colored pieces on the paper bag. Then, I layered a clean paper towel on top of the colored area and ironed it with a dry cotton setting. I replaced the paper towel as needed. This melts the wax and leaves the pigment of the crayon behind. (The tutorials I read recommended Crayola crayons, as they have more pigment than some of the cheaper crayons.)

I pieced the smaller mailbox that was on a separate scrap for a postcard to send to my mom. (Her favorite color is pink. Several years ago, my youngest declared her gifts should all be pink, soft and fluffy. We stick with that as much as possible.)

After adding embroidery, I created a fabric postcard. 

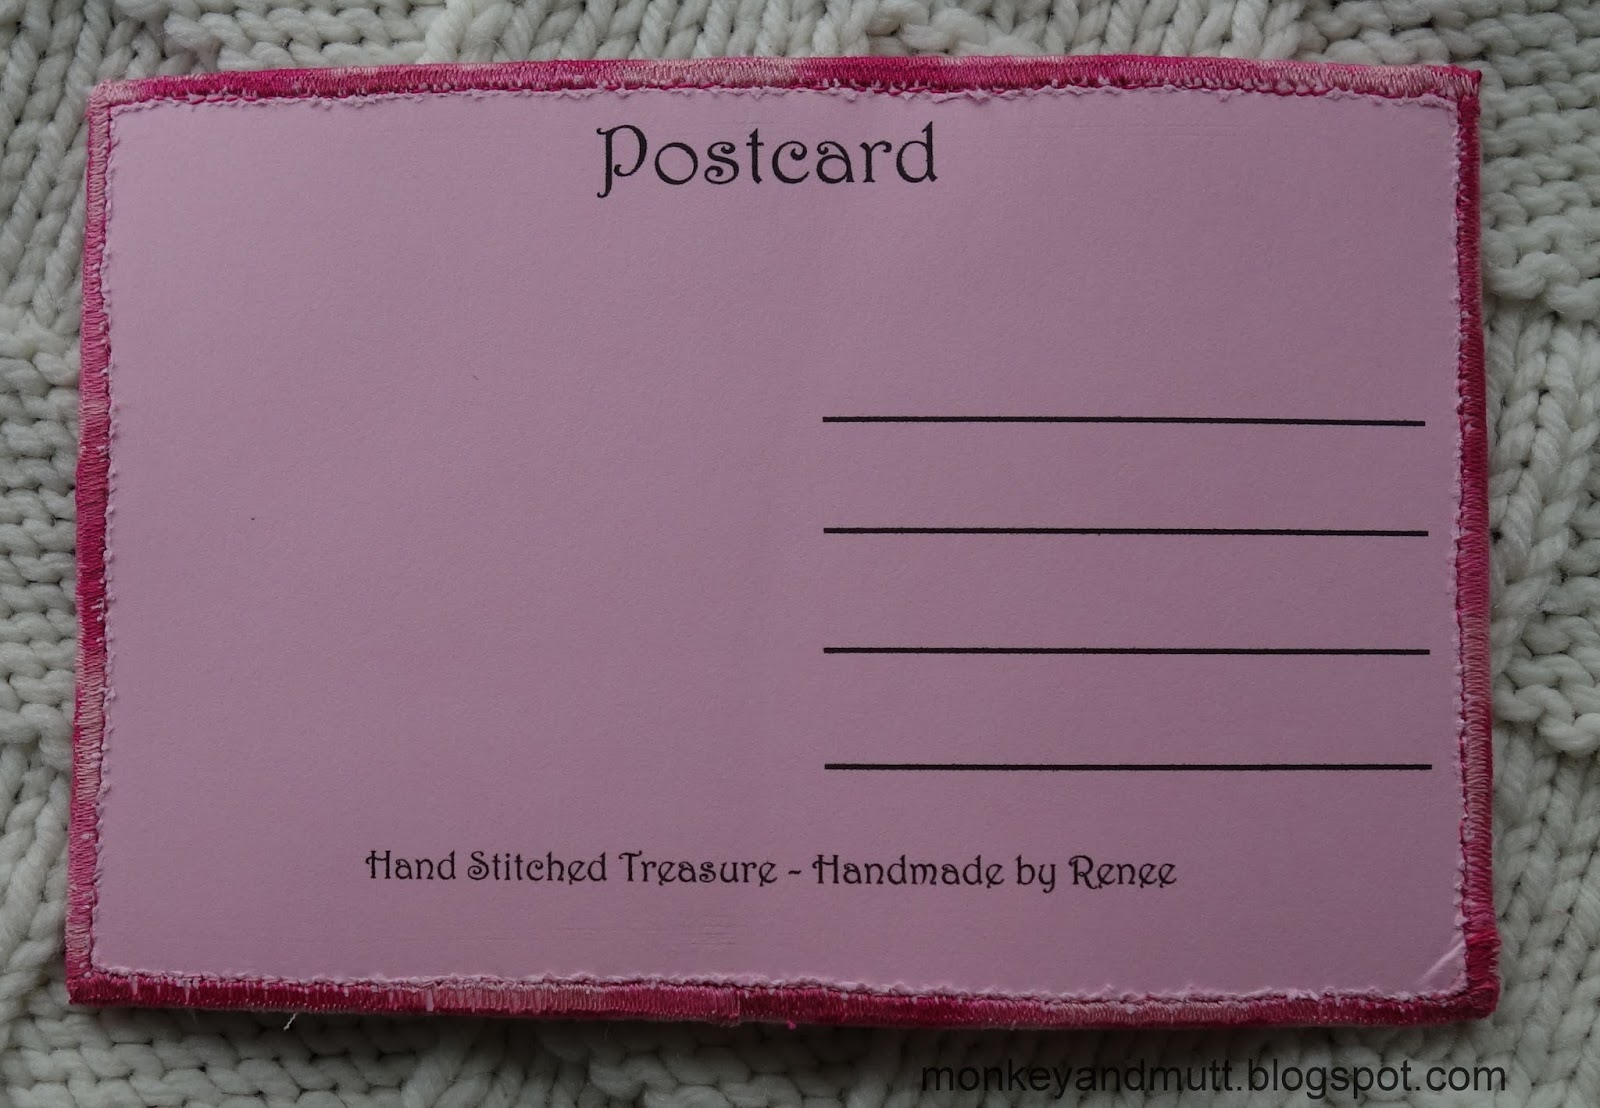
I printed this text onto a sheet of pink card stock for the back. (It fit 2 postcard backs on 1 sheet of card stock.)

My mom received it in the mail last night and loves it. (I was a little worried. It usually takes 1-2 days for mail to travel from my home to hers. This one took 5 days.)

All of the embroidery is finished on the panel of 6. Now to play with my sewing machine to make a few more items... 

If you are interested, I can share how I make these into fabric postcards, mug rugs and zipper pouches in later posts. Just let me know.

Have you been making Valentines? If so, I would love to hear about them!

There may be sneak peeks of items shared on the Facebook page I set up this week, too. You may find it here.

Thank you for stopping by!
Renee



Friday, February 3, 2017

2017 CQI Valentine Postcard Swap


Wilma is fabulous. She organized the 2017 Crazy Quilting International (CQI) Valentine Postcard Swap. 


I decided to make a couple of fabric postcards at the same time. So, I pieced both on the same piece of muslin.


Embellishing this one was a lot of fun!

My husband said he could not tell the butterfly's flight path said, "Love". He thought it looked like "Save". *sigh* It was a little late to do anything about it...


I was still happy with how it turned out.

After mailing it, I noticed I also forgot to add a thread from the spider to the web. Oops! (We'll pretend that was intentional so the spider would be crawling on the card, not dangling from its web, okay?!)


I cut a piece of pink card stock to measure 8.5 x 11-inches to fit in our printer. Using Microsoft Word, I created the design for the back and was able to fit two of these on the pink card stock.

For fun, the blog name was added to the bottom of the postcard.

The note on the back (not pictured) was written with a black glitter gel pen, so the ink sparkles. 
(It really is the little things that make me smile!)

This was mailed out on February 1st for Day 1 of InCoWriMo (International Correspondence Writing Month.)

After the recipient receives the 2nd postcard I created, 
it will be shared here. (If you cannot wait until then, it is on Instagram - the recipient does not check in there...)

Thank you for stopping by!
Renee 


Sunday, February 14, 2016

Happy Valentine's Day!

I am wishing you all a lovely Valentine's Day!  

This beautiful postcard arrived in my mailbox recently. Gayle S. of California created this beauty for the Crazy Quilting International Valentine Postcard Swap 2016. I absolutely love it! Thank you so much, Gayle!  

You may see all of the postcards created for this swap at the Crazy Quilting International blog, here.

I also wrote a tutorial for making crazy quilted fabric postcards. You may find that here, on the CQI blog.

A few other notes you may find of interest are below. (Do you ever have that nagging feeling you are forgetting something? I have that now...)

1. Charting Creations has a sale through midnight CST (central standard time) tonight. 

2. Heaven and Earth Designs has a sale through midnight tonight (I think EST (eastern standard time), but I could not find the information to confirm that.) HAED also has also updated the list of freebie charts and you may see them here.

3. The Victorian Motto Sampler Shoppe has a floss giveaway that ends on February 28th.

4. Kim at Wisdom With Needle and Thread will be announcing a giveaway each week this month. The Week 3 giveaway will be announced on Monday, February 15th.

5. Anthea at Hibiscus Stitches will be hosting Christmas Through the Year (CTTY). If you are interested in creating and sharing your non-Christmas themed gifts early, I encourage you to check out CTTY here.

6. Sharon B. at Pintangle shared information about a free monogram ebook available through the Antique Pattern Library. You may find that post here.

7.  Pamela Kellogg of Kitty & Me Designs shared a few patterns for crazy quilt seams using waste canvas. You may find them here.

8. Susan of CQ4Fun and DesertSky Quilting is offering two link parties for bloggers each month at Stitch-In Days. The second Saturday of each month, if you are working on an embroidery project designed by Jenny of Elefantz, you are invited to link up and share progress on your work. On the fourth Friday of each month, you are invited to link up and share your progress on any hand-embroidered project. You may find more details here.

Happy Valentine's Day!
-Renee

Friday, February 5, 2016

Valentine for My Sweetheart


Last October, I decided I should finally make a project and submit a photo to the Crazy Quilt Quarterly Magazine. My schedule was rather full, so I almost opted to wait. However, after looking through the types of submissions Pamela Kellogg hoped to receive for the Spring edition of the magazine (which had a submission deadline of November 1st), I decided to make a Valentine postcard for my husband. 


It definitely needed seams with hearts.
The base seam above was inspired by 


This was another fun stitch to complete.


While ironing the crazy quilted panel to the Peltex to create this postcard, these flower sequins lost a bit of their shape from the heat. However, I still love this feather-stitched seam!


This was a fun way to dress up a Cretan stitched seam.


In hind sight, I should have used white to create the butterfly's flight path. Can you see that it reads, "Be mine"?


There is also a message in the spider's web.


I am not certain, but I believe this was the first spider 
I created with a heart-shaped bead.


After writing a brief love note on the back, 
I mailed it to my husband's work address.


I mailed it in a plastic sleeve.
My husband said a small hole wore into the plastic covering the spider, so I was thankful for that extra bit of protection.


Yesterday, my husband emailed me a picture of his Valentine, 
displayed in the center of his cork board at work.

Thank you so much for stopping by! If you crazy quilt at all, I  encourage you to submit some of your work to the Crazy Quilt Quarterly Magazine. Pamela Kellogg will be accepting submissions for the Autumn 2016 edition through May 1st. For more details and for a list of themes for this edition, check out this page on her blog. There is also a Crazy Quilt Quarterly Calendar Contest running through May 1st. You may find more details here (just click on the first photo in the post for a larger view of the contest rules.)

Renee


Wednesday, February 3, 2016

Valentine Postcard Swap and Other Notes

2016 Crazy Quilting International Valentine Postcard Swap
This crazy quilted Valentine postcard went out in the mail yesterday to another participant in the 2016 Crazy Quilting International Valentine Postcard Swap.


I had more fun playing with Sharon B.'s Crazy Quilt Templates Set 2 to create the vines. 

(Click on any image for a larger view.)


And to space my buttonhole stitches for this flower seam. 


This was such a fun project to work on!


I hope the recipient likes it!

January was a crazy busy month. I might have over-committed myself just a bit. Maybe. <Grins> 

There was a fair amount of time spent behind the scenes working with my fellow moderators for the Crazy Quilting International group, setting up quarterly challenges. We do hope the members of the group have fun with them! The first challenge will to create an Extended Seam (building a seam with several stitches.) This is not one of my strong points; so, I plan to try working on this skill.  I have also been working on a "How to Make a Crazy Quilted Fabric Postcard Tutorial" that I hope to complete and share on the Crazy Quilting International blog by the beginning of next week.

In addition to working on my cross-stitch projects and completing Mary's block for the CQI UTS Round Robin, I created a tissue cover to add to my Etsy shop - Hand Stitched Treasure. (However, I am waiting to list it until I have a few more items completed for the inventory. The shop is empty at the moment.) 

My January Crazy Quilt Journal Project (CQJP) 2016 block is still in progress. I will share an update soon! I fell a bit behind schedule working a few things I will be able to share in May, after the release of the Summer edition of the Crazy Quilt Quarterly Magazine.

Tomorrow, I hope to be able to share a secret project I created last October. (Hint: If you have a copy of the Spring 2016 edition of the Crazy Quilt Quarterly, then you have already seen it.) 


The Spring edition is now available on Magcloud, here. I am not affiliated with the magazine. However, it was fun to submit my work and see it in print along with so many talented artists! There are some fantastic crazy quilts and fun tutorials in this edition.

I do hope if you crazy quilt that you might consider making a submission for the Autumn 2016 edition. The deadline is May 1st. You may find more details here. There is also a Crazy Quilt Quarterly Calendar Contest with a May 1st deadline; you may find more details about that here.

On another note, if any of you would like to know more about Audrey Hepburn, there is a giveaway this week at Wisdom with Needle and Thread you may want to check out. (I encourage you to stroll through some of Kim's posts to see some of her lovely work while you are there.)

Now, I am off to try out a new craft! I received some polymer clay for Christmas from my sweet husband and my boys. My first attempt at making my own buttons for my crazy quilt work should be fun, if nothing else!

Thanks so much for stopping by.
Renee