

In the crazy quilt groups I belong to, new members frequently ask, "How do I piece a block?"
Planning to write a tutorial, I photographed every step of piecing this block.
Then, I made mistakes.
Rather than waiting to piece a block without mistakes to share, I decided to write the tutorial anyway. After all, I cannot be the only person that has made an oops and wondered, "What now?!" (At least I hope not...)
So... this is how I pieced my block - mistakes and all.
(This is a VERY long and photo heavy post. You may click on photos for a larger view.)
Before You Start
Think about your project.1. What theme will your project follow?
2. What color scheme do you want to work with?
3. How many blocks to you plan to make?
4. What size will your blocks be?
5. What shape will your blocks be?
6. What kind of embellishments do you plan to add? (Consider your plans for the blocks when deciding this.)
For this project:
1. I want a heart theme with a black square in the center featuring a heart and a crazy quilted border around it.
2. I want 1 black fabric and several shades of pink. My embroidery will focus on green (for leaves/stems), pinks, and shades of white.
3. I will make 12 CQJP blocks this year. However, I plan to make 3 different wall quilts featuring 4 blocks in each. So, this project will have 4 blocks.
4. 8-inch x 8-inch blocks.
5. Square blocks.
6. This quilt will be ornamental (so it will not be washed.) This allows me to use ribbons, lace, trims, beads, buttons, charms and various embroidery threads.
This tutorial creates a finished block 8" x 8" (roughly 20 cm x 20 cm) square.
Materials
1. Rotary cutter2. Cutting Mat
3. Cutting ruler (I used a 6" wide ruler and a 12 1/2-inch square cutting template.)
4. Muslin
5. Scraps of fabric in shades and hues that coordinate well together. (Tip: If not for the large center piece I planned for this block, I would have looked for 8-12 fabrics for this piece. I knew I only wanted a CQ border and looked for 5 coordinating pinks. The other hues I had available clashed - in my opinion - so I settled on these 3. I also want my embroidery to stand out, so I avoided printed fabrics.)
6. Ribbons, laces, trims that coordinate with your fabrics.
7. Pins
8. Fabric safe pen/pencil/marker.
9. Iron-on fabric adhesive (I used Heat'n Bond)
10. Heart template (you may make a heart on stiff paper or cardboard)
Step 1:
Cut a 12 x 12-inch (roughly 30 cm x 30 cm) square of muslin.
Tip: add 2 - 4 inches to the size of your block. This allows you to easily hoop your work. Sometimes the embroidery pulls the fabric causing it to shrink. Having extra fabric allows you to cut your block to the correct size after embellishment. For my 8-inch block, I added 4-inches (2-inches on each side) and cut a 12-inch foundation.

Step 2:
Mark the seam allowances onto one side of the muslin foundation. This will be the BACK of the block.
Tip 1: I use micron pen for this step. They do not bleed and the ink is permanently set when ironed.
Tip 2: I used the markings on the square ruler for this step as described below.

Above is a close-up of the photo below. The block was 12-inches. I subtracted 2 inches (accounting for my 2-inch seam allowance) and lined the corner up with this 10-inch mark.

Beginning at the top-right corner, I traced an 8-inch line across the top and a second line down the right side of the block.

Next, I lined the 8-inch lines on the template up with the lines on my foundation. I drew 8-inch lines along the left side and the bottom of the block - completing the 8-inch square.
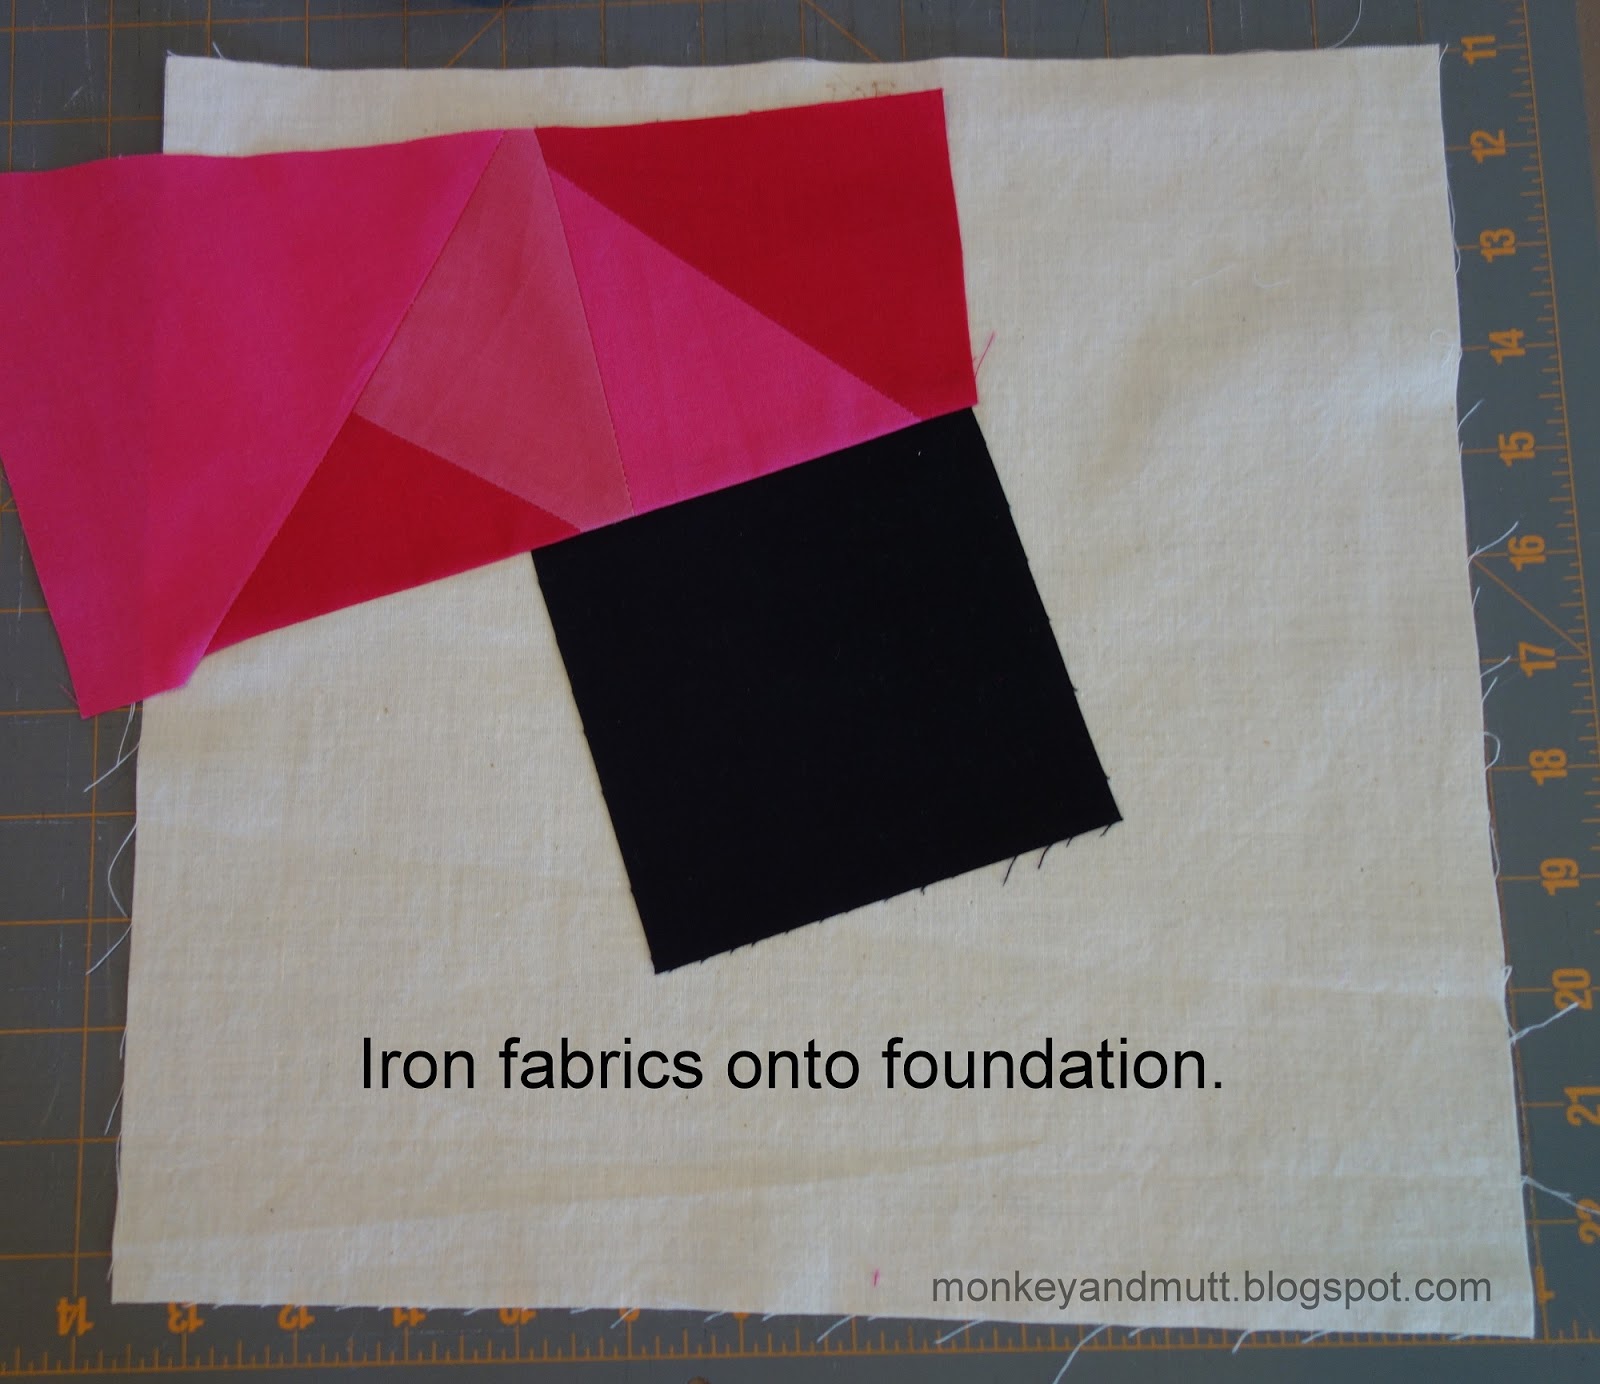
Step 3:
Gather and iron your fabrics.

Step 4:
Cut your center fabric. Remember to add an extra 1/2-inch for the seam allowance.
I wanted a 4-inch center, so I cut a 4 1/2-inch square.
Tip: I find the flip-and-sew method of piecing to be easier with an odd number of sides on the center shape. As you will see, avoiding long seams is difficult with a square (or rectangle.)

Step 5:
Place the center fabric the way you want it on the FRONT of the muslin. (If you see the square you just drew, you are on the back. Flip it over.)
Tip 1: I hold my block up to a window so I can see how my fabric is lined up with the square I drew on the back.

Tip 2: If you are making multiple blocks, set them all out and make sure the center pieces are lined up the way you want them.

For this project, I want 2 blocks with the center angled in one direction and 2 blocks with the centers angled the opposite direction.
Step 6:
Sew your next fabric to the center fabric.
Please note: Normally, I would select 1 fabric, line it up with 1 edge of my center piece, sew it on, trim the fabric and move on to the next edge of the center with another fabric - as seen in this tutorial I shared on the Crazy Quilting International blog last year. Because I only have 3 other fabrics and because I hoped for more angles in the CQ border around my center piece, I made a little more work for myself.
For this block I cut 6-inch strips of each shade of pink.

I labeled each color.

Next, I sewed triangles of fabric A and B together and pressed the seams open.
NOTE: If you are using fancy fabrics, be sure your iron is on the appropriate settings.


Fabric C was sewn along the edge of fabric B. Seams were pressed open.

This process was continued with fabric A, then B and then C. The strip was trimmed after each new fabric, as needed.

When the strip was long enough, I cut one side, creating an edge to line up with my black center fabric.

Line one edge of the strip of fabric up with an edge of the black square.
Tip: If adding scraps of fabric that have been sewn together like this, be sure you look at all of the seams. Do they lay the way you want them too? I did not realize until much later that I had a seam that was perpendicular to the center block. I prefer my seams to be more angled. Had I noticed sooner, I could have trimmed the straight edge at more of an angle.

Next, fold the fabric so the right sides are together, lining the edges up.
Tip: Place a pin at each edge of the black fabric. You will only sew that section. (I did not do this and sewed the entire strip down. It caused problems later, as you will see.)

Sew the strips together. Only sew along the edge of your center fabric! (I forgot...)
Then, fold the new strip open and press the seams flat.
Step 7:
Trim the fabric. Place block right-side-down on cutting mat. Make sure the pieces are laying flat in the correct position when you do so.
At one end of the seam you just sewed, fold the muslin back. You will see the center fabric and the new strip you added.

Line the cutting ruler along the edge of the black center fabric.
Be sure the muslin is all underneath the ruler. (You do NOT want to cut the foundation.) And trim the edge.

Repeat at the opposite end. When your fabric reaches the edge of the block, fold the foundation back about 1-inch (or halfway between the seam lines you drew and the outer edge of the foundation.) Place the cutting ruler along on the foundation - be sure the muslin is all under the ruler - and trim the edge.

Step 8:
Continue sewing fabrics A, B and C into strips. Line them up the way you like them. (Pay attention to how the seams will look.) Sew them to another edge of the center fabric. Trim and repeat.
IMPORTANT NOTE: If you want to add ribbons, trims, or lace to your block, it is often easiest to add it while piecing your block. (I almost always forget...)
For this block I wanted the trims I added to extend from the center to the outer edge of the block. So, I pieced more scraps of fabric together.
When I laid the next strip on the foundation to see if I liked the way it looked, I also set a piece of lace or ribbon along a seam to see how it would look. During this process, I paid attention to the direction the trims laid on the block. (I did not want them all to slant in the same direction.)
Once I decided on an area I wanted to add the trim, I pinned it in place and then sewed that section onto the foundation.

NOTE: During this step, I realized my error in sewing my first strip all the way across the block instead of stopping at the edge of the black center fabric.
I considered ripping out part of the seam, so I could trim the fabric even with the black center piece. However, this would have left me with 3 seams running straight up and down in that small section. And, it the darker pink would have been cut into a tiny triangle.
How did I fix it? I sewed the next strip from the top of the black fabric (just beneath the Oops area) to the bottom of the black square.

After pressing the seam flat, I carefully cut the upper edge of this new strip so it extended about 3/8" over the seam above it.
I folded the raw edges under, so the fabric lined up with the edge above, pressed the fold flat, and pinned it into place.

Trim the edges.

Repeat process, sewing strips to each edge until the block is covered.


Step 9:
Baste the block.
On the BACK of the foundation (so you can see the square you drew), pin all loose edges of the block to the foundation. Be sure ribbons or trims are also pinned in place.

Look at the front of the block to make sure everything is pinned properly in place.
Using the longest stitch setting, baste along the square you drew on the foundation.
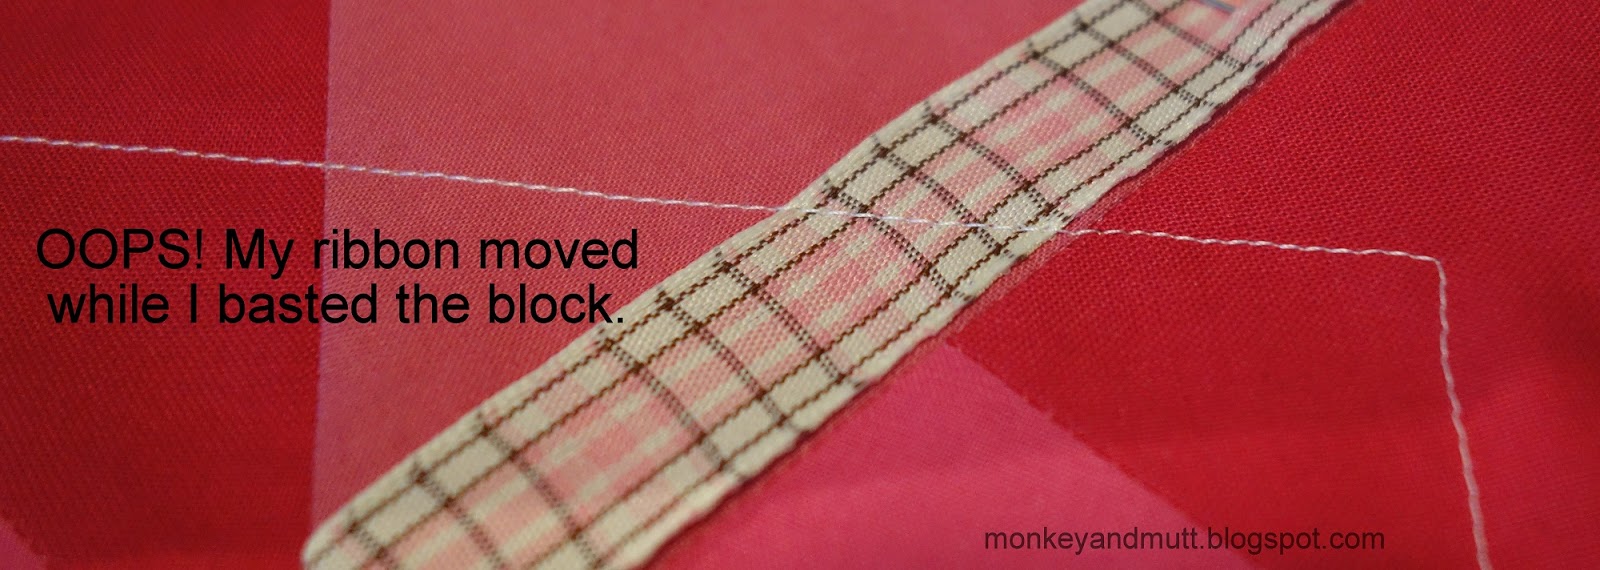
If your trims move while you are basting, find your seam ripper and
carefully remove the basting stitches along that section.
You may then pin the trim in place or baste it in the correct place. (I did both, as seen below.)


In addition to securing the edges of the block to the foundation, the basting lines are a great help when embellishing the block.
At a glance, you know any stitching outside of that square will be hidden when the crazy quilt is sewn together.
I also avoid adding any beads within 1/4-inch of the basted seam. I place larger charms or buttons even further away from the basted seam. Items placed closer may have difficulty feeding through my sewing machine while assembling the crazy quilt.

Step 10:
Applique heart to center of the black square of fabric.
Note: this step could be completed before assembling the block.
First, find a heart template that fits within the 4-inch black square of fabric in the center of the block. (Or draw one on cardboard or card stock and cut it out to use as a template)
Trace the heart onto the paper side of your iron-on adhesive.

Following the instructions for your iron-on adhesive, adhere the heart to the WRONG side of your favorite shade of pink fabric used on your block.
I am making four blocks, so I traced four hearts.

Cut the hearts out.
Before adhering the heart to the black square of fabric, play with the layout until it sits the way you want it on your block.
If you are making more than one block, I suggest looking at all of the blocks together and then ironing the hearts into place the way you like them.


Now, your block is ready for embellishment!
When I work on this block, I will apply stitching to each of the trims to secure them on the block. And, I will remember I have a seam that needs to be securely stitched in place.
I do not like having 2 parallel seams along the top section of the block, so I may try to make that less obvious with my embellishments.
When embellishing, I will break up some of the longer seams (like the one extending across the bottom section of the block.) For example, adding a border around the black central fabric will help break the long seams into smaller sections.
I do hope this tutorial is helpful!
Happy Stitching!
Renee
9 comments:
Ooo I can't wait to see how these turn out!! Love pinks and black together. :) Great idea on showing how to fix mistakes. Sometimes following a tutorial you run into an issue and wonder "how do I fix this without making it worse?" So I really like that you showed us your oops and how you fixed them.
Hi Renae this is a great tutorial,thankyou for sharing.
Renee thank you for sharing your tutorial. You have really made each step seem very doable. I will hopefully be able to pursue making a Crazy Quilt project in 2017. May you have a Wonderful 2017 and beyond. XO
A great tutorial, Renee. Thanks!
Wow....I tried but I'm pretty sure you wrote this post in a foreign language haha. I'm just a baby when it comes to using my sewing machine. You explained it perfect though. It just went way above my head. Thanks for sharing though. It's amazing to see it come together. I'm impressed. I'll just stick with my cross stitching haha.
Great tutorial Renee and I love the look of these new blocks.... can't wait to see your embellishments as you add them! Christine x
Explained very nicely! Sometimes I do that fold under thing on purpose, or piece a curve and fold it under as I place it on the block. I think it's a great trick to have in the tool box! These are going to be very pretty blocks.
A great tutorial Renee! It took a look of time and effort to do and it's much appreciated.
Thank you for the tutorial. If I ever attempt this, I'll look back at this first and make sure I'm organized and ready to fix the inevitable mistakes.
Post a Comment