Thursday, June 13, 2013

A Snowball from Nicki Lee!

A snowball from Nicki Lee!  It is even prettier in person.
Look what arrived in the mail today!  Nicki Lee from Raviolee Dreams made this for me.  It is the very first in my winter/snowman snowball collection through the Crazy Quilting International Snowball Swap. (Someday, I may have to make my first Etsy purchase.  Nicki Lee has the prettiest laces and I would love to add some to my crazy quilting stash.  The Christmas wish list has begun!)

Snowman Close-up.  Stitching by Nicki Lee at Raviolee Dreams
The net, the pearls and the beads shimmer and shine in the light.  You can almost catch the shimmer in the photo above.  I just love the falling snow.

Stitching by Nicki Lee at Raviolee Dreams.

My eldest (nicknamed Monkey), calls this feather-stitched section my "wintery tree."  Those facets on those silver beads love to sparkle in the light!  And the bugle beads on the right love to shine.

Stitching by Nicki Lee at Raviolee Dreams.
The metallic blue floss sparkles.  Isn't this lovely?!

Stitching by Nicki Lee at Raviolee Dreams.
I love everything about this beautiful snowball.

My youngest thought he was being clever.  (His nickname is Mutt, because he loves dogs.  And, because I refused to call him Piggy, even if he could oink well when he was little.  Recently, he admitted that I was right when I explained he would thank me for that refusal some day.)  When he saw my snowball, he declared, "That's a horrible summer block!"  My husband and I looked at him funny.  He grinned and added, "That's why it's a wonderful winter block!"  Silly kid, sure is cute.

Thank you, Nicki Lee!

I finished my second snowball this week and mailed it to India.  I am trying to wait until Andrea receives it before I post pictures, but it is not easy. 

Thank you for visiting!
Renee

Saturday, June 8, 2013

First Crazy Quilted Messenger Bag Post 2

Tree trunk and branches stitched for my first crazy quilted messenger bag.
When my children arrived home from school yesterday, I warned them they would be shocked to know I added a tree to my messenger bag.  (I was being sarcastic, of course.)  One of my boys replied, "Yeah, Mom.  That is so unlike you."

I do seem to love embroidered trees and landscapes.  (You will see more when I finally share the other projects I have been working on!)

I threaded my needle with two strands of floss using two different DMC flosses: 1 strand of #838 and 1 strand of #610.  I like the color variation this gave the chain stitched tree trunk and branches.

Messenger Bag front flap as of this morning - June 8, 2013.

Today will be a busy one; yet, I hope to find some time to add some leaves to this tree.  I would love to use green silk ribbon.  However, this part of the flap will be in an area where I worry I may snag ribbon leaves.  So, the leaves will most likely be lazy daisy stitches with a few different shades of green DMC embroidery floss.  (Or maybe I will use a variegated green EdMar floss?!  So many choices. *Grins*)

I wish you a wonderful weekend!
-Renee

Friday, June 7, 2013

My First Messenger Bag Post 1

Front Flap Panel - Bare
Well, after completing my first crazy quilted purse, I decided to try making a messenger bag.  This will be my first attempt sewing a messenger bag, but I decided to modify the pattern with some crazy quilting.  (The pattern I used was Butterick B4147 - I took advantage of a $0.99 pattern sale at Jo-Ann Fabrics last year.)  The front, back, sides, and strap will all be crazy quilted using a variety of pink and black fabrics. 

After adding my first seam treatment, I decided I should plan the block out better - so my seams would not compete with one another.  My sketch also gives me a basic idea to follow, so I spend less time staring at the fabric wondering what to do next.  However, it is not a concrete plan, and I have already deviated from it a bit...
For the first seam, I used 2 strands of green DMC cotton floss and buttonhole stitches.  Next, I added 2 green lazy daisy stitches at the base of each "stem," using the same floss.  After that, I used a single strand of a variegated pink Iris EdMar #018 floss to make 2 alternating flowers.  One consists of 3 lazy daisy stitches.  The other uses two straight stitches with a French knot in the center.

The second seam was an alternated chain stitch using 2 different threads on the same needle.  I used Finca Perle No. 8 in "Light Pale Geranium" #1724 (I discovered this at Canby Quilt and Fabric in Canby, Oregon  - next to their EdMar floss selection) and DMC Perle No. 12 cotton in Black #310.  (I thought I bought No. 8... Oops!)
You can see a bit of the 3rd seam in the photo above.  Using pink RiverSilks 4mm ribbon (#20), I made a herringbone stitch.  (In the future, I think I will take the time to measure, rather than eyeballing those stitches.  My husband tells me it looks fine, but I find myself very critical of my work!) 

Then, I used the tracing method described in Marsha Michler's The Art of Crazy Quilting: A Complete Resource for Embellished Quilting.  I centered quarters along a line I planned to match to the seam and traced them in hopes of achieving evenly rounded arches.  (I think it worked!) 

The lower halves use a single strand of black Lola Edmar #206 and 5 straight stitches to create spokes.  The upper arches use a single strand of a light pink Glory EdMar #218 floss and a chain stitch.  5 straight stitches were made within the pink arches, using the same pink.  The same black was used to make a straight stitch within each pink triangle.  Next, using a single strand of a pink variegated Glory EdMar #043 floss, a lazy daisy was added between each black spoke. 

The arched seam is not complete, but I am saving the beads for later.  The green stem-stitched stems you see above will be completed with some SRE (Silk Ribbon Embroidery.)
As you can see, I skipped the arch that would have interfered with my first seam.

Using pink variegated Glory EdMar floss #083, I made a stem-stitched seam.  Then, I went back and added 3 straight stitches on alternating sides of the seam.
Using DMC No. 5 Black #310 cotton floss, I added the chain-stitched seam (seen above the spider web.) 

I found a DMC pink cotton floss similar to the color of the flower trim, and used a single strand to stitch it into place.

In the lower-right corner (not pictured here), I began working a green chain-stitched vine on the marbled pink fabric (using 2 strands of a green DMC cotton floss).  However, I stopped as I approached the black fabric pictured here, as I knew I wanted a spider web in this section.  I wanted the vine to cross over the web, so I needed to stitch the web first.

A single strand of DMC No. 12 White perle cotton made the web.  As this will be a bag I intend to use, I ignored the advice I have read on many tutorials about making spider webs.  The longer strands are couched down, and the smaller web stitches do poke through the fabric, rather than wrapping loosely around the longer threads.  (I did not want to increase the odds of the threads catching and snagging on anything.)
I picked up a fat quarter of the black fabric with the pink rosebuds (barely visible above) at Every Thread Counts, a lovely quilt shop in Hood River, Oregon.  My desire to use that fabric and the pink OSU fabric inspired the pink and black theme for this bag.

This seam was created with (somewhat) evenly spaced fly stitches (with 2 strands of a green DMC cotton floss.)  I have always wanted to attempt wisteria blossoms, so I added them here.  I also took the liberty of making the blossoms blue using a single strand of variegated Lola EdMar #034 floss to make bunches of French knots.  (Shaping these little clusters was a bit trickier than I imagined, but I think they turned out!

Front Flap Panel by June 7, 2013
This is how the panel looks this morning.  I cannot wait to see this one finished!
Hmm... I forgot to mention that I added the light pink ribbon with the white polka dots along the lace seam.  I believe it went on just before the herringbone ribbon border.

I have also been busy working on two more snowballs for the CQI swap.  And, I have been procrastinating the work on my April block for CQJP 2013.  I am attempting some needle-painting on that block, and I am not sure it is turning out.  Time will tell...

Thank you for stopping by!
-Renee


Wednesday, June 5, 2013

My First Crazy Quilt Purse Completed


I began this purse back in January and finally completed it this morning!  (To see larger views, click on photos.)
Front of purse with the flap open.  (The spider lurks beneath the flap.)

Well, I think it is done.  I am not happy with the Velcro closure.  Although I was extremely careful about placing it where the pattern marked, I believe the Velcro on the front pocket should have been about a quarter-inch higher.

If I use this pattern (Butterick #B5728) in the future, I will sew a buttonhole onto the front flap prior to basting it onto the purse.  Then, I will sew a button onto the front pocket, lining up with the buttonhole.
Front of purse - Butterick Pattern B5728 (original pattern is NOT Crazy Quilted)
Back of purse - Butterick Pattern B5728 (original pattern is NOT Crazy Quilted)
All-in-all, for my first CQ purse, I am happy with the results.

Close Up of front
The beaded flowers on the front flap were inspired by a few crazy quilted blocks I have seen posted with the Crazy Quilting International Yahoo! Group and - more recently - by an adorable Crazy Quilt Journal Project Block.  (Click here to see it.  And, if you have not checked out the eye candy at the CQJP 2013 blog, you are missing out!)

The tall Easter Daisies on the front lower-right pocket were inspired by Diana Lampe's Embroidery for all Seasons. 
Close Up of back
The flower sequins made turning the purse right-side-out after sewing the lining in very, very interesting.  I feared I may lose them - or pull out some embroidered stitches.  Luckily, that did not happen!

I traced the hearts from a quilting template I purchased some time ago and randomly filled them with stitches.

The tree in the center was inspired by a tree in Aimee Ray's book, Doodle Stitching: The Motif Collection: 400+ Easy Embroidery Designs.  (My husband is not a fan of pastels or pinks.  I must admit, I ended up setting this project aside for over a month after he was a little too honest and told me my tree reminded him of "cheap pink plastic jewelry."  *Please note that Aimee Ray's tree is not at all pink, nor does it resemble cheap plastic jewelry. You may see it for yourself if you click the link to her book on Amazon.com I added above.*  Now we laugh about it and I affectionately refer to this as my "Cheap Pink Plastic Jewelry Purse.")

Thank you for stopping by!
Renee

Tuesday, May 28, 2013

A Snowball for Nicki Lee

A snowball for Nicki Lee
I stumbled upon the Crazy Quilting International Yahoo group about a year ago, while looking for ideas to make my first crazy quilt.  (I was planning to make a cream on cream crazy quilt at the time; however, as you can see by my blog, my interests changed - lol!)

You can see some of the amazing eye candy the CQI members have created on their blog.  Just click here.

One of the swaps the group had going was a "Snowball Fight."  Looking at these beautiful works of art, I have often thought I might like to join in, but I was still a little bit intimidated by the beautiful stitching the ladies in the group did.

A couple of weeks ago, I decided to step outside of my comfort zone and give it a try.  I asked the group a few questions I had about the swap, and Nicki Lee was one of the first to reply.  She also offered to be the first to trade snowballs with me. 

Now, if you have seen Nicki Lee's work, you will understand why I felt like I had just won the lottery.  (If you have not, here is a peek at her blog at Raviolee Dreams.) 

It is a little bit intimidating to make something for someone when you admire their work, particularly when the theme of the block is one you have never attempted.  However, we never know what we can accomplish if we are too afraid to try.  So, I made my first attempt at a snowball with an under the sea theme. 

Sea horse pattern from DMC Collection: Mini Motif Designs by Mary Bartley Stockett

The cross-stitch designs are from a leaflet I purchased years ago, planning to make a hand towel.  It is called DMC Collection: Mini Motif Designs: Exclusive Creation by Mary Bartley Stockett.  (I was unable to find a leaflet online to share with you.  It was published in 1993 by Graphworks International Inc.)

Conch pattern from DMC Collection: Mini Motif Designs by Mary Bartley Stockett  
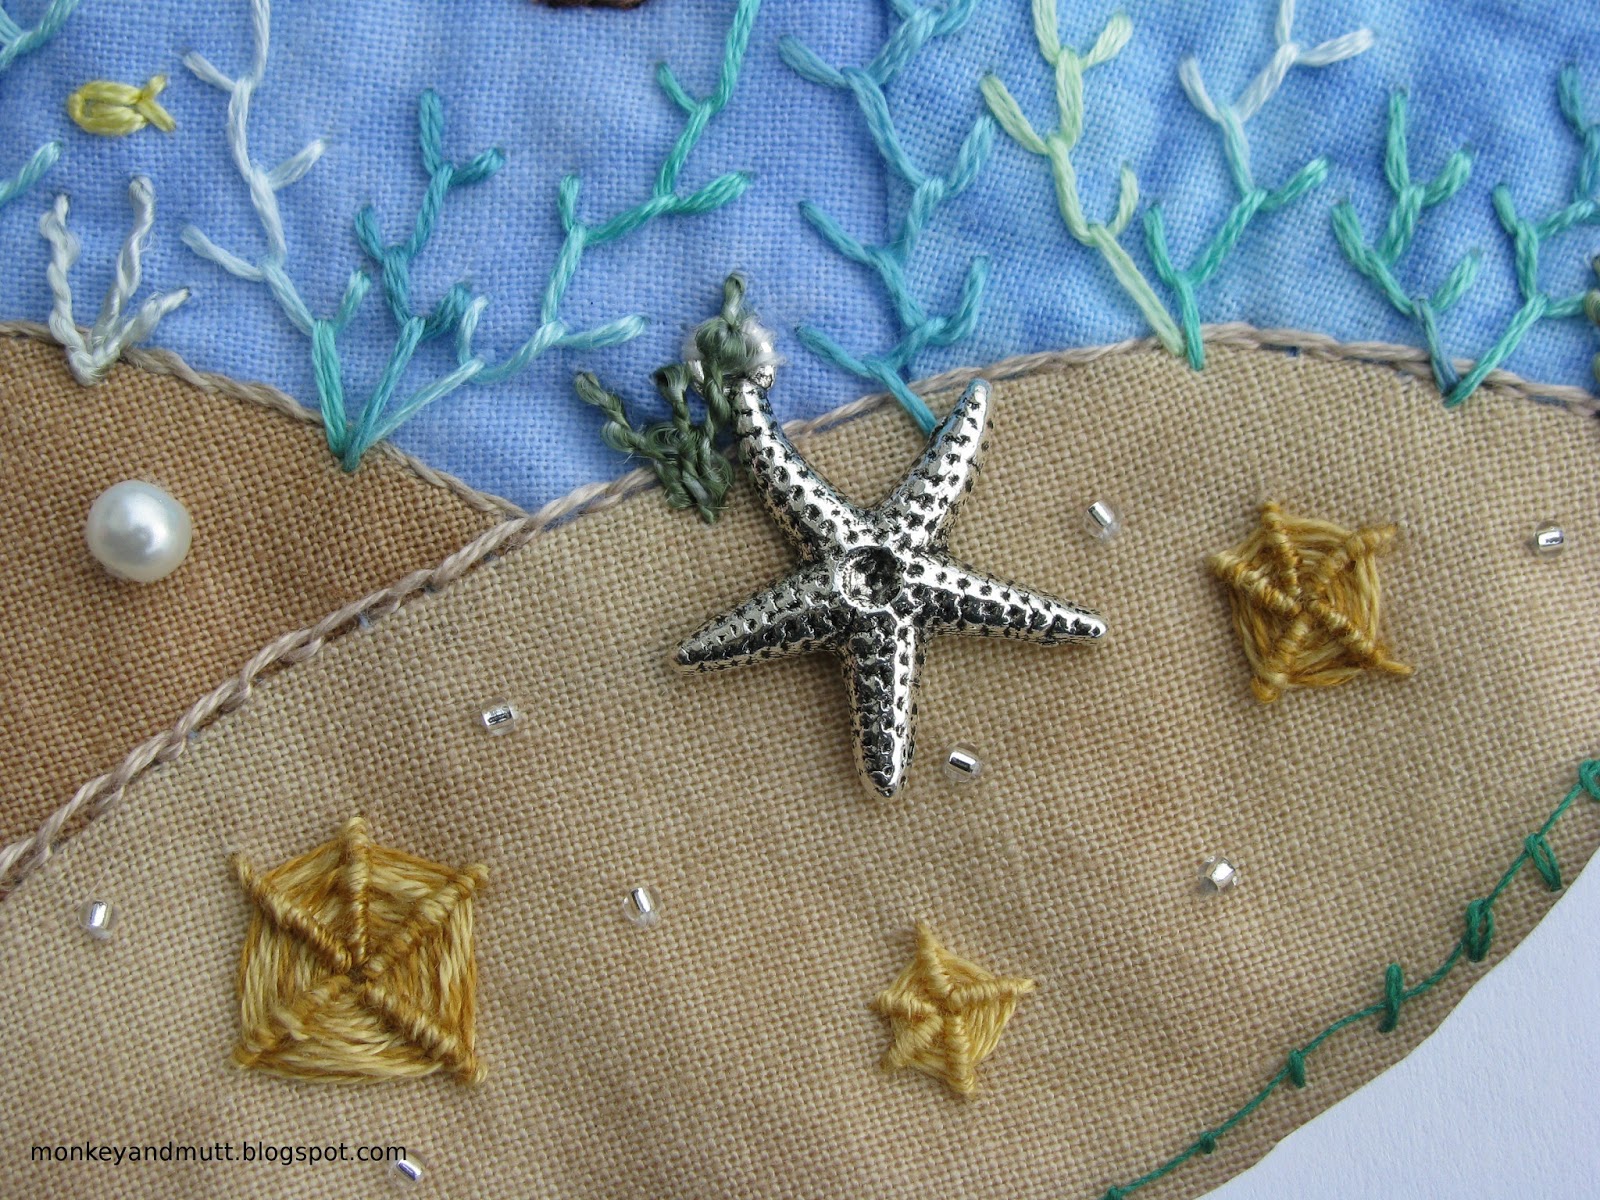
I found the antiquated sterling silver plated Halcraft Charm Gallery charms at Michaels.


This small, cd-sized block held many firsts for me.

1.  This was my first hand-pieced block (I followed the piecing instructions from Allie Aller's Crazy Quilting: Modern Piecing & Embellishing Techniques for Joyful Stitching by Allie Aller.  However, I did not trust myself to use my sewing machine for the curved seams and discovered that I actually enjoyed sewing it by hand!)

2.  The block pieces are all curved.

3.  It is an Under the Sea theme.

4.  I used a coral stitch for the first time.

5.  I finally attempted a whipped circle (using 5 spokes, hoping it would resemble a starfish.)

6.  There are charms on the block.

7.  Curiosity allowed me to discover a lazy daisy stitch combined with two straight stitches will, indeed, make a tiny fish.

It was a lot of fun to put this little underwater scene together.  I hope Nicki Lee likes it!  

Thank you for visiting my blog!
-Renee