Friday, August 31, 2012

My First Round Robin Post #3

I finally received my second block from the CQI Novice Round Robin!  (It was delivered to the wrong address, but eventually made it my way.) 

Click photo for larger image.
This is Hazel's block and the lovely work already completed was done by Mardeen.  I love the way she highlighted the frog and added little beads to his back to add some texture.  Of course, the crown is simply awesome.  The cattails, butterfly, dragonfly and the lily pad with a flower all fit so well.  And I just love the seam treatments.

I have a few ideas rattling around in my head, but I need to figure out exactly what and where to embellish.  Mardeen  has set the bar pretty high.  My youngest admired her work with me and then told me he hoped I could do a good job and that I would not mess it up.  I had to laugh.  I was thinking the same thing.  *Grins* 

So, I guess we will have to stay tuned and see where my imagination takes this frog prince.

Thanks for visiting!
Renee


Tuesday, August 28, 2012

Crazy Quilted Glasses Case

The back of the case (the part I stitched first).


Front of the case - personalized with beads.

In my last post, I mentioned that I stumbled upon photos of some absolutely lovely crazy quilted glasses cases that inspired me to try to make a glasses case, myself.  I was actually looking up the beautiful work done on a "snowball" crazy quilted circle that a member of Crazy Quilting International made for another member, when I discovered her pretty cases.  If you are not familiar with the blog, Humming Needles, I encourage you to click on the link here and take a peek at some wonderful eye candy. 

I must admit, the glasses case I made is not nearly as romantic as the ones I found on Humming Needles.  However, I hoped it would be perfect for my sister - a huge Oregon State University fan. 

Like the last case I made, I mostly followed the instructions found at Skip to My Lou.  However, for the outside panels, I cut overly large rectangles of muslin.  Next, I drew lines for the edges.  (Next time, I will extend the seem allowance by at least an extra 1/8-inch for the crazy quilted panels.  Some of my stitching went over the seem lines, to extend off the page, so-to-speak.  When it was time to cut the panel, I had to be very careful not to cut the embroidery thread, so the stitching would not come loose.)  And, rather than using batting and quilting the case, I adhered interfacing to the back of the muslin after I completed the embellishments and cut the panels down to size.  (I may use a slightly different pattern next time.  The Velcro made turning the case right-side-out without snagging the embroidery quite tricky!)

Using scraps of Oregon State University fabric for the center of the front and back panels, I machine pieced my blocks.  I only used orange and black fabrics.  Before I began stitching, I basted around the seem lines, to mark my boundaries.  I only intended to use orange and black flosses; however, some of the tone-on-tone was just too difficult to see.  So, I added white, as well.

The most time-consuming part for me was the alternating orange and white chain stitch I used to cover the white borders in the OSU print and to frame the center panels.  It was really quite fun to use two colors of thread on the same needle; although it was a bit tricky keeping the correct color on top of the needle.  So, it was a very slow process, but worth the end result.

While working on this project, I saw a lovely tree a friend of mine added to her current crazy quilt block.  (Her trees are gorgeous!  I encourage you too see for yourself, at Crystal's Crafty Adventures.)  When I mentioned how much I liked her trees, Crystal directed me to a tree tutorial on the blog, Shawkl.  (Even if you do not crazy quilt, and have no need for the tutorial, it is worth a peek.  Scroll down to see Kathy's tree.  It is quite impressive!)  My first attempt was way too far to the left, and could only bow to the right.  My 15-year-old, Monkey, took a look at it and asked, "It's a Dr. Seuss tree, isn't it?"  As much as I love Dr. Seuss, it was not the look I was going for; so, I took it out and tried again.  I opted to leave my tree (no pun intended) as a silhouette (orange leaves would not show up and I feared white ones would look odd.) 

After seeing the work I did on Mardeen's block in our current CQI Novice Round Robin, my sister commented that she liked the purple flowers (the Winter Iris.)  So, I added one here - in orange and black, of course.  And, I had seen several blocks with benches in them recently, so I tried to make one too.  It's a bit lopsided, but I was simply thrilled my boys looked at it and knew what it was without asking!

Personalized - and I made my first bullion butterfly - without directions, even!
In late August, we attended the Aurora Colony Days celebration.  Imagine my delight when I stumbled upon a Yarn and Beads shop that sold some beads individually!  It will definitely be worth another trip in the future.  I picked up the letter beads to personalize the case while I was there; and I was so tickled, I have no doubt I provided my family with a few chuckles and shakes of the head with my exuberance.  (It truly is the little things in life...)

My sister opened her gift while I was on the phone with her; and she liked it, so I was happy.  It may be a simple glasses case, but it is also a small reminder that miles and miles may stretch between us, yet we are never far from each others thoughts.  Happy Birthday, Sis!

Thank you for visiting!
-Renee

Saturday, August 18, 2012

Glasses Case

My first glasses case.
A few months ago, I stumbled upon some lovely eyeglasses cases on a blog.  For weeks and weeks, I itched to make one.  However, I made that little rule.  The one that required I complete two unfinished projects prior to beginning a new one.  That did not stop me from bookmarking a couple of on-line tutorials though.

For someone annoyingly rule oriented, I certainly found a way around the rule limiting new projects!  My nephew has a birthday coming up and he loves to wear sunglasses.  (Gifts are different, right?!)  I decided to make him an Oregon State University themed sunglasses case, as he is a big Beavers fan. 

Of the many tutorials I found on-line, I decided to go with the one I found at Skip to My Lou.  I already had everything I needed to make the case.  However, after I began the project, I discovered I was the only one in my family that did not know my nephew had recently decided to root for the Ducks at U of O.  Oops!  Thankfully, a quick call to his mom assured me that he still like the Beavers, too.  Whew!  (And if it turns out he does not like the case, I can always pick up some Duck fabric.  If nothing else, the reaction of my family of Beaver fans would be quite entertaining.)

Tomorrow, we will see my nephew and see what he thinks.  (The other side has his nick-name on it; so, it has a personal touch, too.)

Thank you for visiting!
-Renee
Tuesday, August 14, 2012

Crazy Quilt Day 31

I decided to take some time to figure out how I wanted to finish "January" on the block.  So, I moved on to the last sections and fused the applique items onto the block. 

The fuzzy snowman is going to be quite the challenge for me, for reasons soon to be revealed.  My next step will be finding DMC cotton flosses that closely match the blues in the little house to stitch it into place.  I sure hope I can make both of these sections look the way I picture them in my head!  (If only those pictured ideas would stop changing!)

Thanks for visiting!  I hope you have a wonderful week.

-Renee

Weekly Goals

Wow... I am behind with posting my goals.  On the up side, it has been a fun, busy summer! 

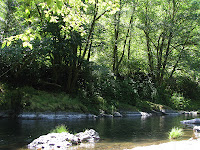
Trask River
We went camping with some friends along the Trask River.  It was fantastic.  We found the perfect swimming hole along the river and had the place entirely to ourselves.  We were later told it was one of the hottest days of the year.  A great day to spend along the river!

Drake Falls @ Silver Falls State Park
We also went on a couple more hikes.  Last week, we went to Silver Falls, yet again!  This time we went with my sister-in-law (one of my favorite people), niece and nephew.  We went along trails we had not visited this summer and saw more of the waterfalls.

Yesterday, the 6 of us also went to Mirror Lake.  (I forgot to take my camera with me.  Ugh!)  The kids cooled off by wading in the lake with the crayfish.  Both trips were fabulous.

On Saturday, Monkey and I ran a 5K.  He won a gift card for finishing first in his age group, and I finished with my best time on a 5K race.  Do not get me wrong.  I am slower than molasses.  But I finally ran less than a 12-minute-mile.  It was a busy, yet wonderful weekend.


I have also been busy trying to keep my flowers watered in this heat.  The boys both helped me plant sunflowers in our flower bed, so we could enjoy viewing them from our kitchen this summer.  This picture was taken two weeks ago (I was watering them when I decided to drop the house and grab the camera, thus the hose in the lawn.)  It is the first year the hydrangeas blossomed, so I am a happy camper.  This week, the sunflowers are finally blossoming!  Next year, we have decided we need to plant more sunflowers around the yard.

Kitchen Island Before
Kitchen Island After
And, now that summer feels like it is racing to an end, I feel the pressure to stop procrastinating and finally refinish the kitchen cabinets and paint the front porch.  Last week, I began on the cabinets.  (The lighting changed throughout the day; the sunlight through the window made the before picture look much lighter than it actually was.  The color in the after photo is more accurate.) I have a couple more hours of work to do.  I am hoping to complete both projects before I receive my next round robin block.  (Wish me luck with that - my to do list is HUGE right now!)

Now to figure out my goals for this week...
Running: Run 40 minutes 2 times
Cross Training: Complete Warrior Dash training exercises 3 days
Sewing: Sew black border onto Hearts Askew Quilt & complete birthday gifts.
CQ: Finish one section of January block

Thursday, August 9, 2012

Crazy Quilt Day 30

Yikes!  I have been neglecting my blog recently...  Between summer activities, participating in my first round robin, spending time with my family and trying to complete some projects around the house, I suppose that is understandable.  I need to update my goals, but posting about crazy quilting is so much more fun!

I must confess, I have not made much progress on my January block.  However, I did finally stitch the scarf-letters on to spell out the name of the month.  (The R and Y required so much twisting and such that I actually whip-stitched the two raw edges in the back together; a step I did not find necessary for the other letters.  It took a while, but I finally manipulated them into shape.) 

Next, I need to decide, do I add the snowmen, or leave them as scarves?  Once I decide that, I will be able to start adding the tassels onto the ends of the scarves.  If I do not add snowmen, I need to figure out how to cross the A's.  Hmmm.... tricky, tricky.  I am most tempted to switch to another section of the block so I can mull that one over.

And, I have another confession.  I failed at my resolution not to begin another project until I finished two UFOs.  But I have a great excuse!  (Don't I always?  Hmmm...)  I have been working on a couple of birthday gifts.  Once they the recipients have received them, I will post pictures.

Have a wonderful day, and thank you for stopping by!

-Renee

Wednesday, August 1, 2012

My First Round Robin #2

Mardeen's Block when it arrived.
Last night, I completed my work on Mardeen's block through the Crazy Quilting International Novice Round Robin.  On the 15th, I will mail it on to the next lady and she will be able to add her own "magic" to the block.

Mardeen requested a woodland theme for her block.  I spent a couple of days wondering what to add and where to add it, as well as wishing I knew how to stitch animals.  As mentioned in my last post, I was finally inspired by Diana Lampe's Embroidery for all Seasons.

Mardeen's Block after my work.
So, I pulled out my doodle cloth and tried to rake up the courage to actually pull a needle with thread through a block that belonged to someone else (gulp!)  In the end, I was very glad I did.

Snail and Silver Birch
I began in the lower left corner, starting with the little snail.  (Click on photos to see a larger image.)  Fighting back my nerves, I then attempted the silver birch tree (which is roughly 6-inches tall.)

After adding the flowers and spider...
After that, I added English primroses (which I fear are a bit too tall for scale), followed by winter irises and some small forget-me-nots (in a shade similar to the flowers on the center of the block.)  English bluebells, a few Dutch hyacinths and a bunch of snowflakes followed.  Empty spaces were filled in with more forget-me-nots. (I did my best to make sure anything near the seam line would be okay if it were sewed into the seam, so they would just make the picture appear to expand past the block.)

A small black spider hung from the tree, descending to the flowers below.  I really wanted to add a web for him in the tree; however, I had to take it out.  The branches were so subtle on the purple fabric and the web stood out so much that it simply did not look right at all.  In the end, I also changed this light gray strand of web to a more subtle strand of silver metallic thread.

Bird, nest, & butterfly seam treatment
Up above, I made my first silk ribbon bird, following a pattern from another treasure I found at the library: The Big Book of Little Ribbon Embroidery Designs by Deanna Hall West.  And I added a little nest to the tree with two (colonial knot) eggs that the bird was swooping down to reach. 

After that, I felt this area was complete.  I added a very subtle butterfly seam treatment (an idea from An Encyclopedia of Crazy Quilt Stitches and Motifs by Linda Causee.)  I did not want the seam treatment to detract from the scene below, or to limit the ideas for the block above.

This section completed!
So, if the area was complete, then this section should have felt done.  I had looked up all of the flowers and birch trees on-line.  They all bloomed late winter and early spring.  The birch tree was said to get its leaves later in the spring, so it was okay to have bare branches, wasn't it?  Hmm... After my mother-in-law (an incredible gardener) emailed me asking about adding some leaf buds to this spring scene, I knew she was right.  I had been thinking the same thing, but been too afraid to fix it.  I gave my mother-in-law my feeble explanation, and admitted I was terrified of "messing up the block" because the leaves were not in my nifty little embroidery book.  She assured me of her faith in my abilities, and I spent two days building up courage.  In the end, I chose two shades of green that were also used with the flowers below, and made tiny satin-leaf stitched leaves.  To my relief, it did not ruin the block - whew!

Upper-right corner - bee and tree line.
Next, I was finally able to use a seam-treatment I had seen in An Encyclopedia of Crazy Quilt Stitches and Motifs that I really wanted to try.  Using an uneven blanket stitch and small straight stitches, I created a tree line! It began and ended past the seam lines, so it would appear to be a part of the fabric with the completed project.  Then I toyed between adding a silk ribbon butterfly, or a button of a bee to the center of the green triangle.  The bee won.  (I wish I had written the name of this button down when I purchased it, so I could share that information with you all.)  Using a subtle shade of green, I stitched in a loopy flight path.

I had a lot of fun working on this block.  By facing my fears of tackling the birch tree, followed by my fear of giving it leaves, I concluded my work on the block with a bit more confidence and ready to take on another challenge.  I hope Mardeen likes it!

Thanks for visiting!
-Renee