 |
| Front Flap of Messenger Bag as of 06/21/13. |
Using a quilting heart template I bought on sale some time ago and using the technique I learned in Marsha Michler's The Magic of Crazy Quilting: A Complete Resource for Embellished Quilting, I added a heart to the center of the block.
 |
| Stem-stitched heart outline. |
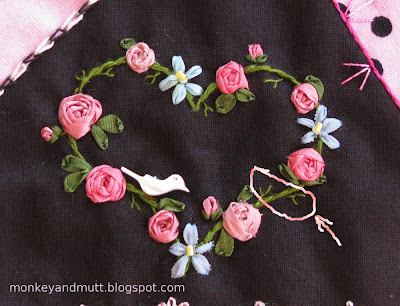
Next, I used a single strand of pink floss to create spokes along the heart for spider-web silk ribbon roses. A few pink silk ribbon lazy daisy stitches created rose buds. There are three shades of pink here.
Green silk ribbon was used to make two straight stitches at the base of each rosebud, and ribbon stitched leaves were added to the roses.
Next, I added 3 pastel yellow glass seed beads to open areas along the heart. Five straight stitches with blue silk ribbon were placed around each yellow bead center. (I ran out of one shade of blue after making the first 2 flowers, so there are two shades of blue on the heart.)
 |
| Heart before adding beads. |
A few unadorned areas remained on the stem-stitched heart, so I used a single strand of the same shade of green and randomly added fly-stitches. (A couple are circled with the arrow pointing to them in the photo above.) I will add glass seed beads to the center of each fly stitch for a few sparkly flower buds.
 |
| Heart beads sealed with clear fingernail polish. |
I ran a few ideas past my wonderfully supportive (and brutally honest) hubby about a few more additions for this little black triangle. And, we actually agreed on the idea we both liked best! I hope to find time to finish this section up today. If I do, this section will look a lot different tomorrow!
 |
| Messenger Bag Front Flap - center section prior to adding beads. |
I hope you enjoy your weekend! It is beautiful and sunny here, after a few days of rain. Perfect weather to let my eldest practice driving.
2 comments:
excellent job on the heart!
Thank you! Today, I have been adding beads around that area and along a couple of the seams. I was not 100 percent sure I liked the end result around the heart, then I saw the heart beads sparkle in the light and I was sold. I hope to have new pictures posted tomorrow.
Post a Comment